Prepare the private path, ECR, and GitHub Actions
Overview
This section presents the steps to prepare the private path, the ECR repository, and GitHub Actions for the image build and push workflow.
Implementation steps
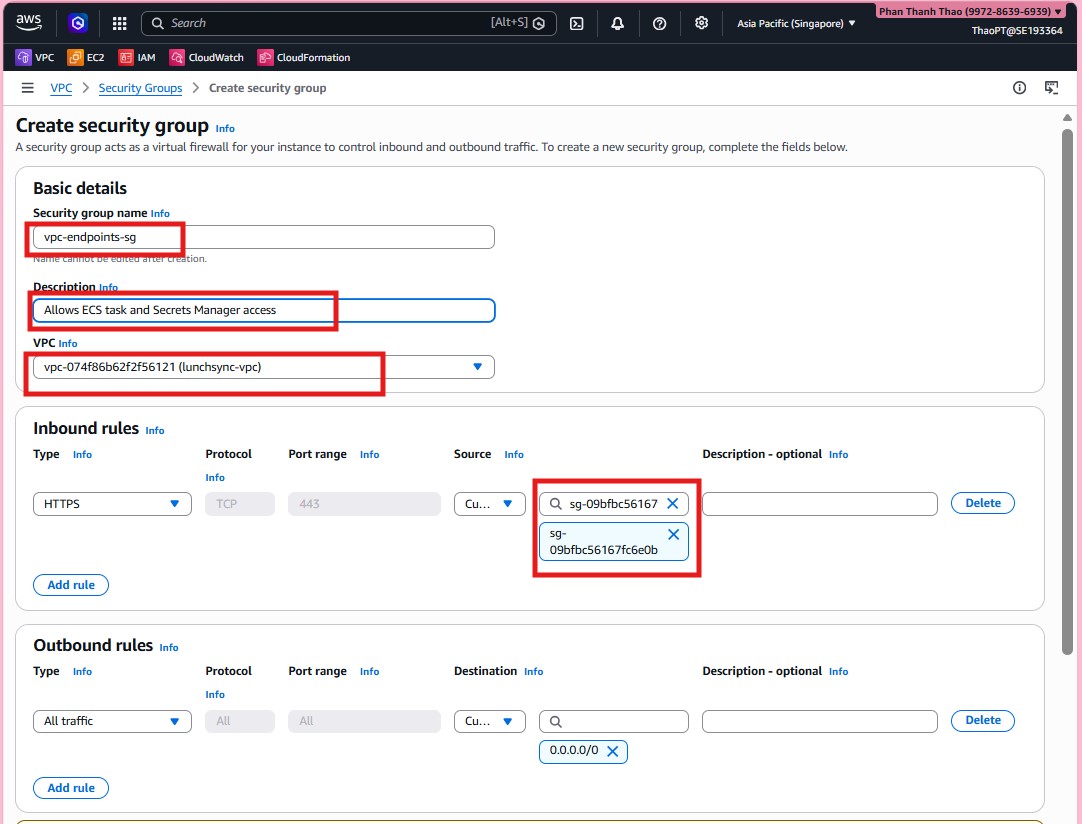
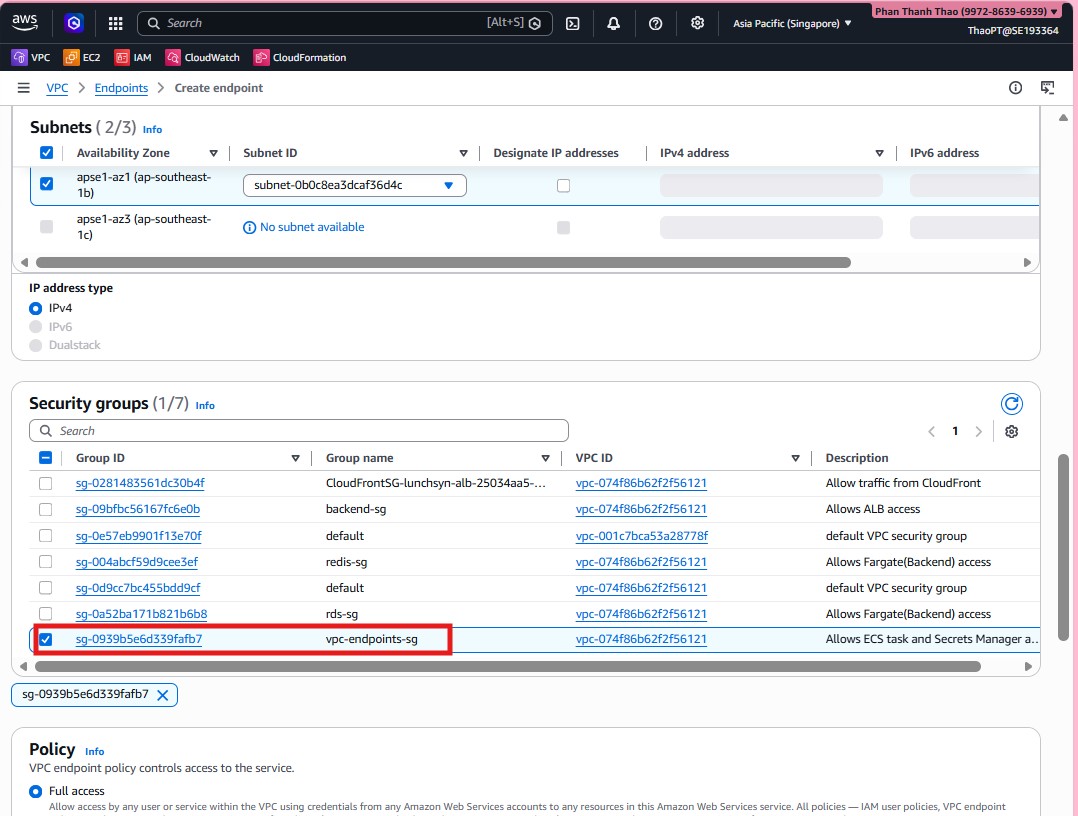
- Start by creating security group
vpc-endpoints-sginsidelunchsync-vpc, allow inbound traffic frombackend-sg, and keep full outbound access for the interface endpoints.
- Open VPC > Endpoints and start creating the first interface endpoint.
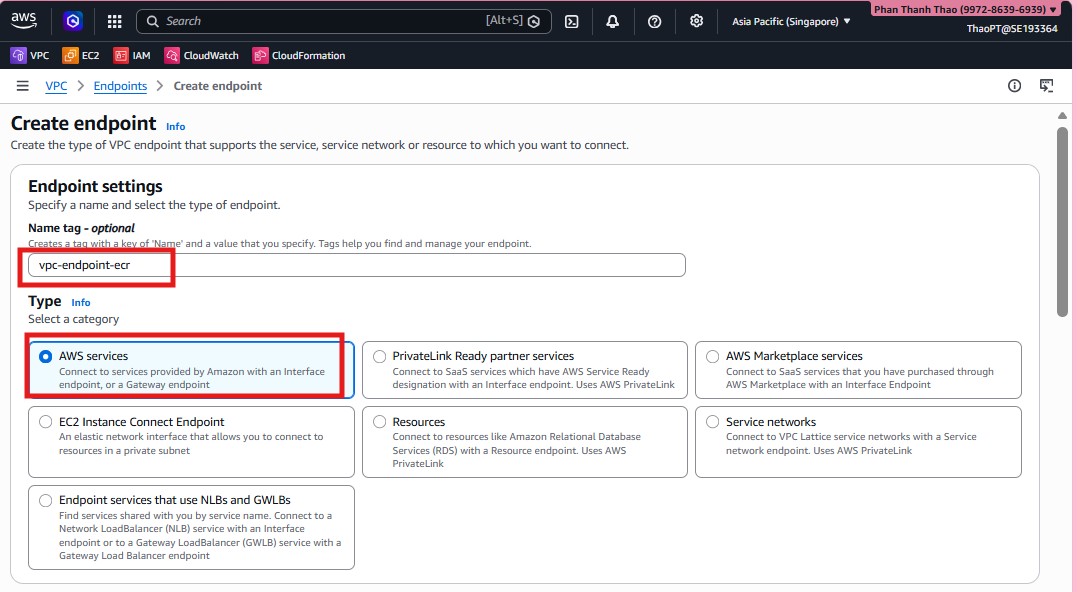
- Choose a service such as
com.amazonaws.ap-southeast-1.ecr.api, enable Private DNS, attach it tolunchsync-vpc, and select the two private subnets.
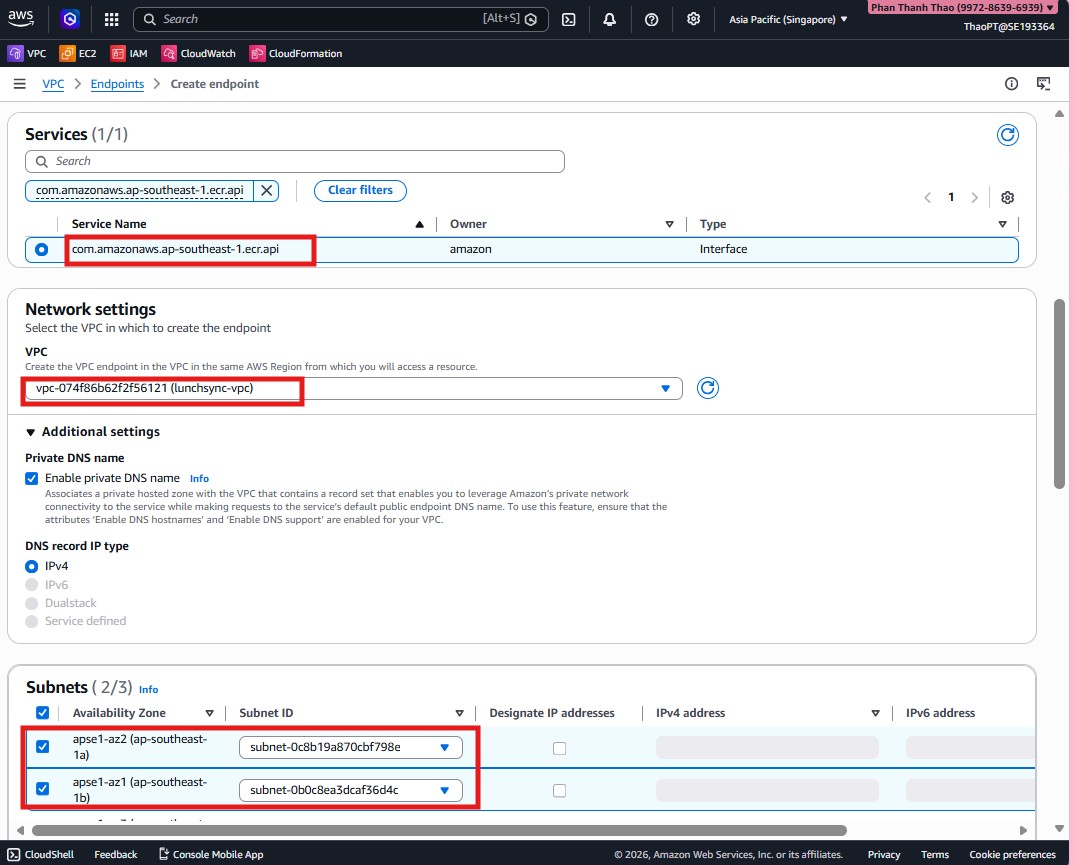
- Attach
vpc-endpoints-sg, keep the endpoint policy atFull access, and create the endpoint.
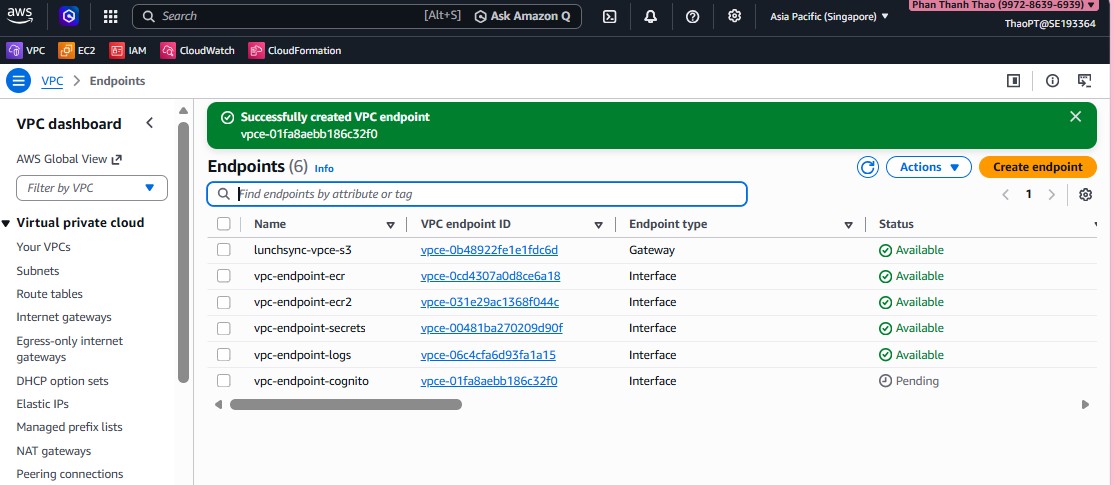
- Repeat the pattern for the backend endpoints you need, such as
ecr.dkr,secretsmanager,logs, andcognito-idp, then review the endpoint list.
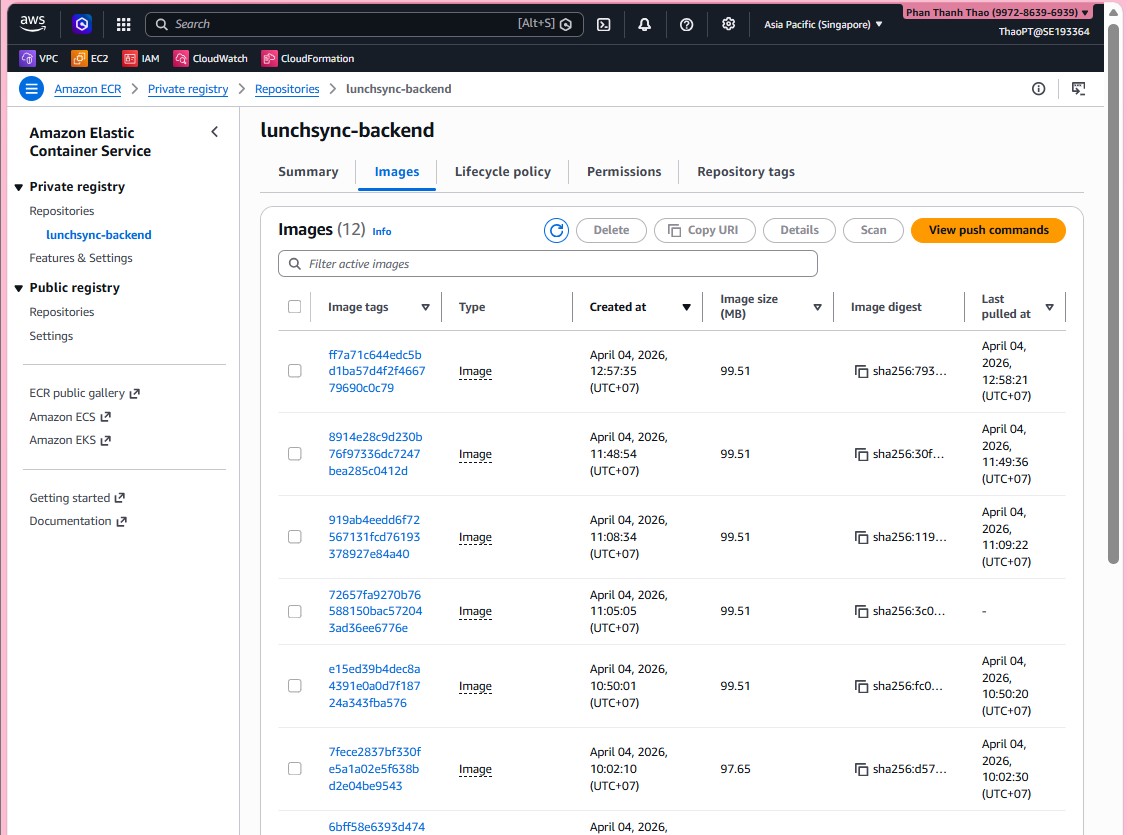
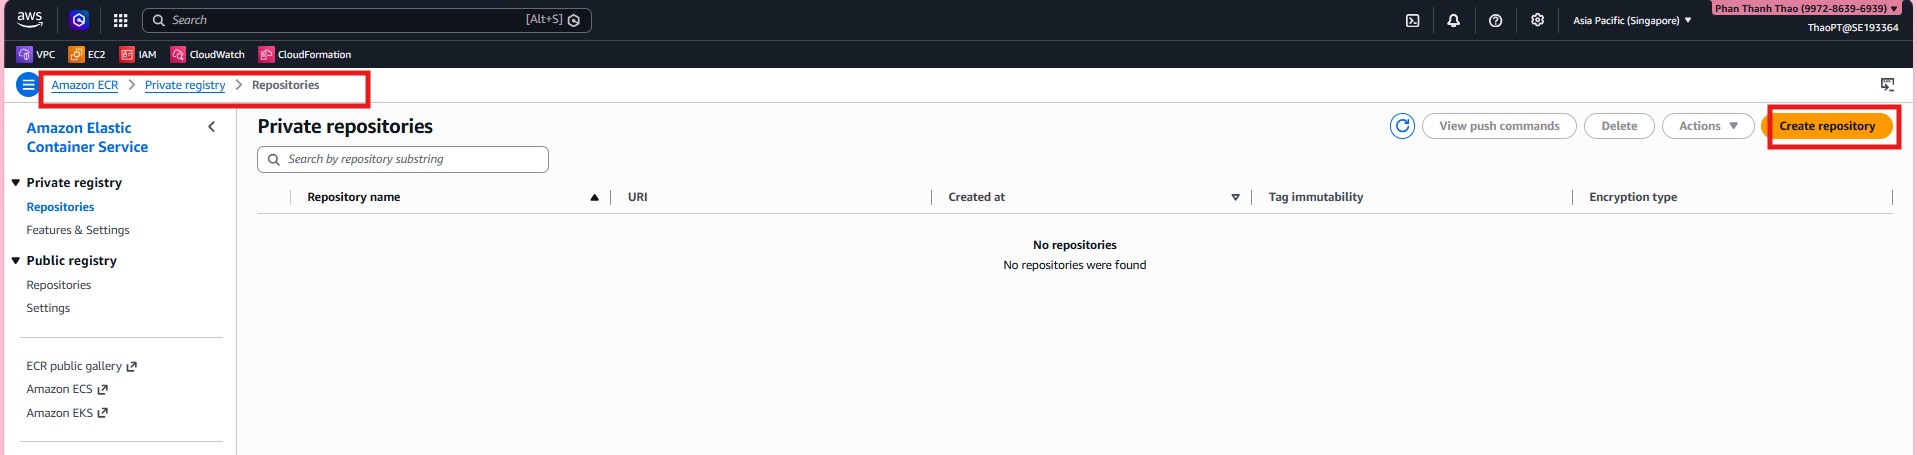
- Move to Amazon ECR and start creating the private repository for the backend image.
- Name the repository
lunchsync-backend.
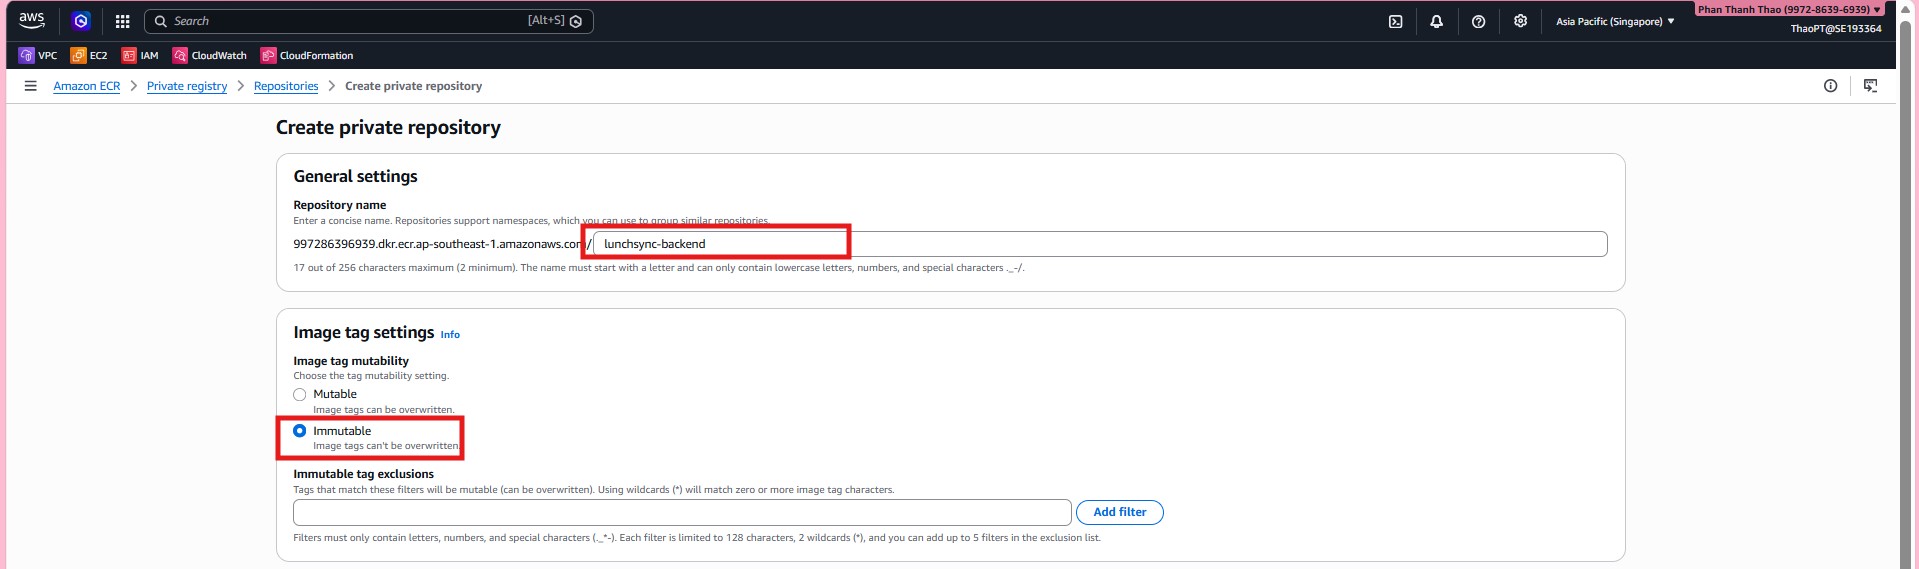
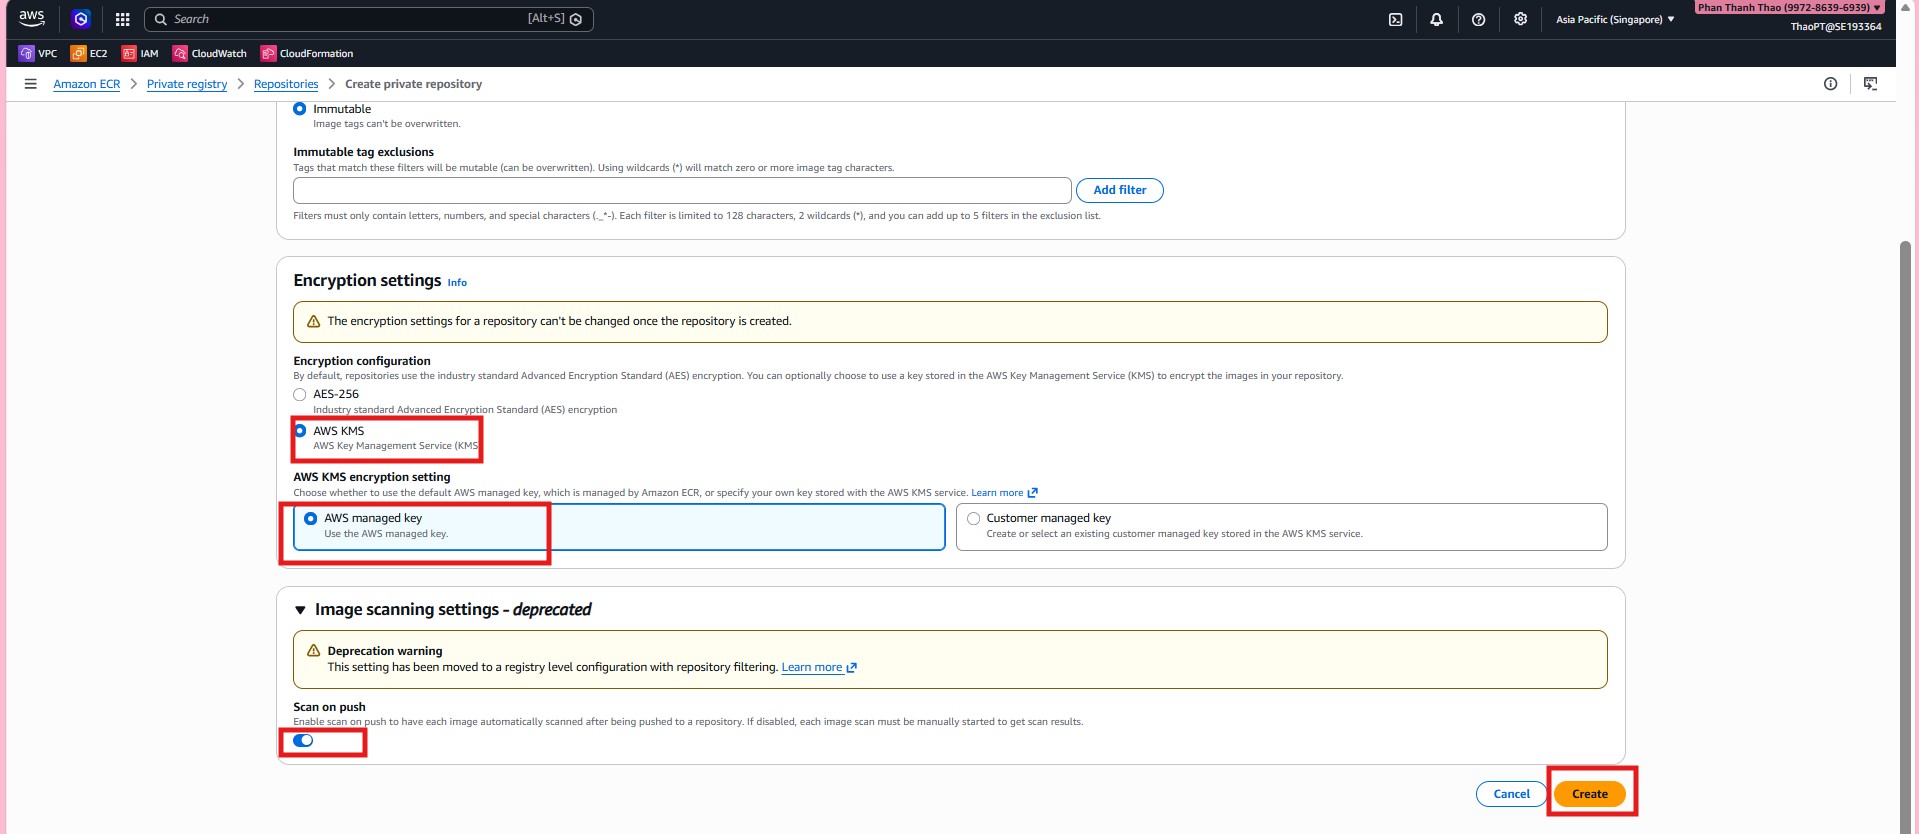
- Configure repository settings such as tag immutability, default ECR/KMS encryption, and the scan-related options that fit the CI/CD workflow.
- After creation, open
lunchsync-backendand review its main repository tabs.
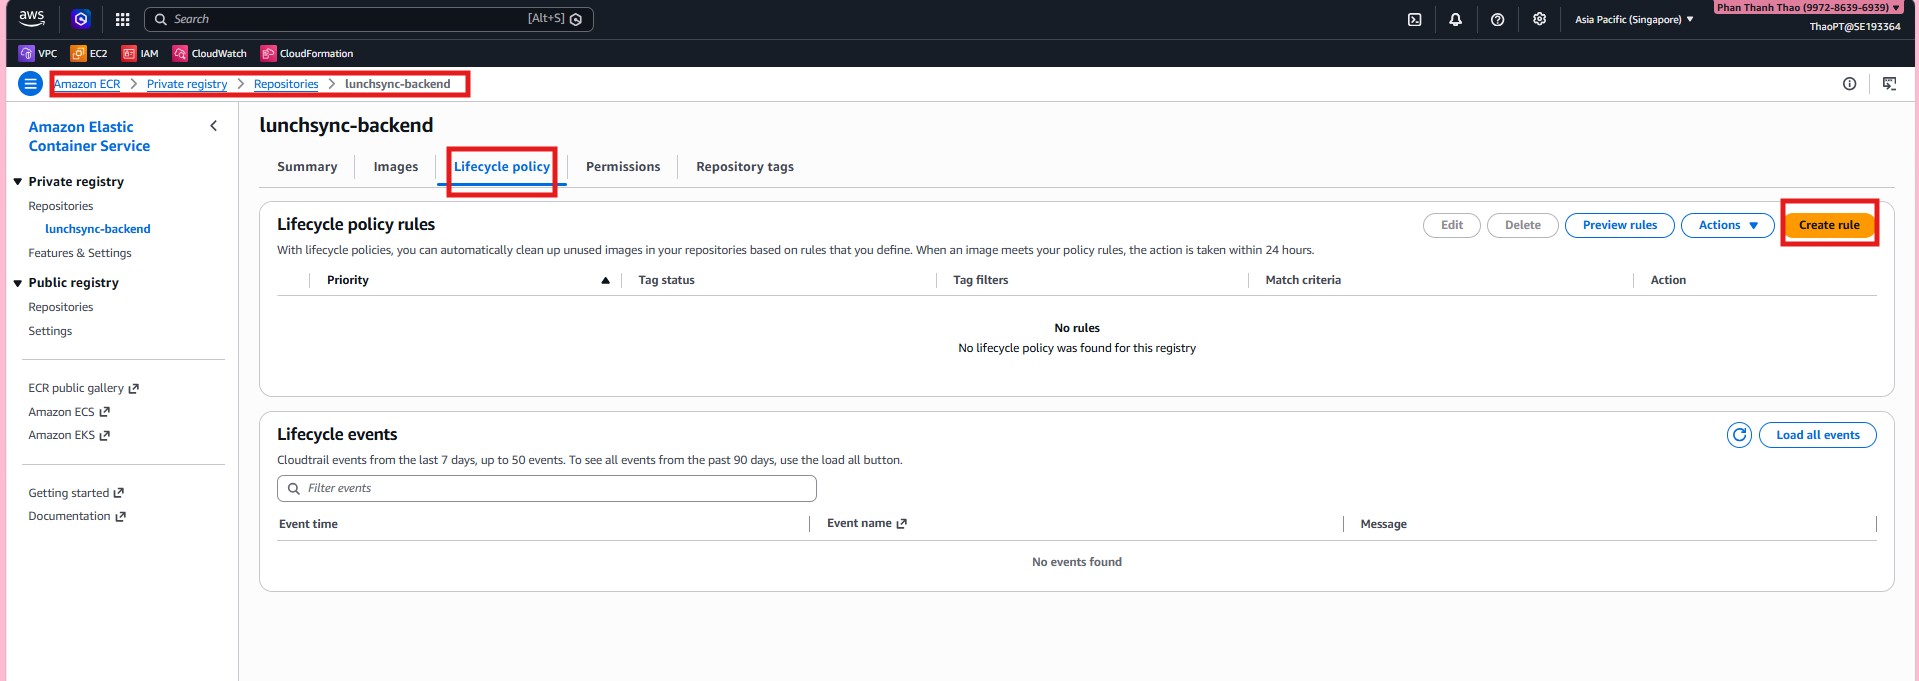
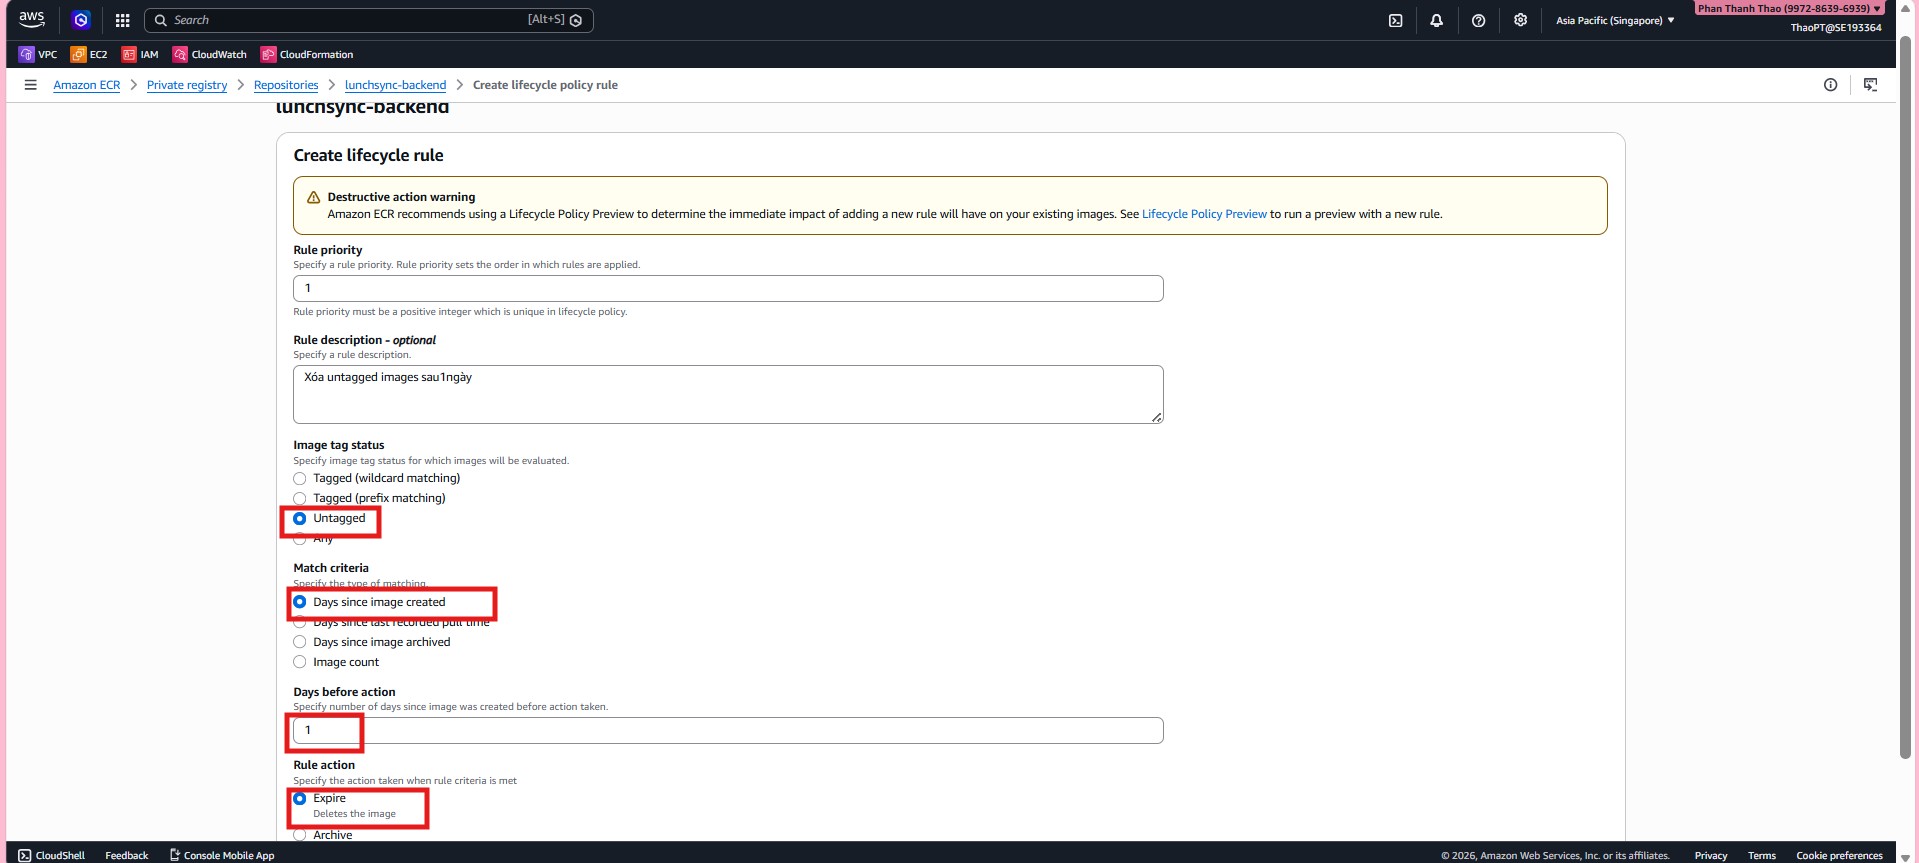
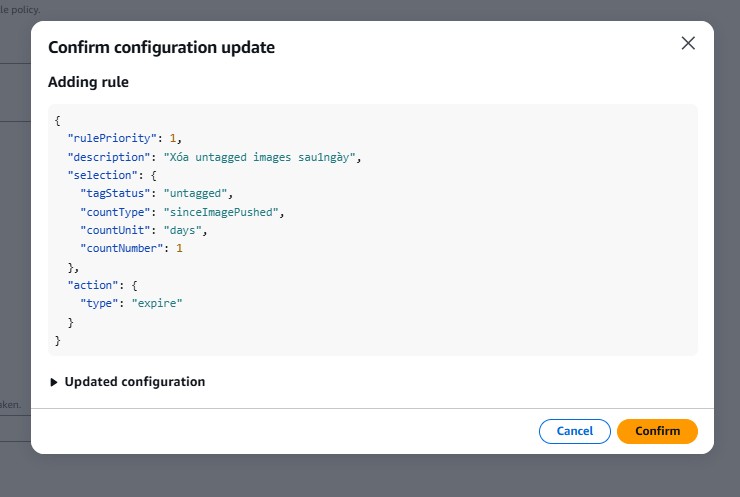
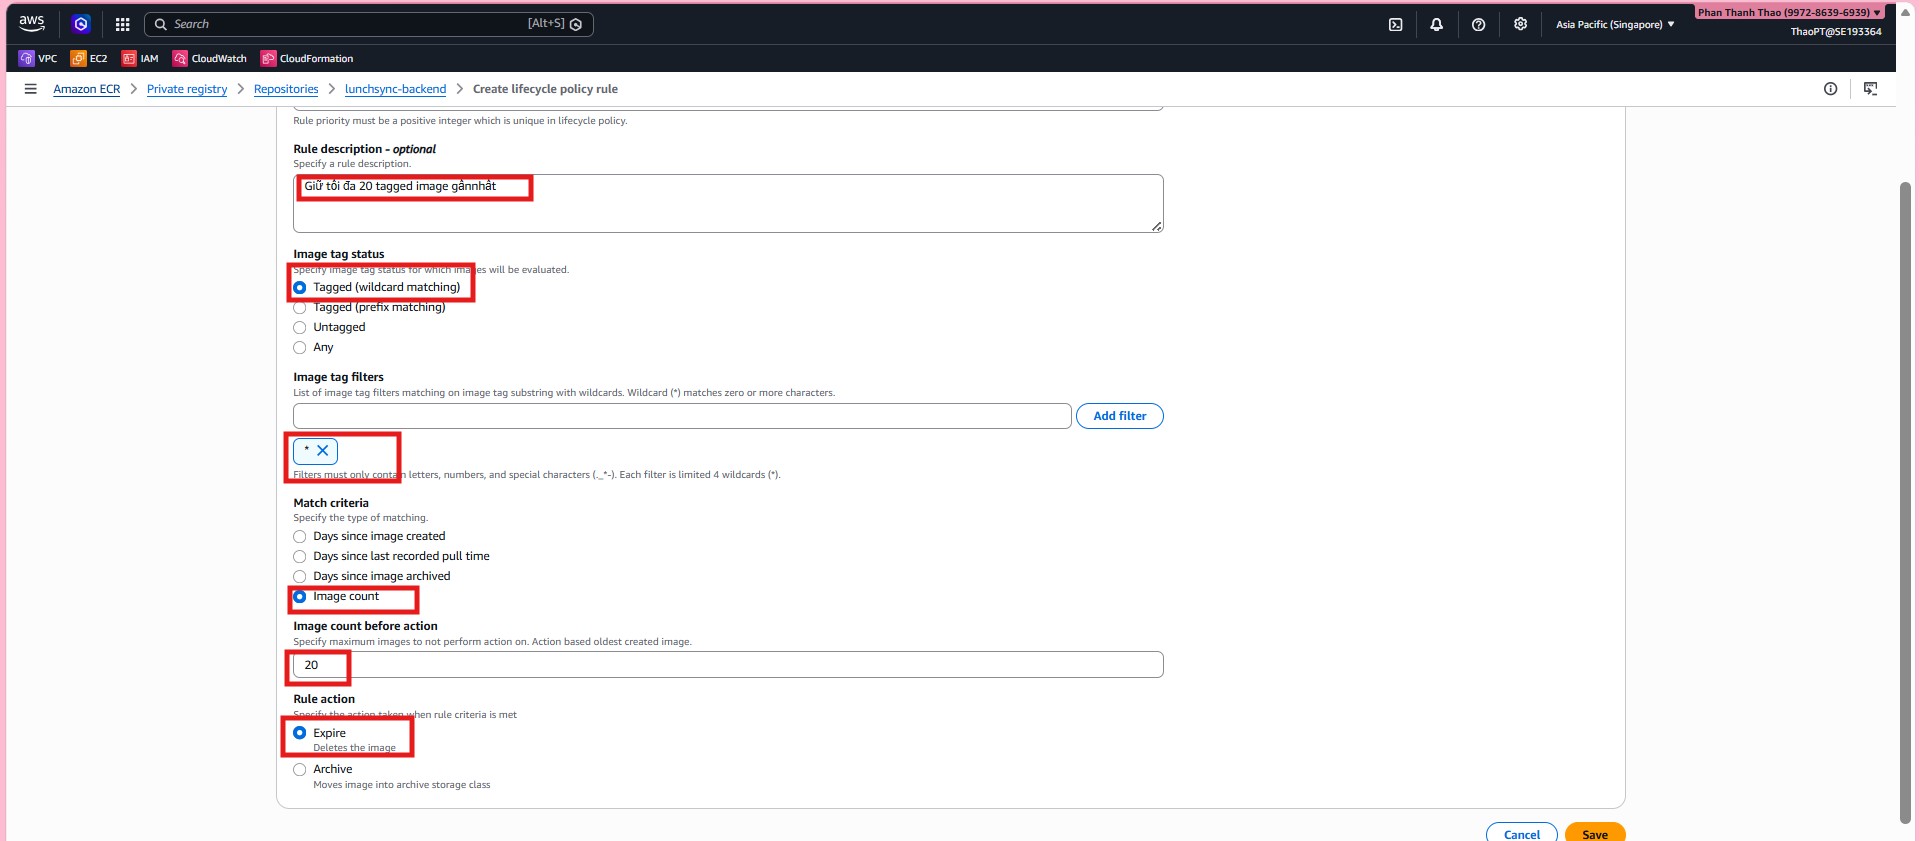
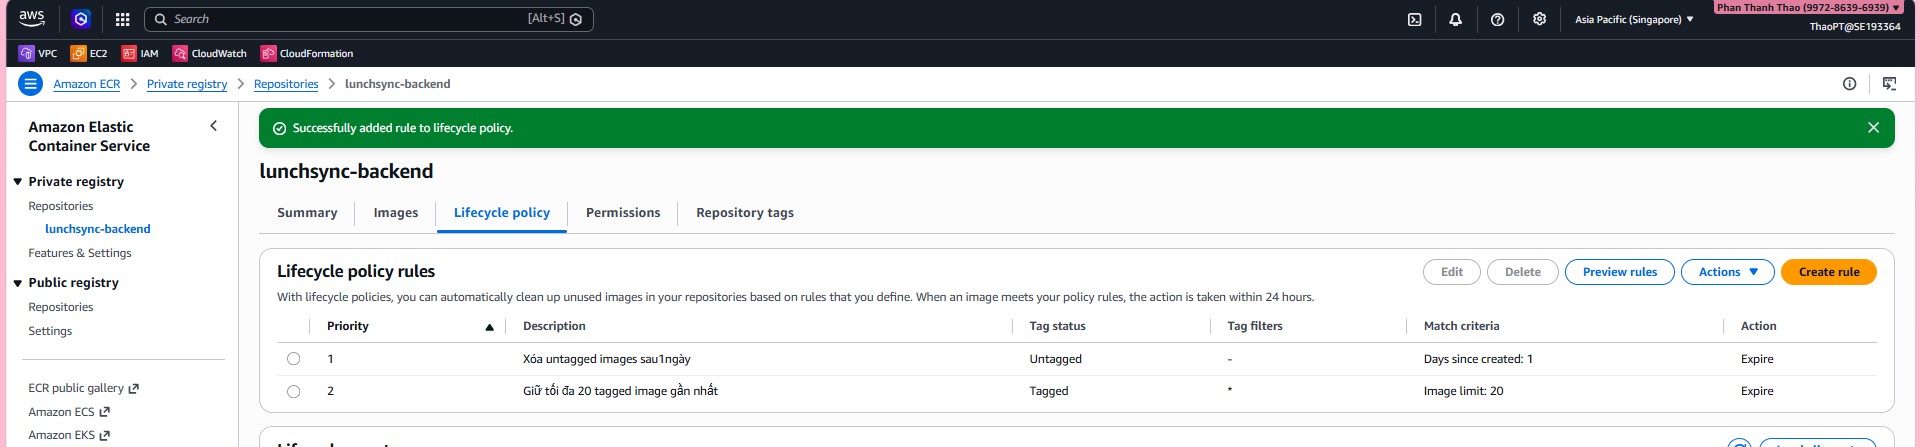
- Create the first lifecycle policy rule to clean up old untagged images.
- Add a second rule to keep only the most recent tagged images needed for rollback.
- Review the lifecycle policy after both rules are added and confirm that the policy is saved.
- Check the lifecycle policy tab one more time to confirm the repository now cleans up images as intended.
- From the repository list, open View push commands to capture the exact login, build, tag, and push URI.

- Save the full ECR push commands because the same values will be used in the workflow or during manual validation.

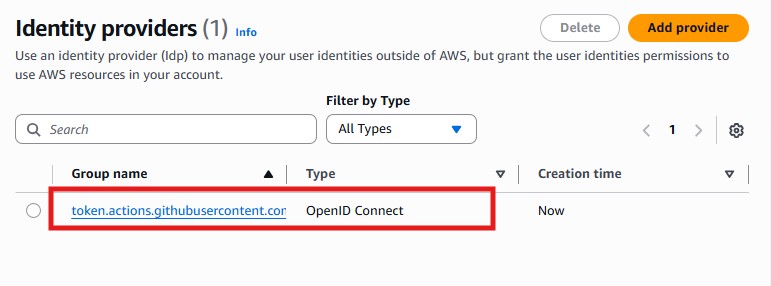
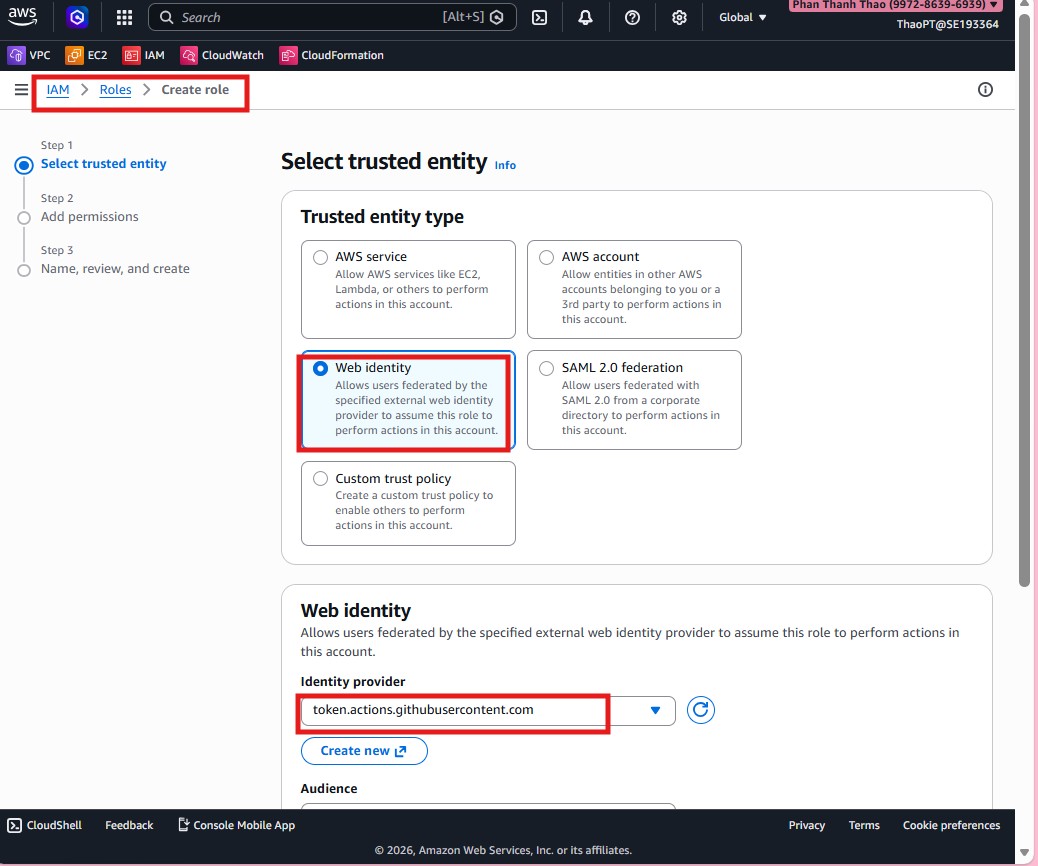
- Once ECR is ready, switch to IAM > Identity providers and add the GitHub OIDC provider.
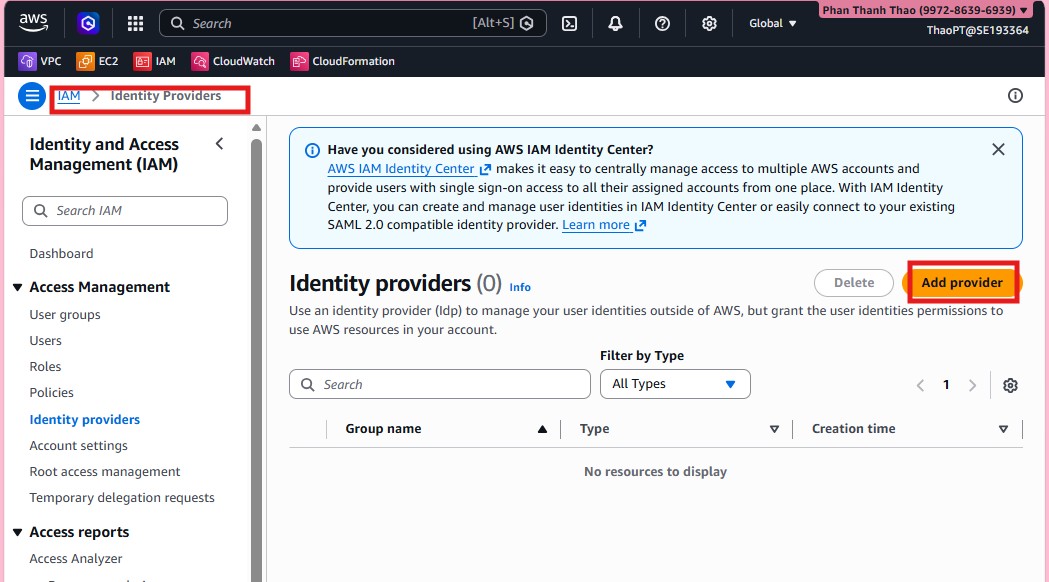
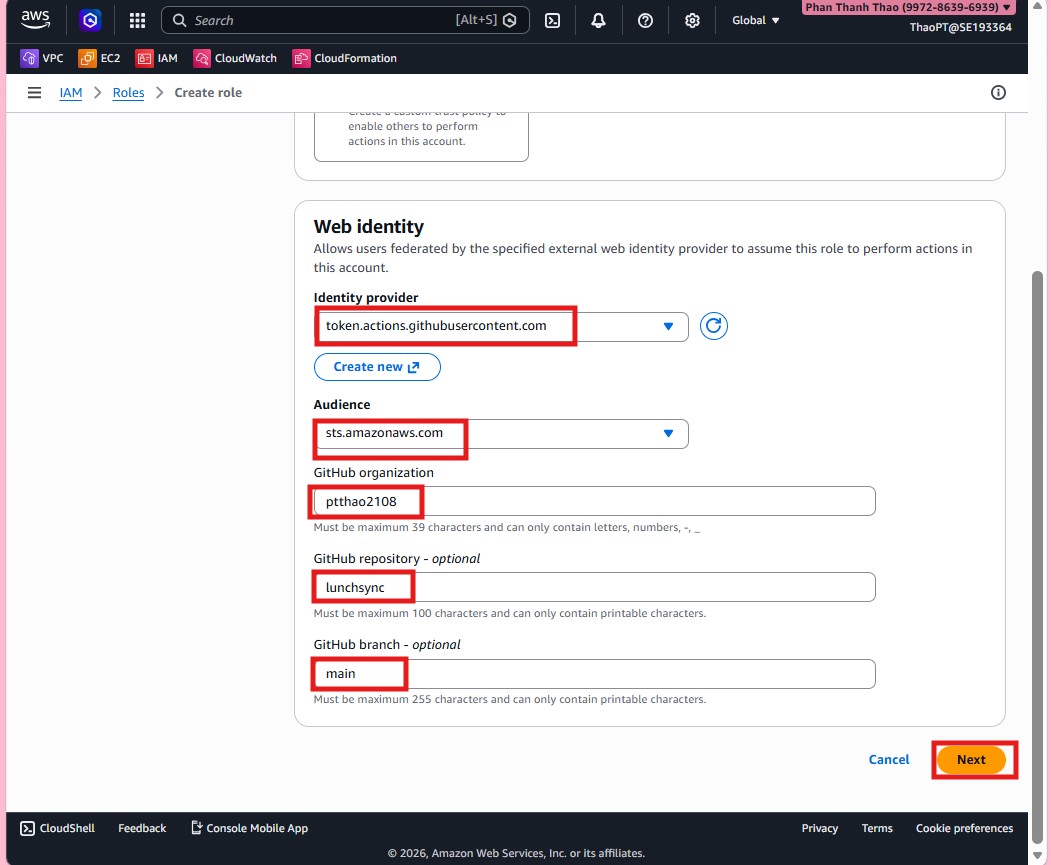
- Choose OpenID Connect, enter
https://token.actions.githubusercontent.com, and usests.amazonaws.comas the audience.

- Review the provider list and confirm that the GitHub provider now exists.
- Create a new role with Web identity as the trusted entity so GitHub Actions can assume it.
- Scope the trust relationship to GitHub organization
pttha02108, repositorylunchsync, and branchmain.
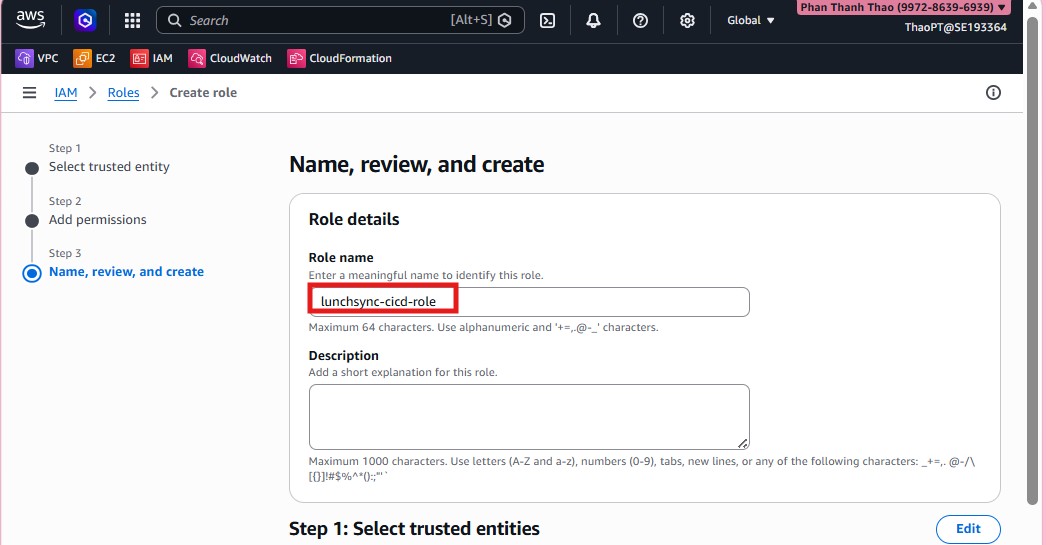
- Name the role
lunchsync-cicd-roleand create it.
- Open the new role and create an inline policy for the pipeline.
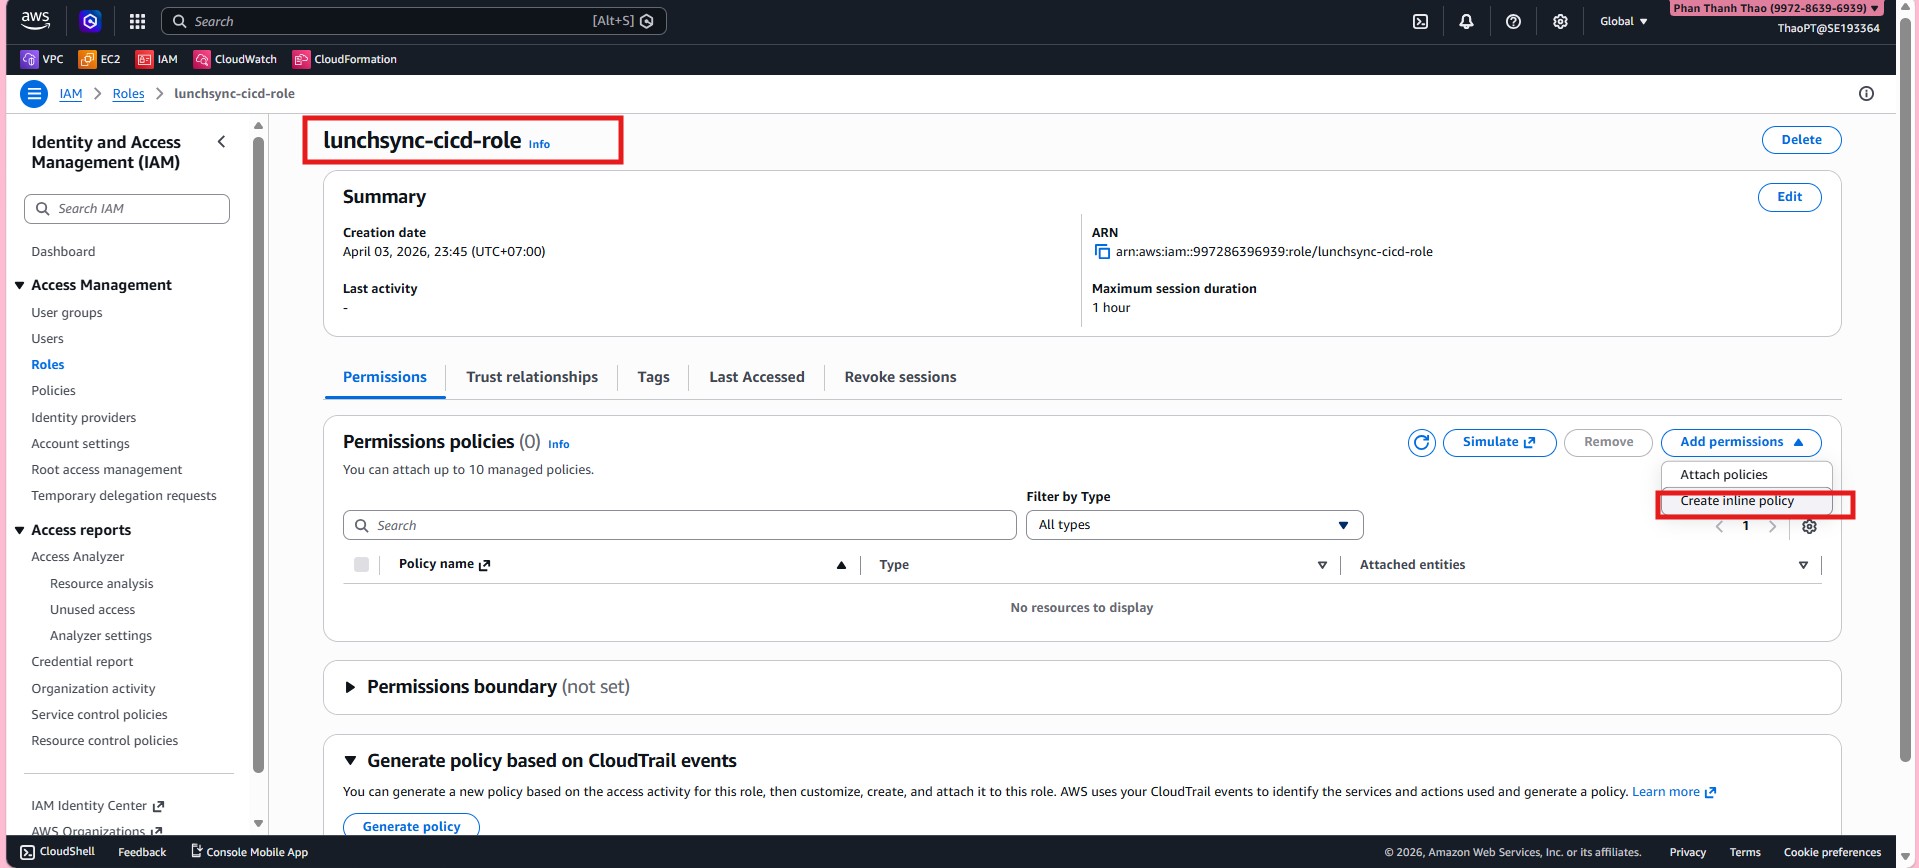
- In the JSON policy, allow the pipeline to log in to ECR, push images, register new task definitions, update the ECS service, and access the related AWS resources it needs.
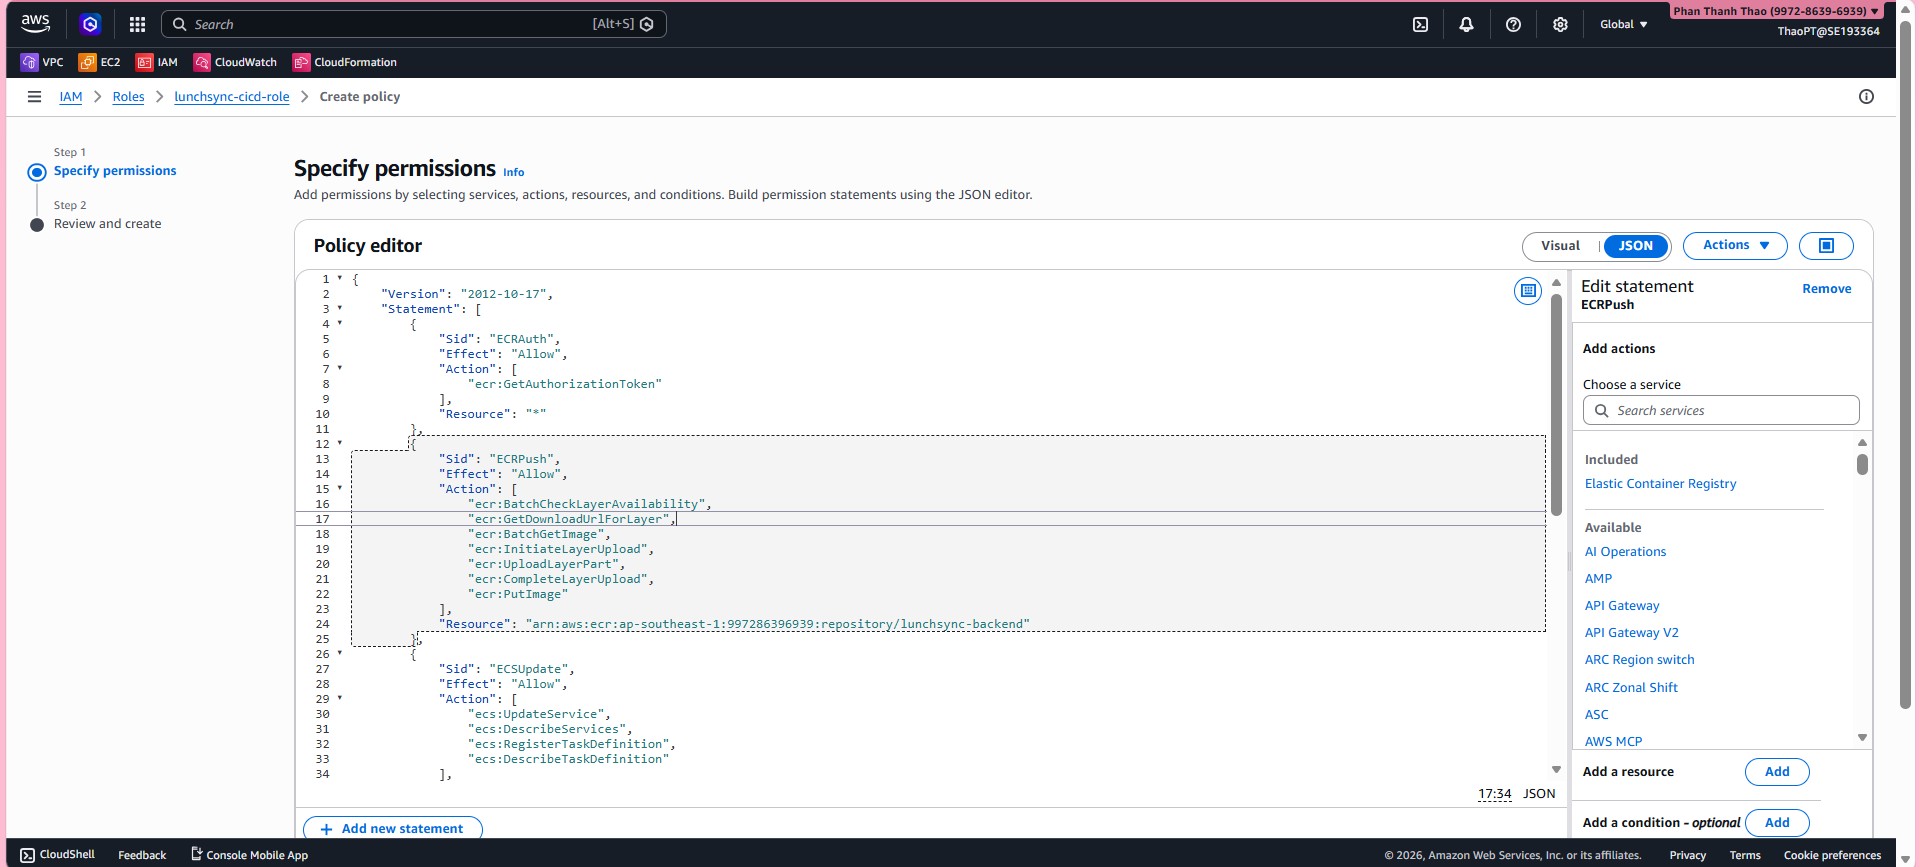
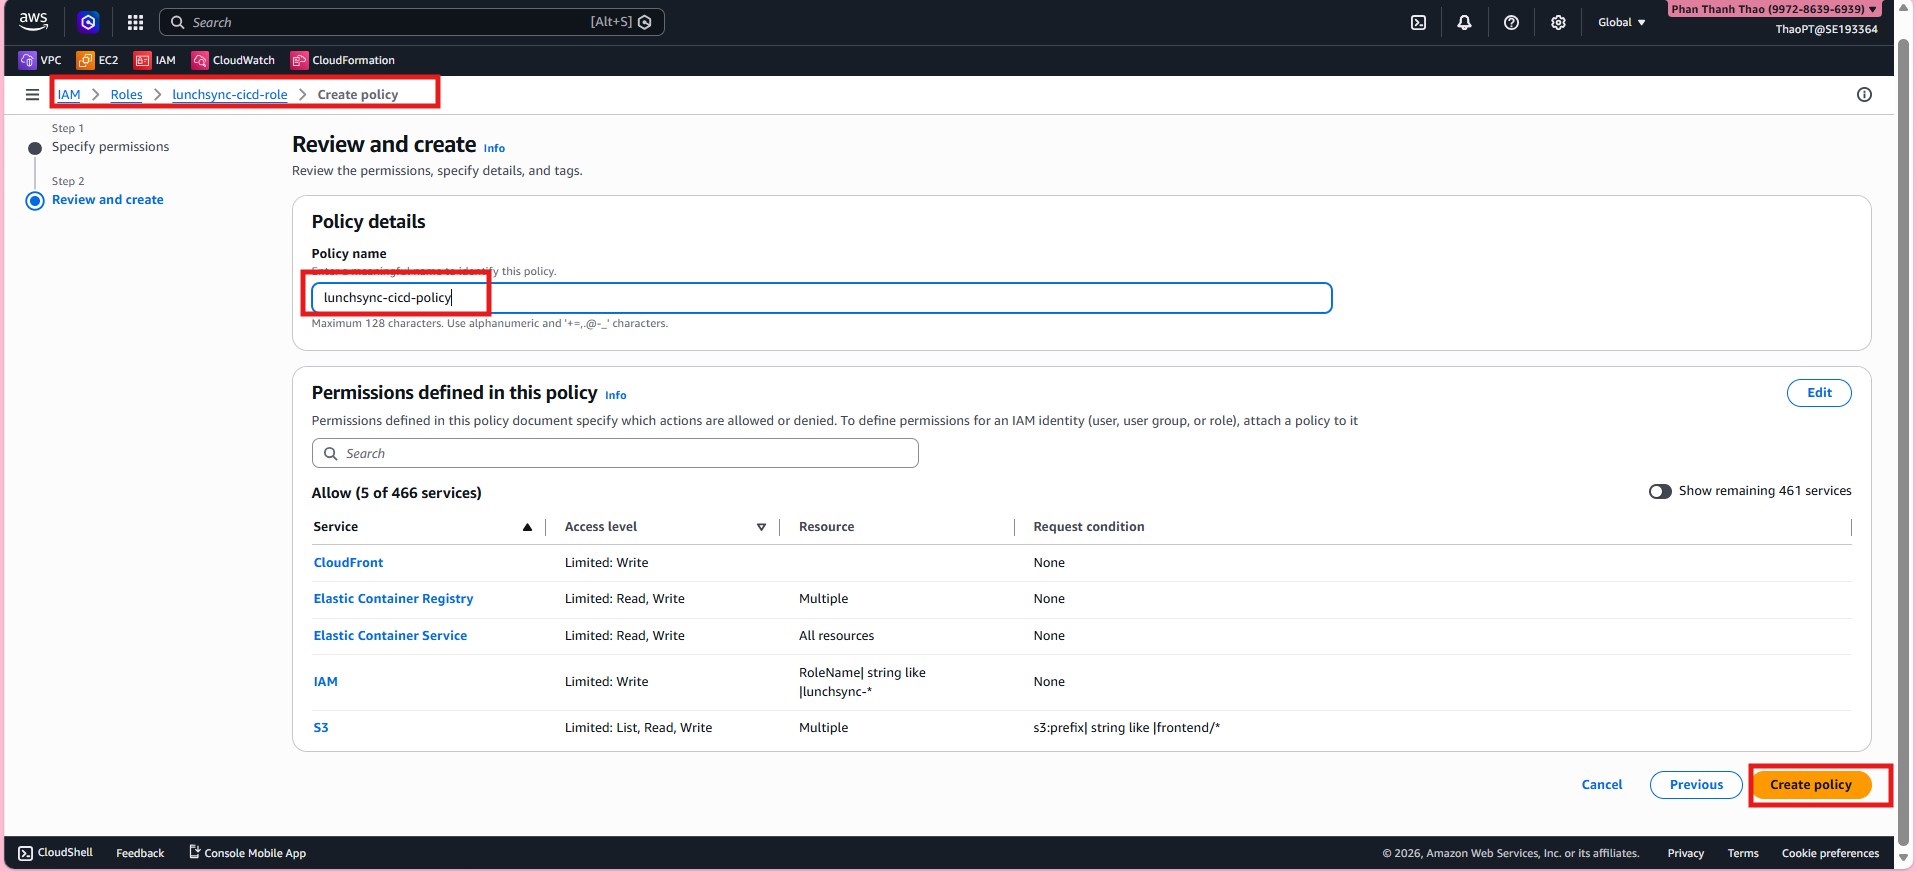
- Name the policy, for example
lunchsync-cicd-policy, and save it.
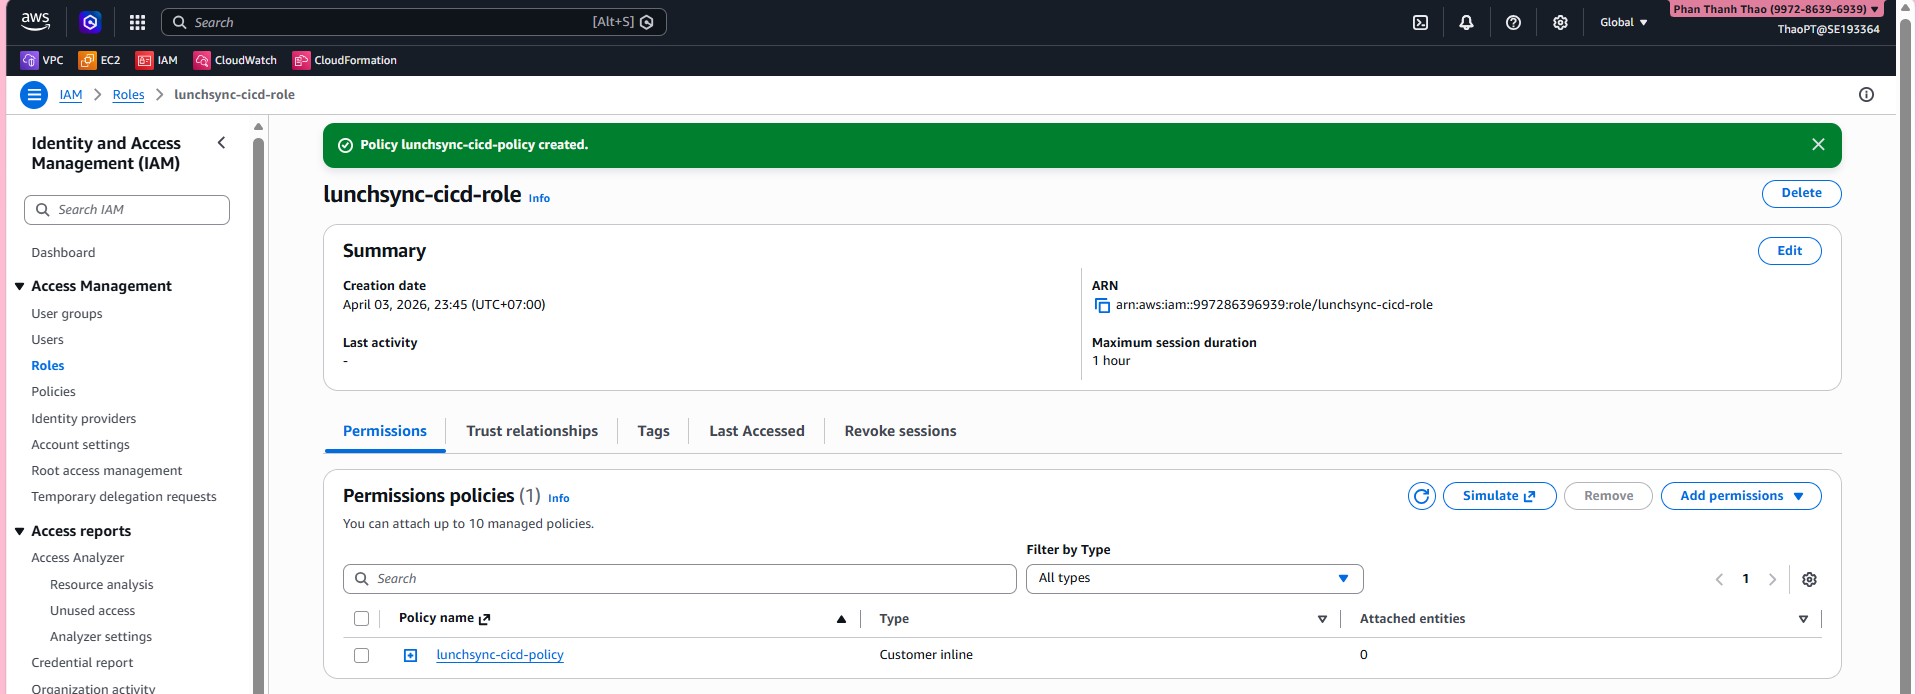
- Review
lunchsync-cicd-roleand confirm the policy is attached correctly.
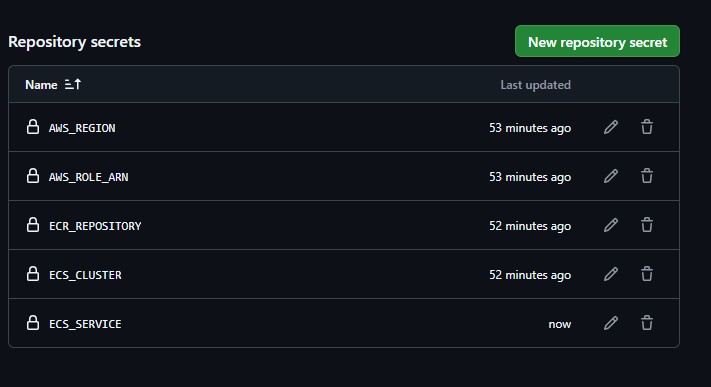
- Return to the GitHub repository and open Settings > Secrets and variables > Actions.
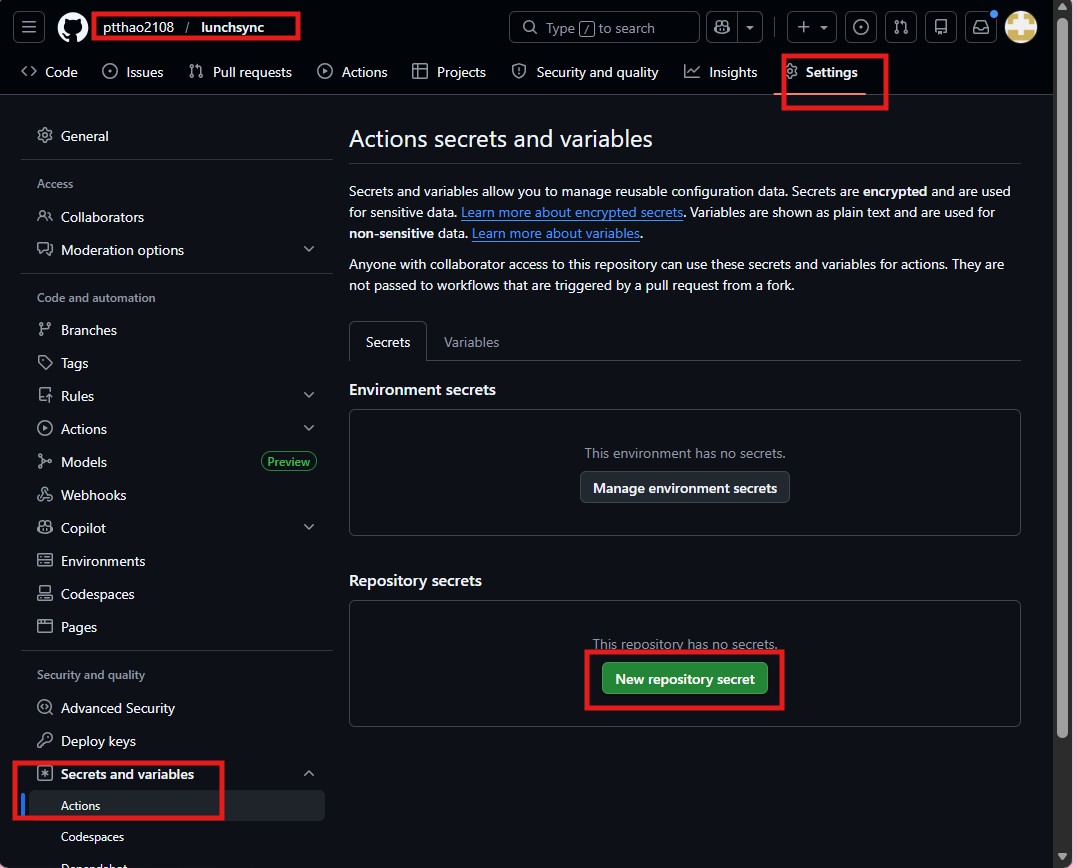
- Add the repository secrets needed by the workflow, such as
AWS_REGION,AWS_ROLE_ARN,ECR_REPOSITORY,ECS_CLUSTER, andECS_SERVICE.
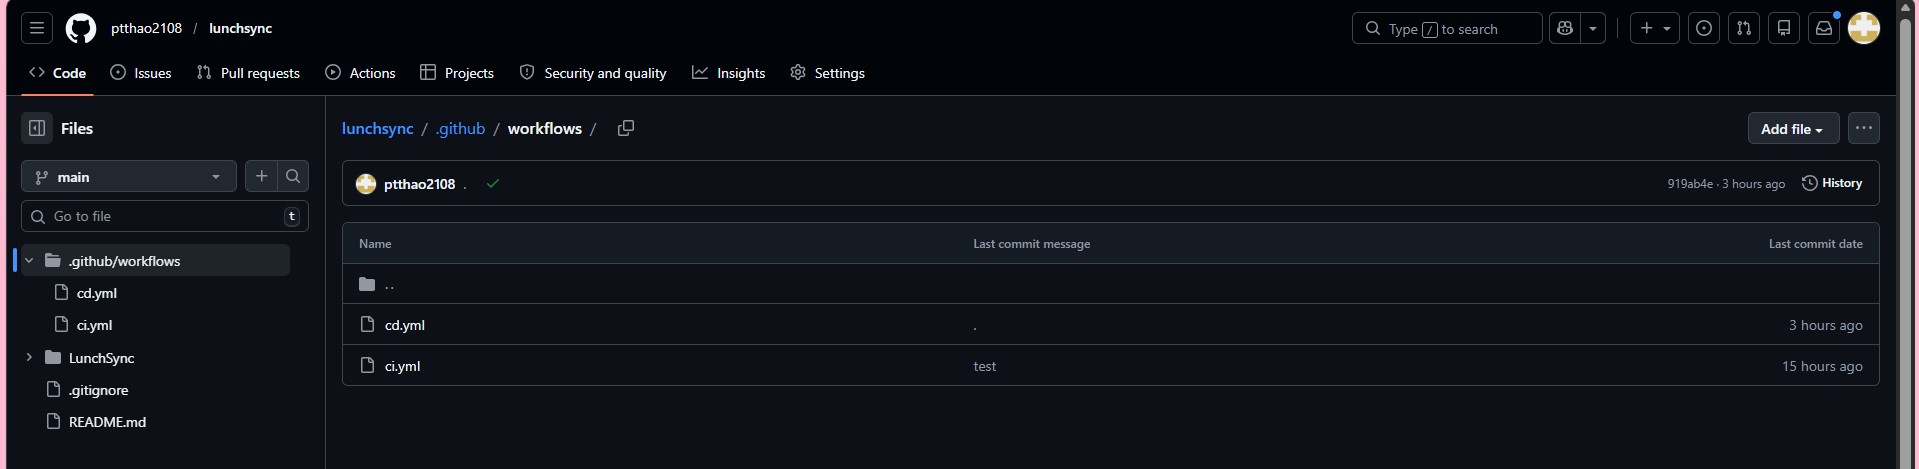
- Review
.github/workflowsand confirm files such asci.ymlandcd.ymlare present.
- Run a manual
docker loginto ECR and adocker buildfor the backend image fromLunchSync.Api/Dockerfile.
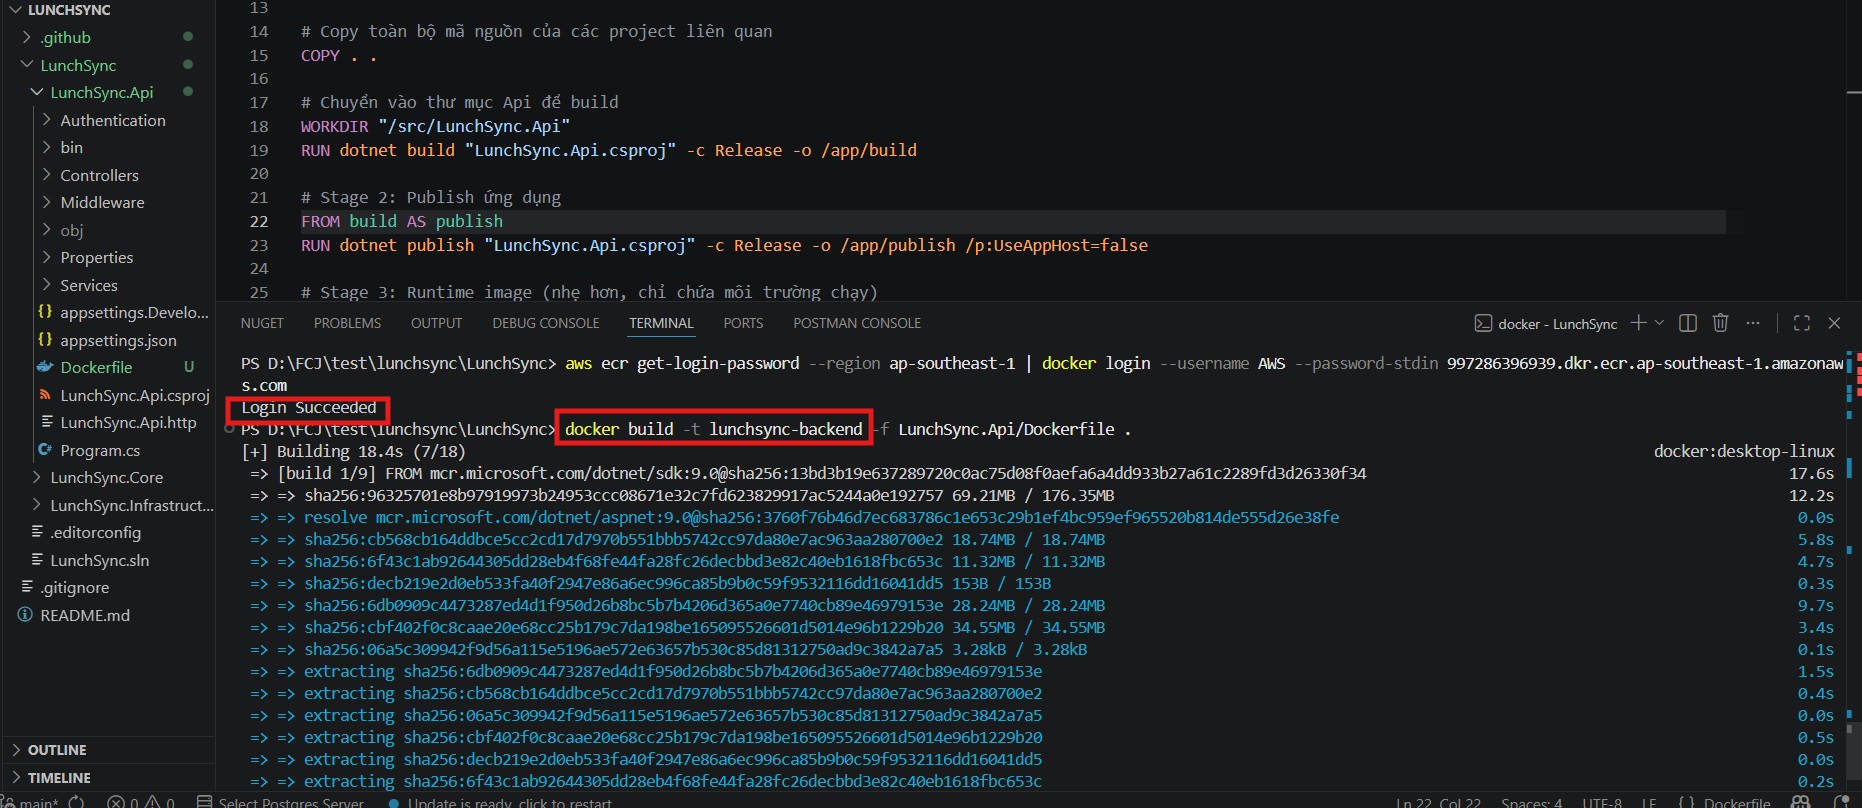
- Tag the image with the correct
lunchsync-backendrepository URI and push it to ECR.
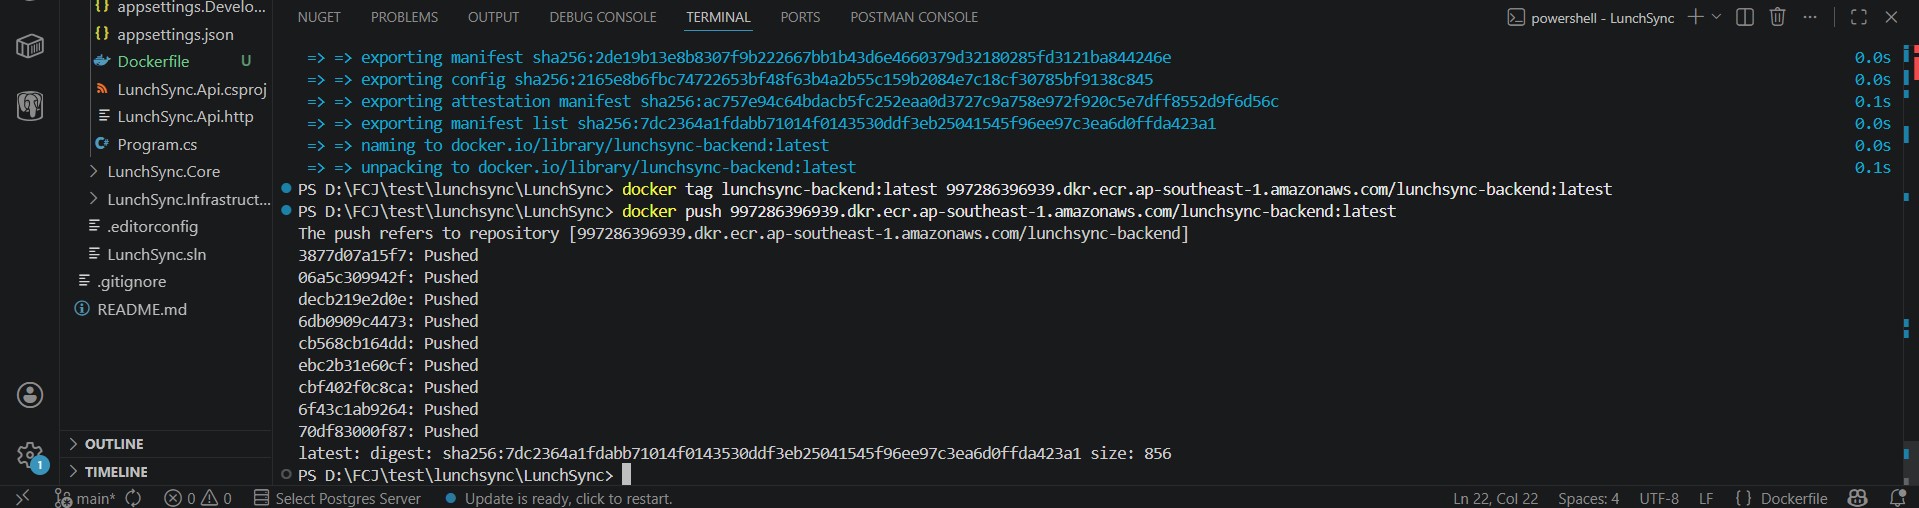
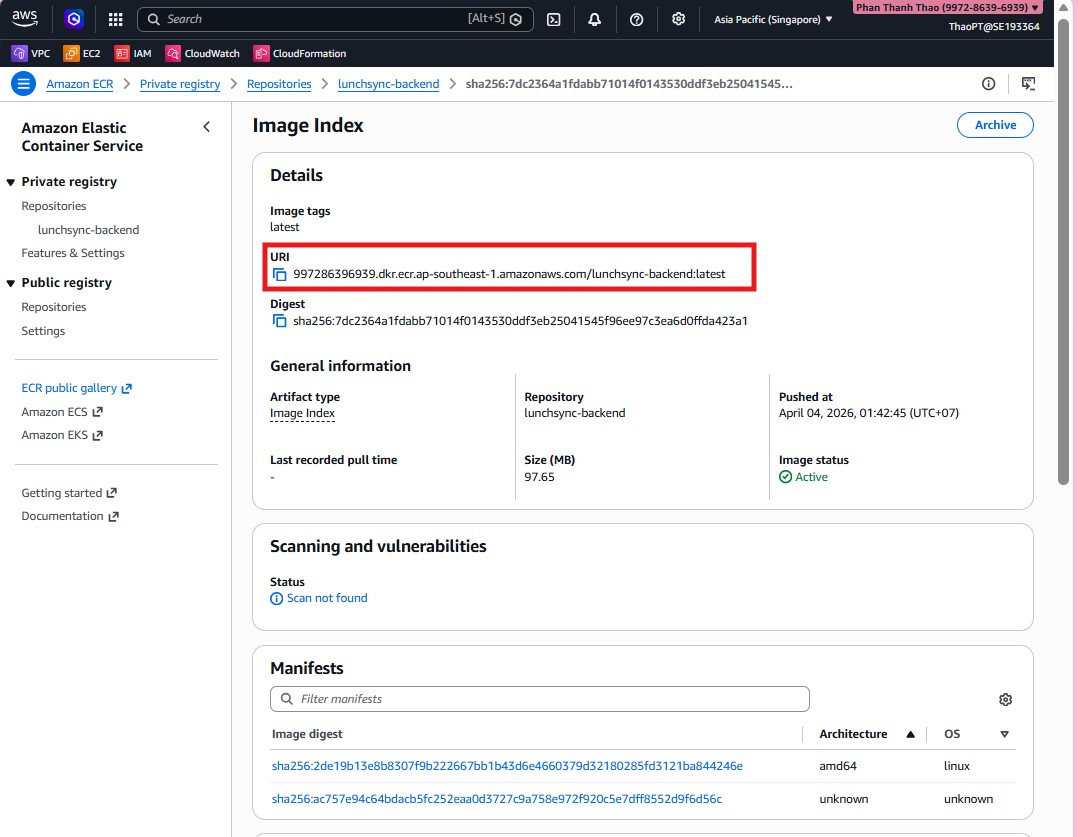
- Return to ECR and confirm that the new image and tag now appear in the repository.
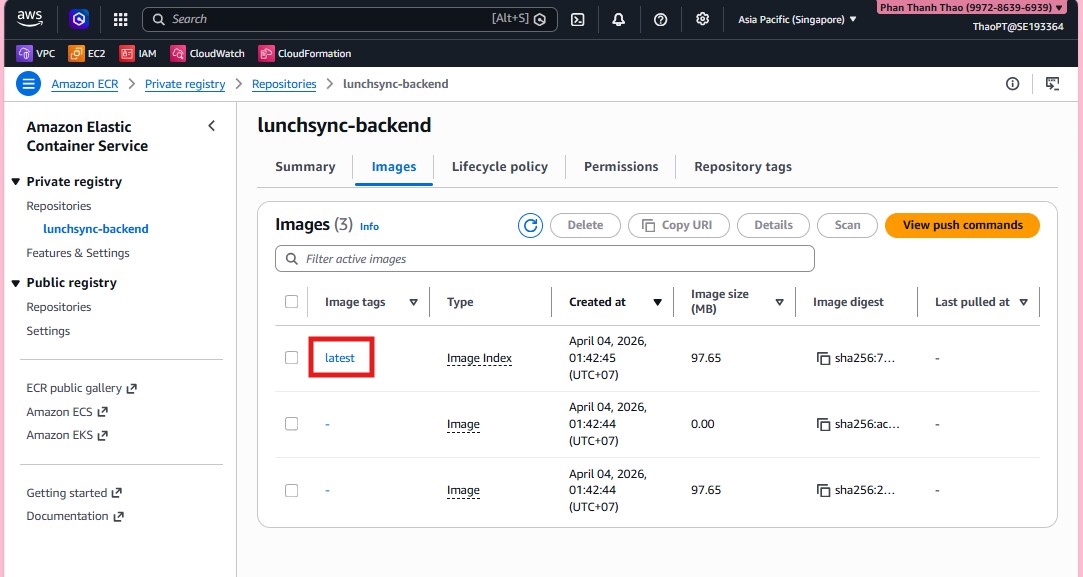
- Open the image details page and capture the full digest and image URI for the task definition step.
- Review the image list, tags, and push timestamps one last time to confirm the repository is ready for ECS deployment.