Provision RDS
Overview
This section presents the steps to provision the RDS instance and prepare the basic backend connectivity settings.
Implementation steps
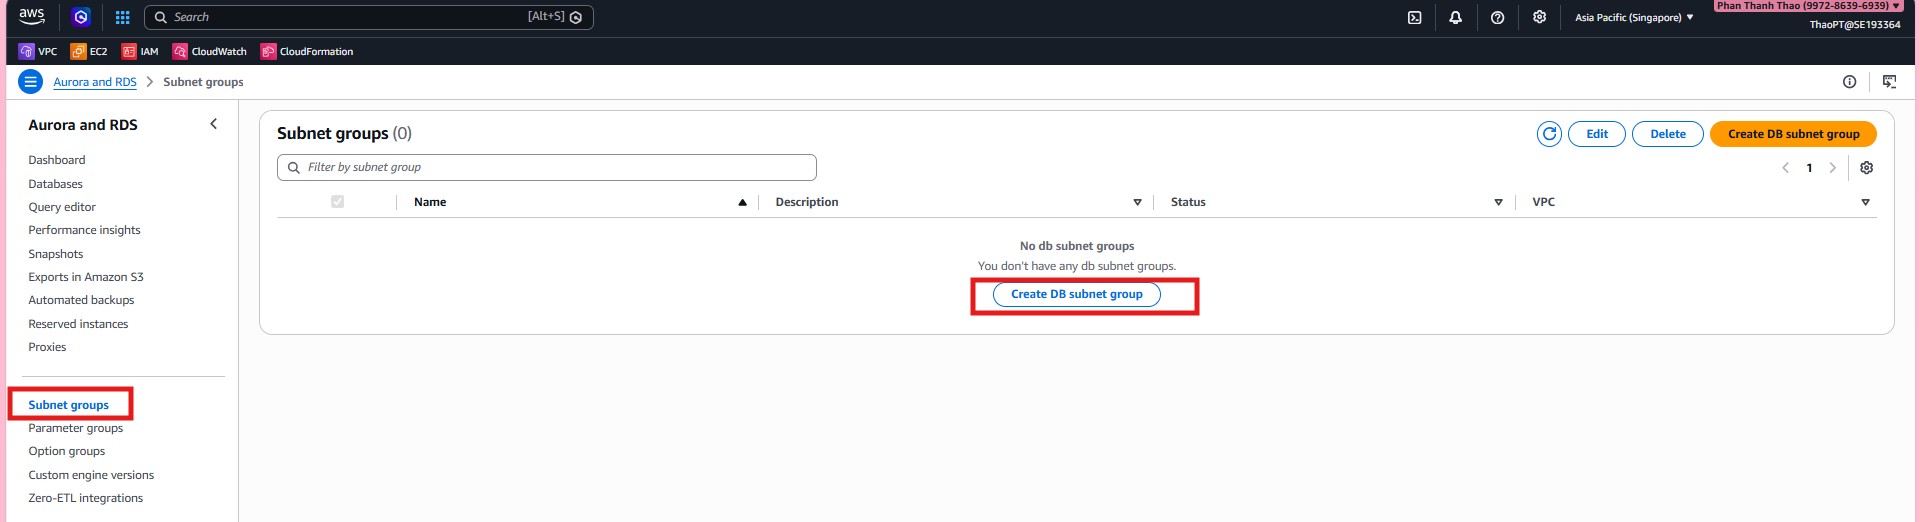
- Before creating the database, open RDS > Subnet groups to prepare a DB subnet group for the private subnets.
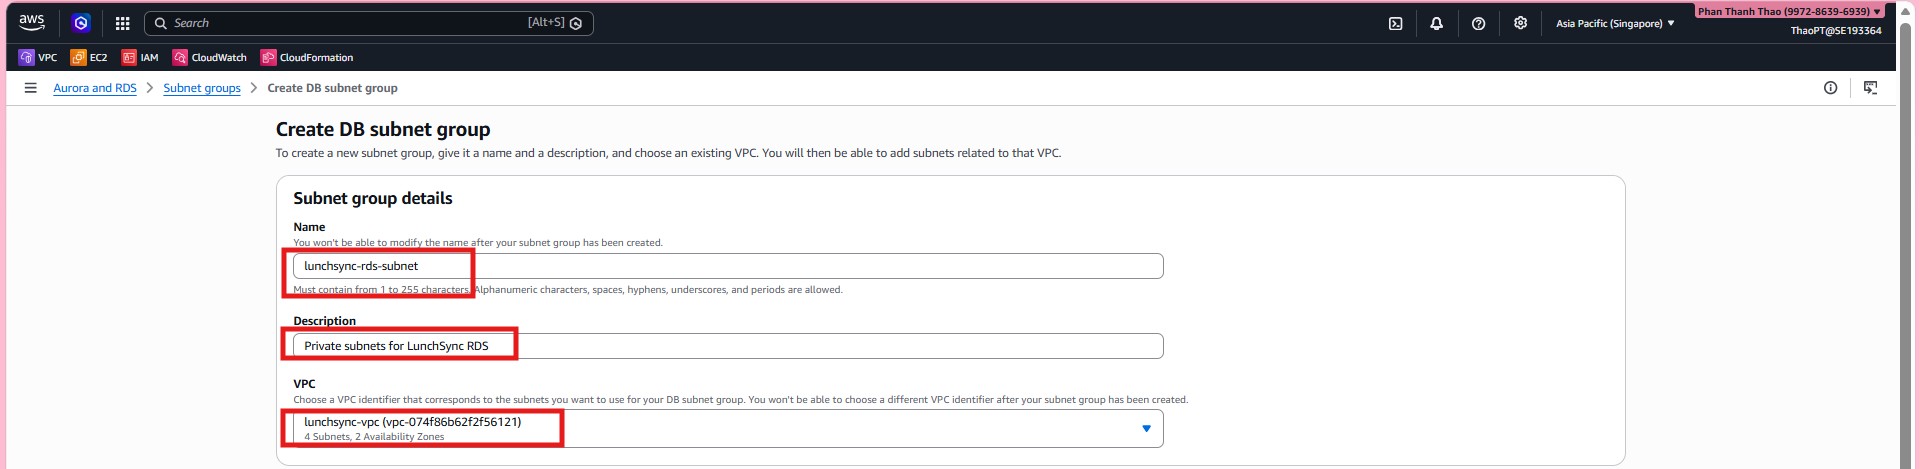
- Create the subnet group
lunchsync-rds-subnet, describe it clearly for LunchSync RDS, and chooselunchsync-vpc.
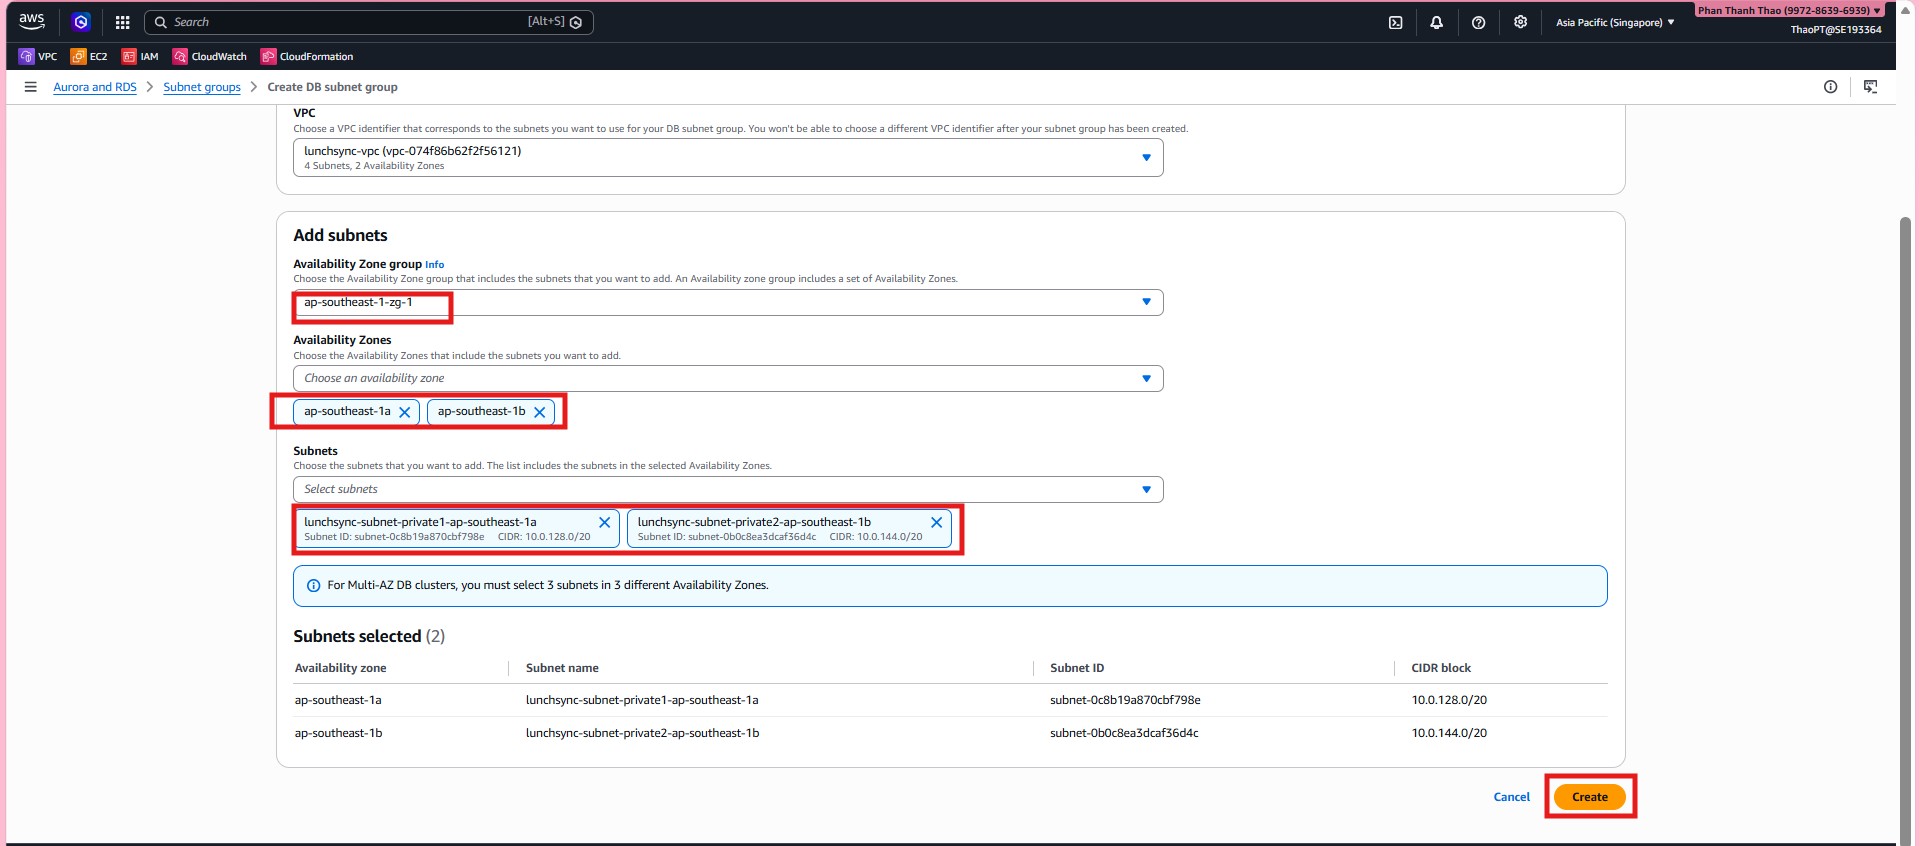
- Select the two private subnets in
ap-southeast-1aandap-southeast-1b, then add them to the subnet group.
- Review the subnet group list and confirm that
lunchsync-rds-subnetis in Complete status.

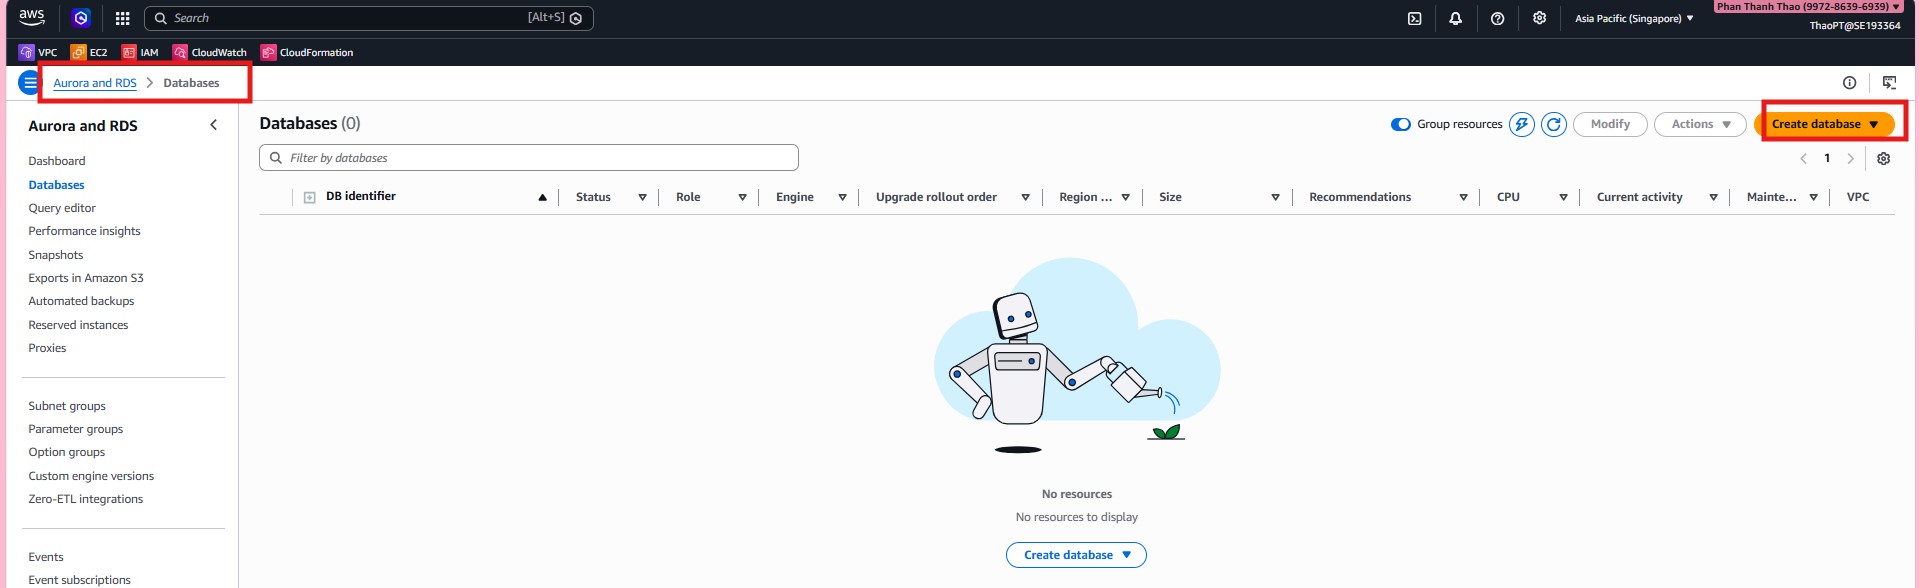
- Open Databases and choose Create database to start provisioning PostgreSQL.
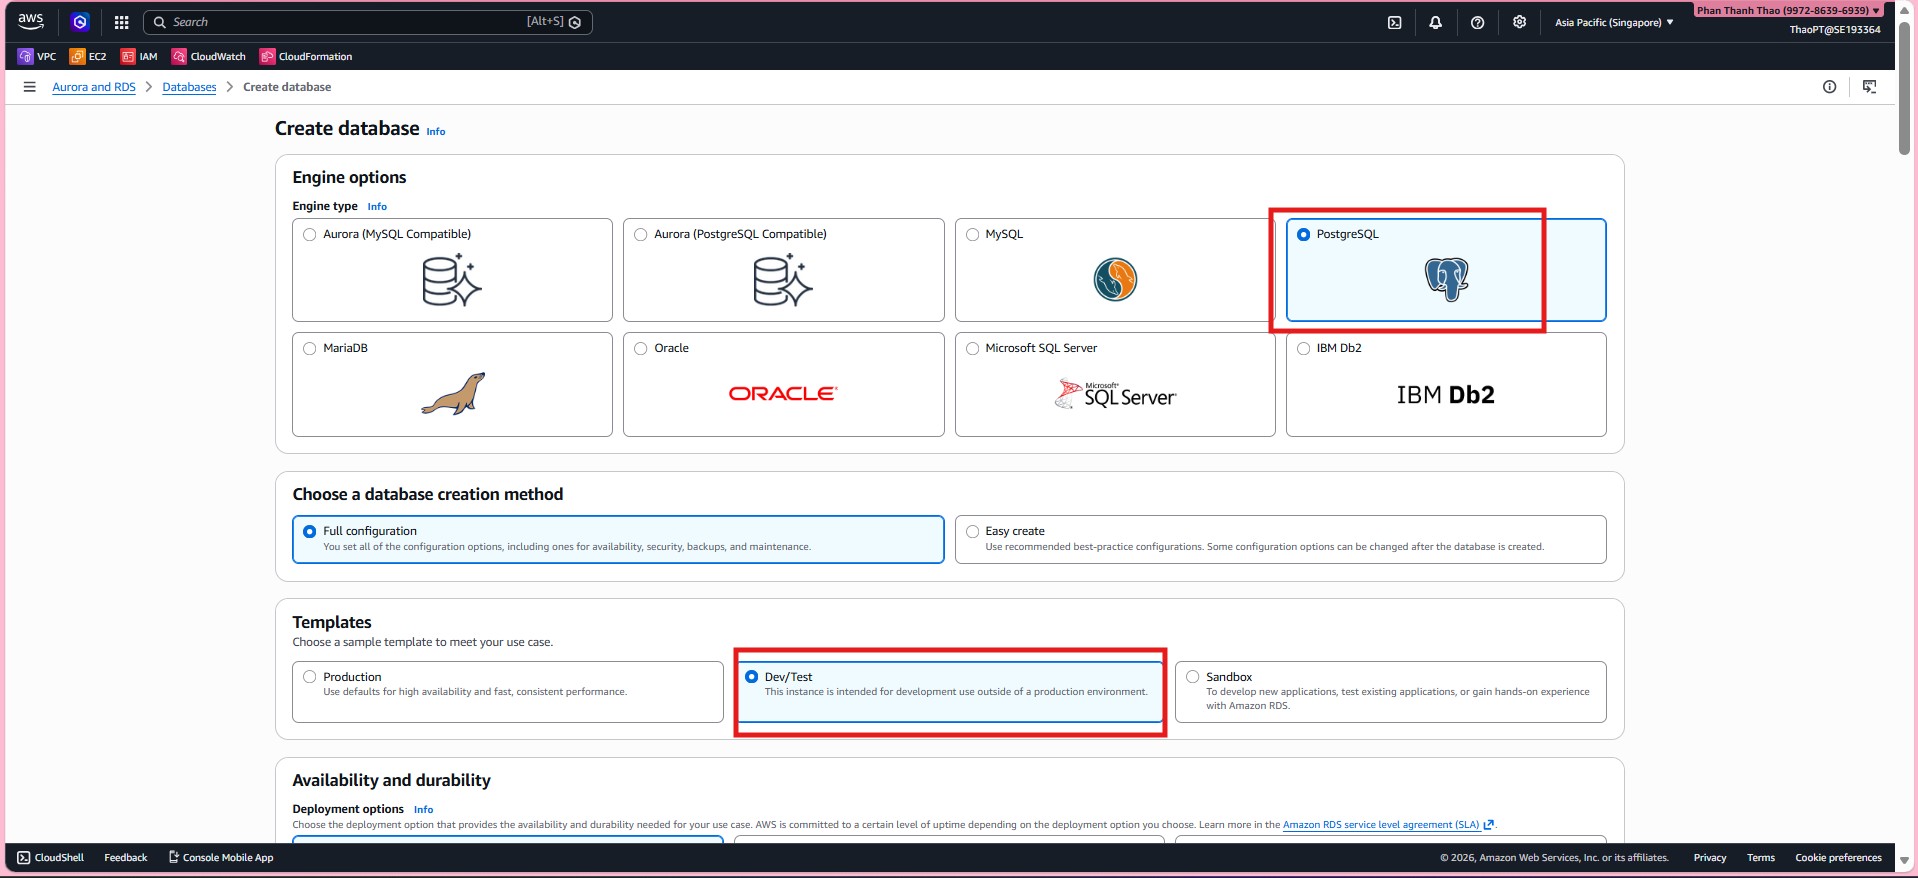
- Choose PostgreSQL, use Standard create / Full configuration, pick a
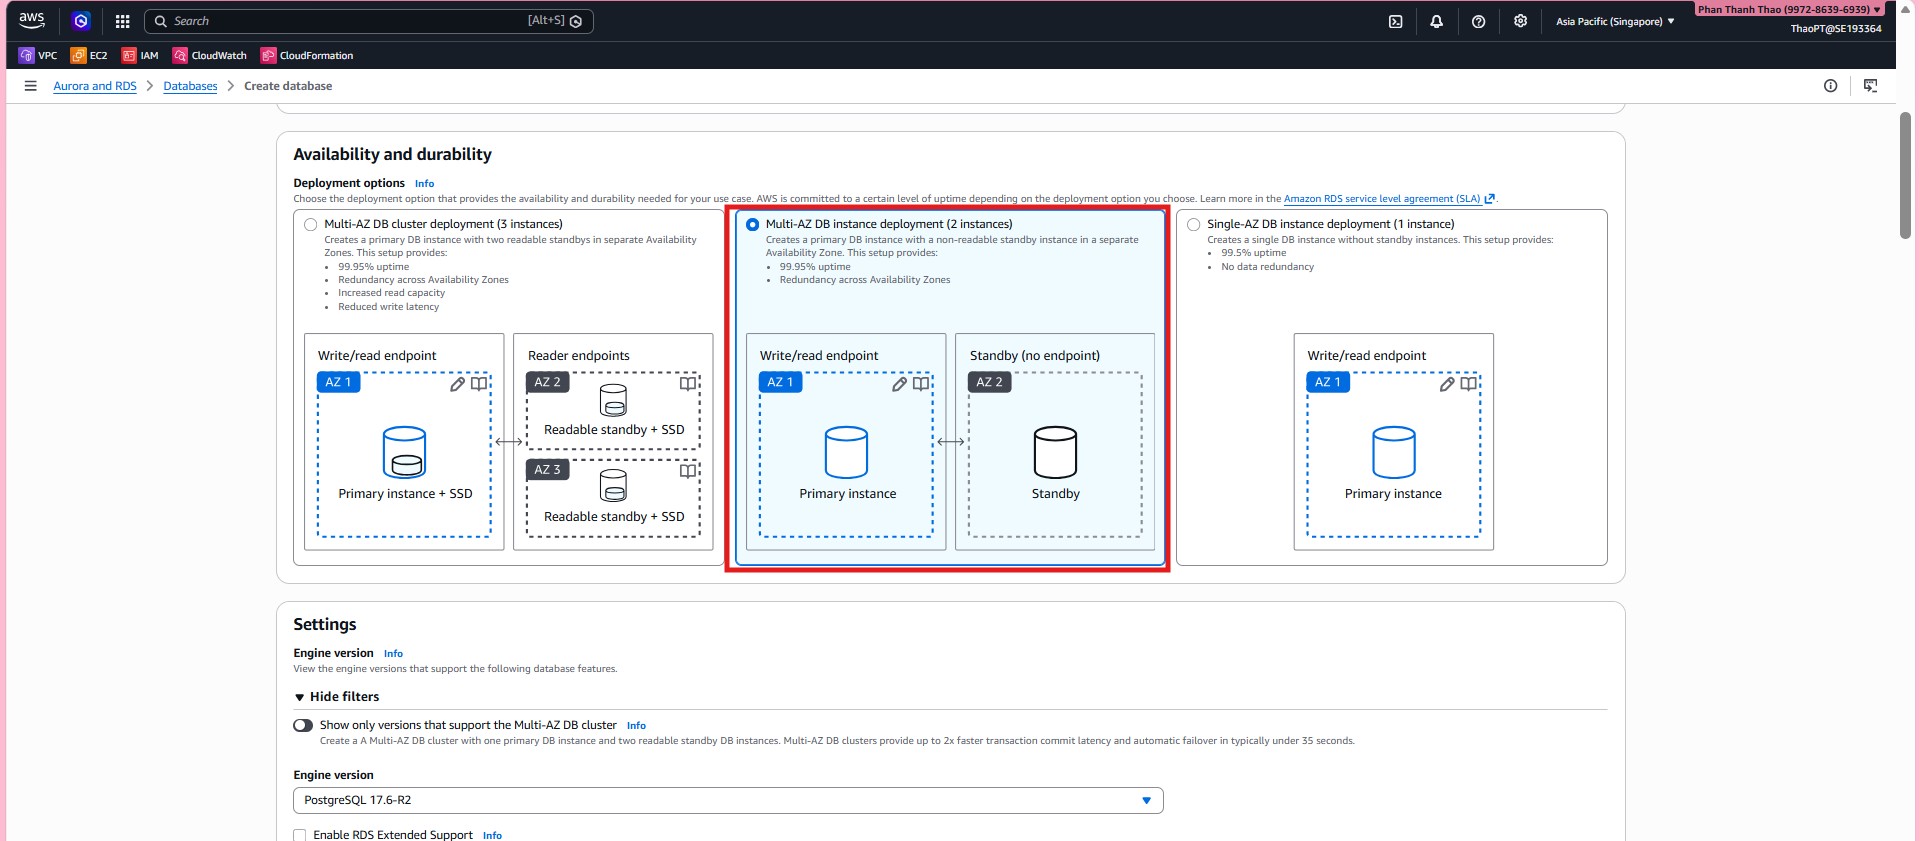
Dev/Teststyle template, and keep the deployment Single-AZ.
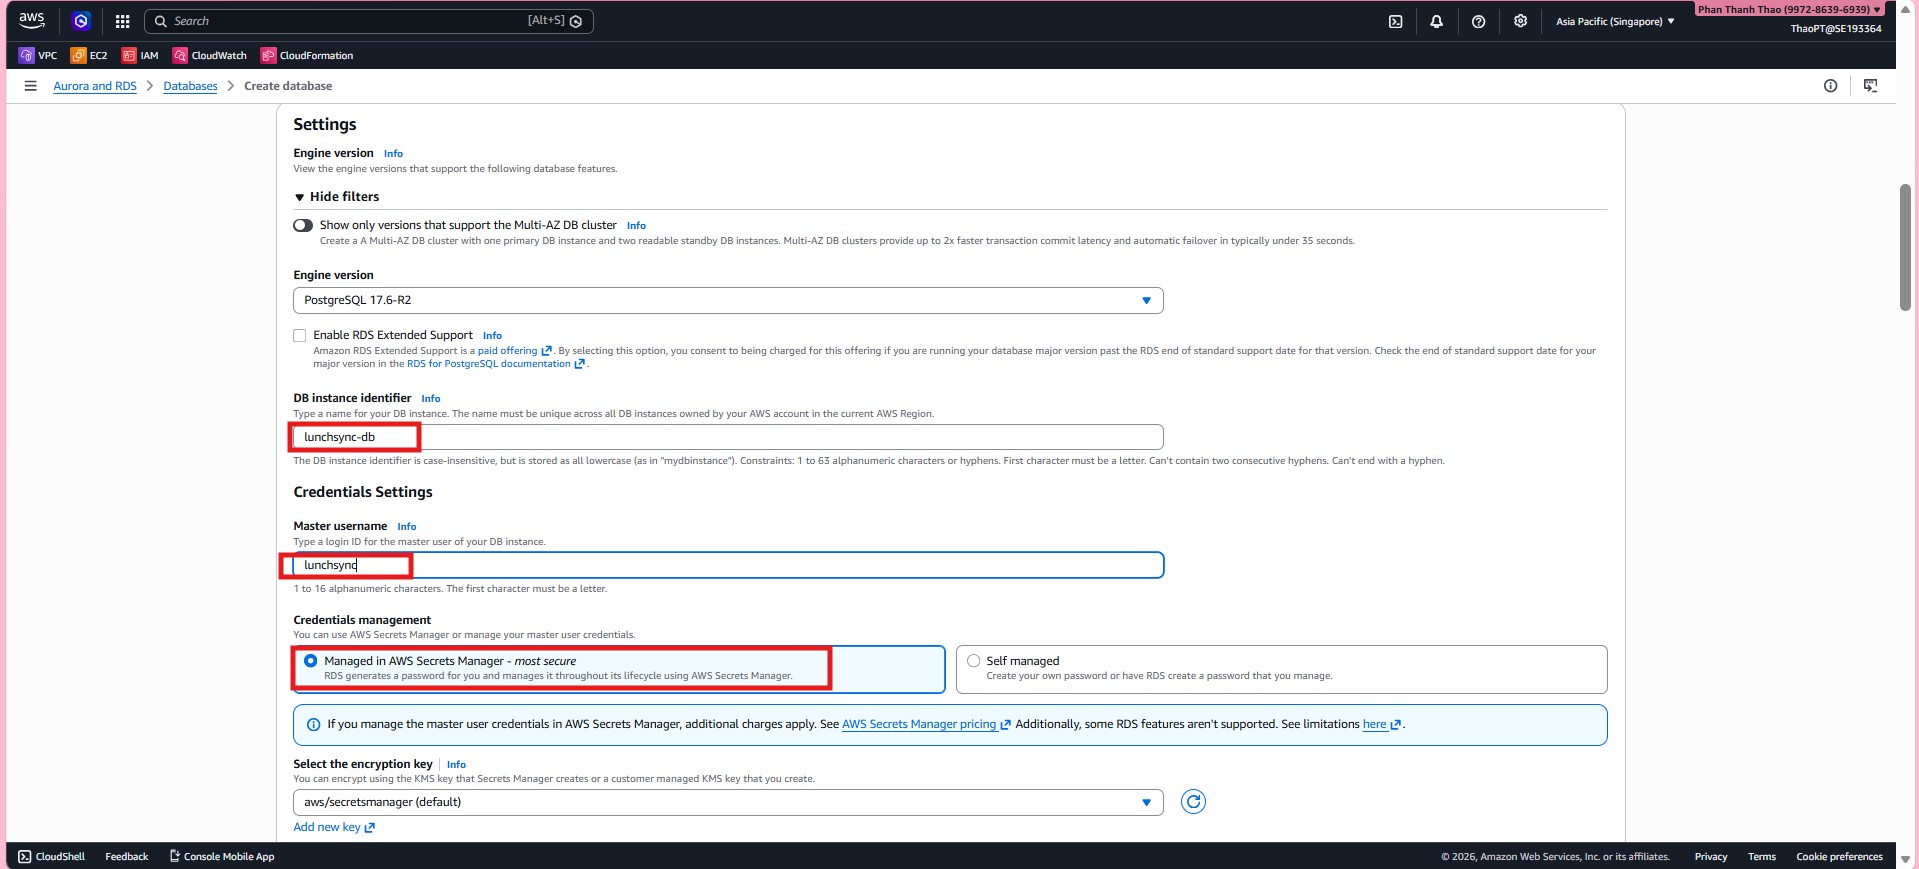
- Set
DB instance identifier = lunchsync-db, uselunchsyncas the master username, and let AWS Secrets Manager manage the credentials.

- Choose instance class
db.t3.micro, storage typegp3, then configure connectivity withlunchsync-vpc, subnet grouplunchsync-rds-subnet,Public access = No, and security grouprds-sg.
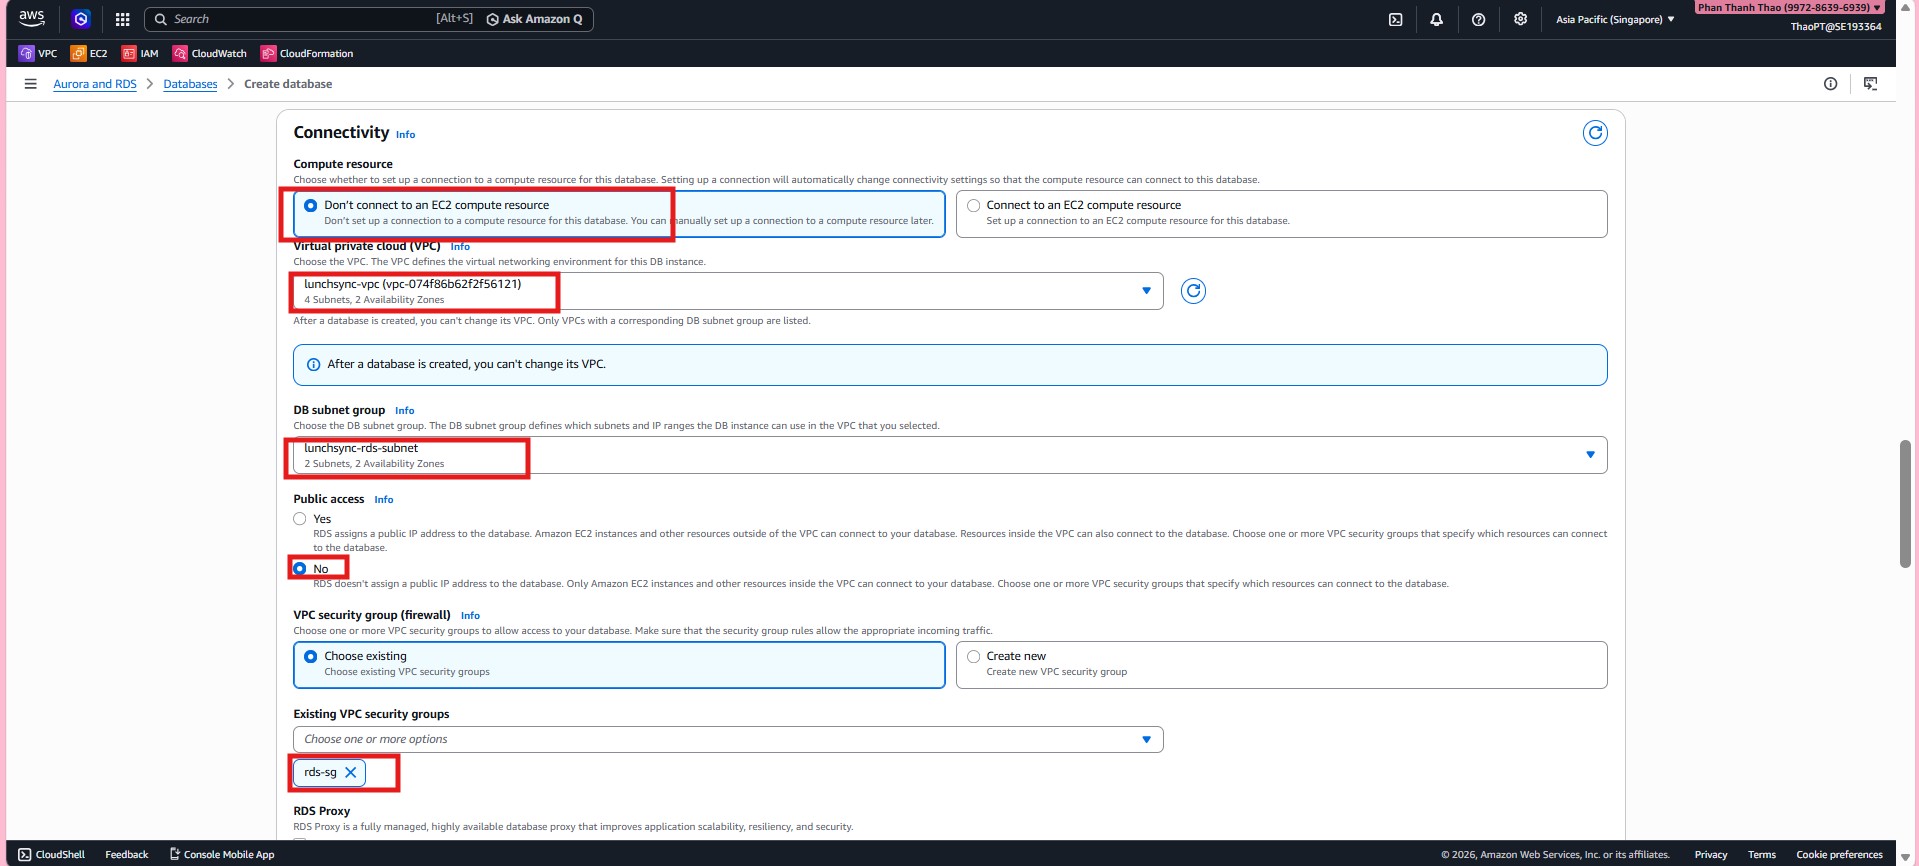
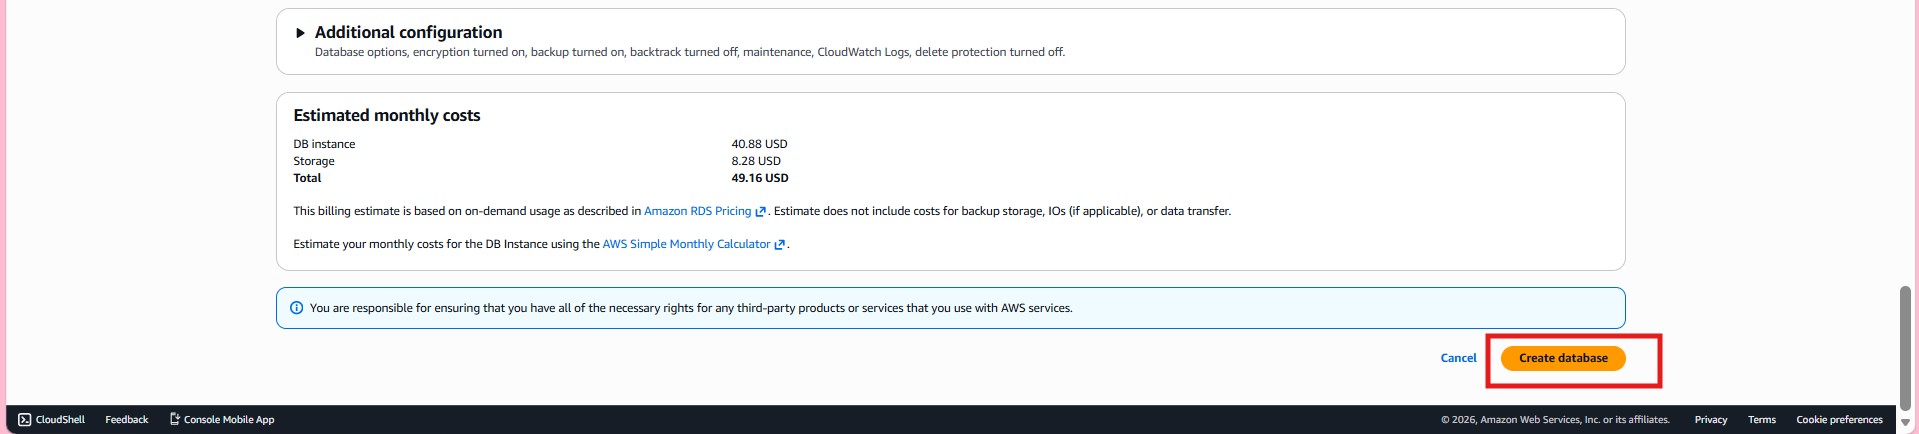
- Review the additional configuration, backup, and maintenance settings, then submit the database request.
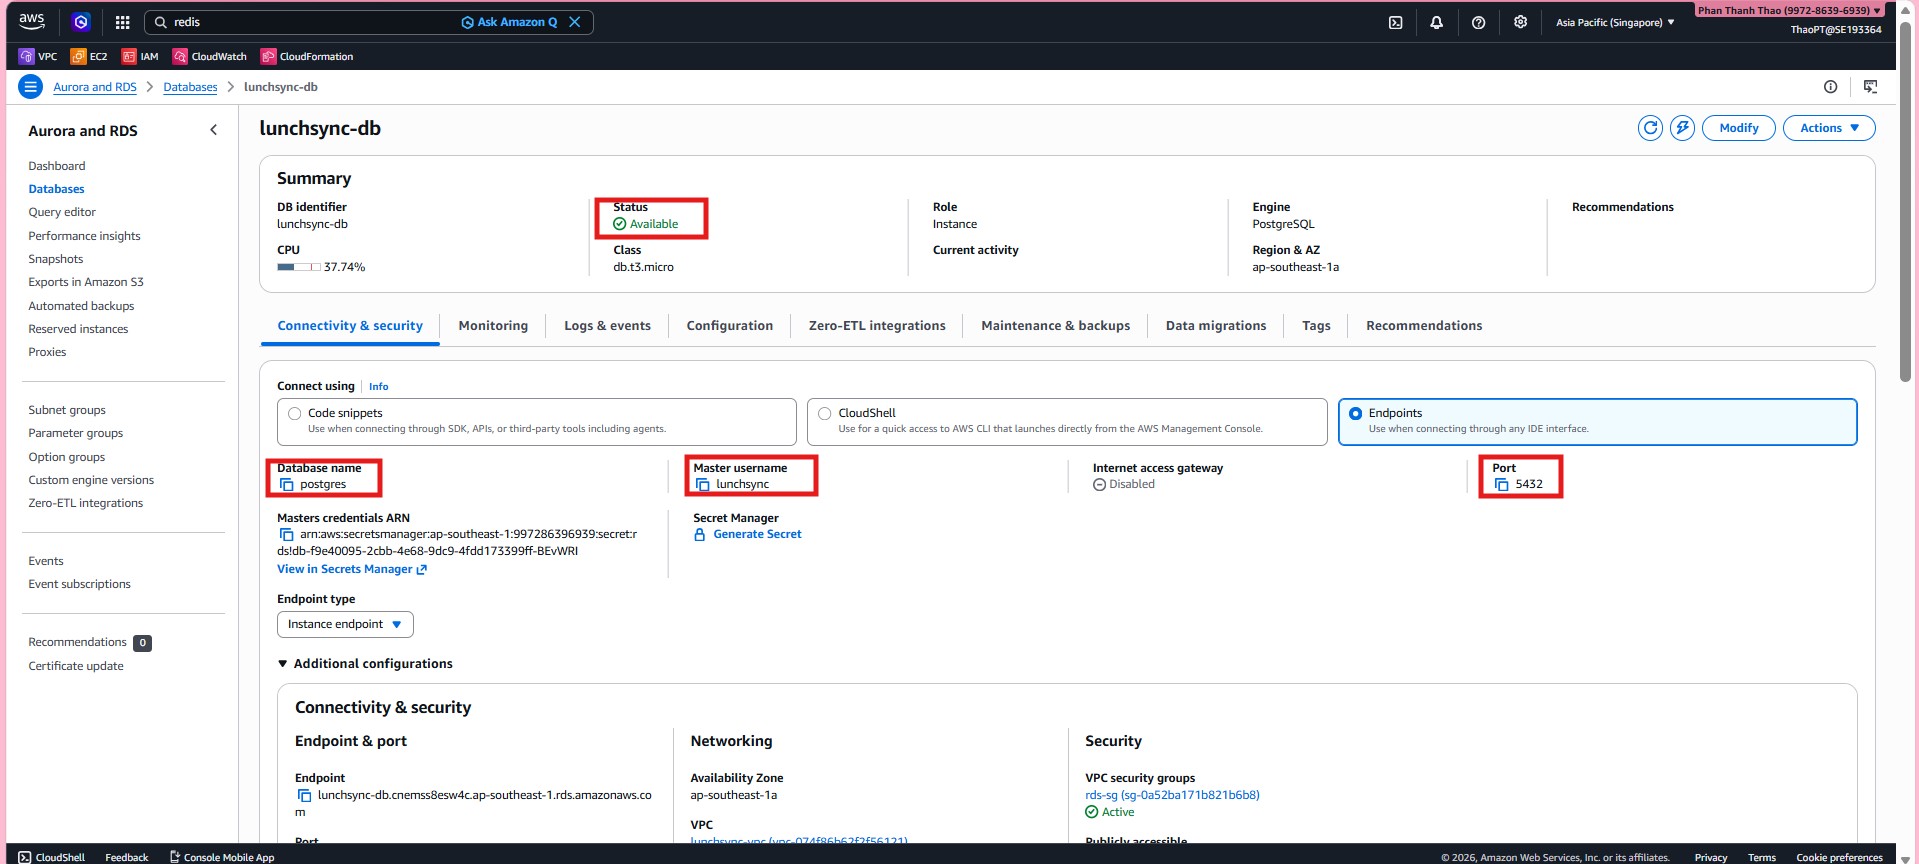
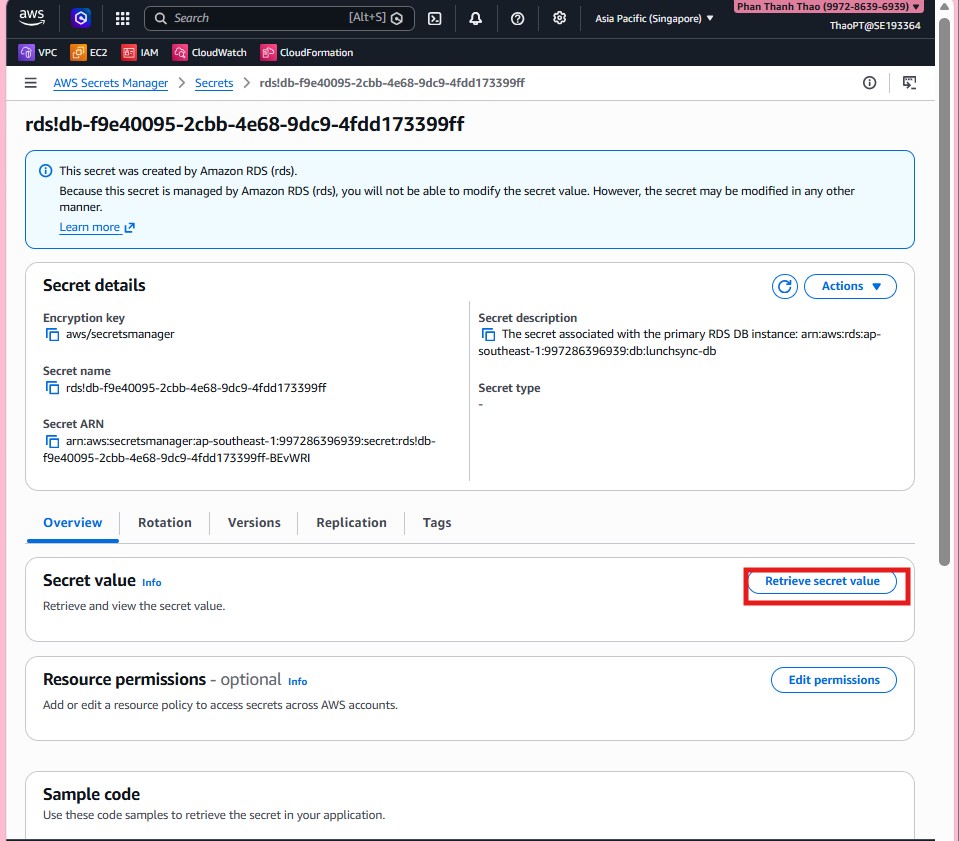
- When
lunchsync-dbreaches Available, record the:5432endpoint, the secret ARN created by RDS, and confirm that the database is not publicly accessible.