S3 and CloudFront
Overview
This section describes the configuration steps for Amazon S3, Origin Access Control (OAC), and CloudFront to serve the static frontend of the system.
Deployment Steps
- Open Amazon S3 and create a new bucket for the LunchSync frontend.
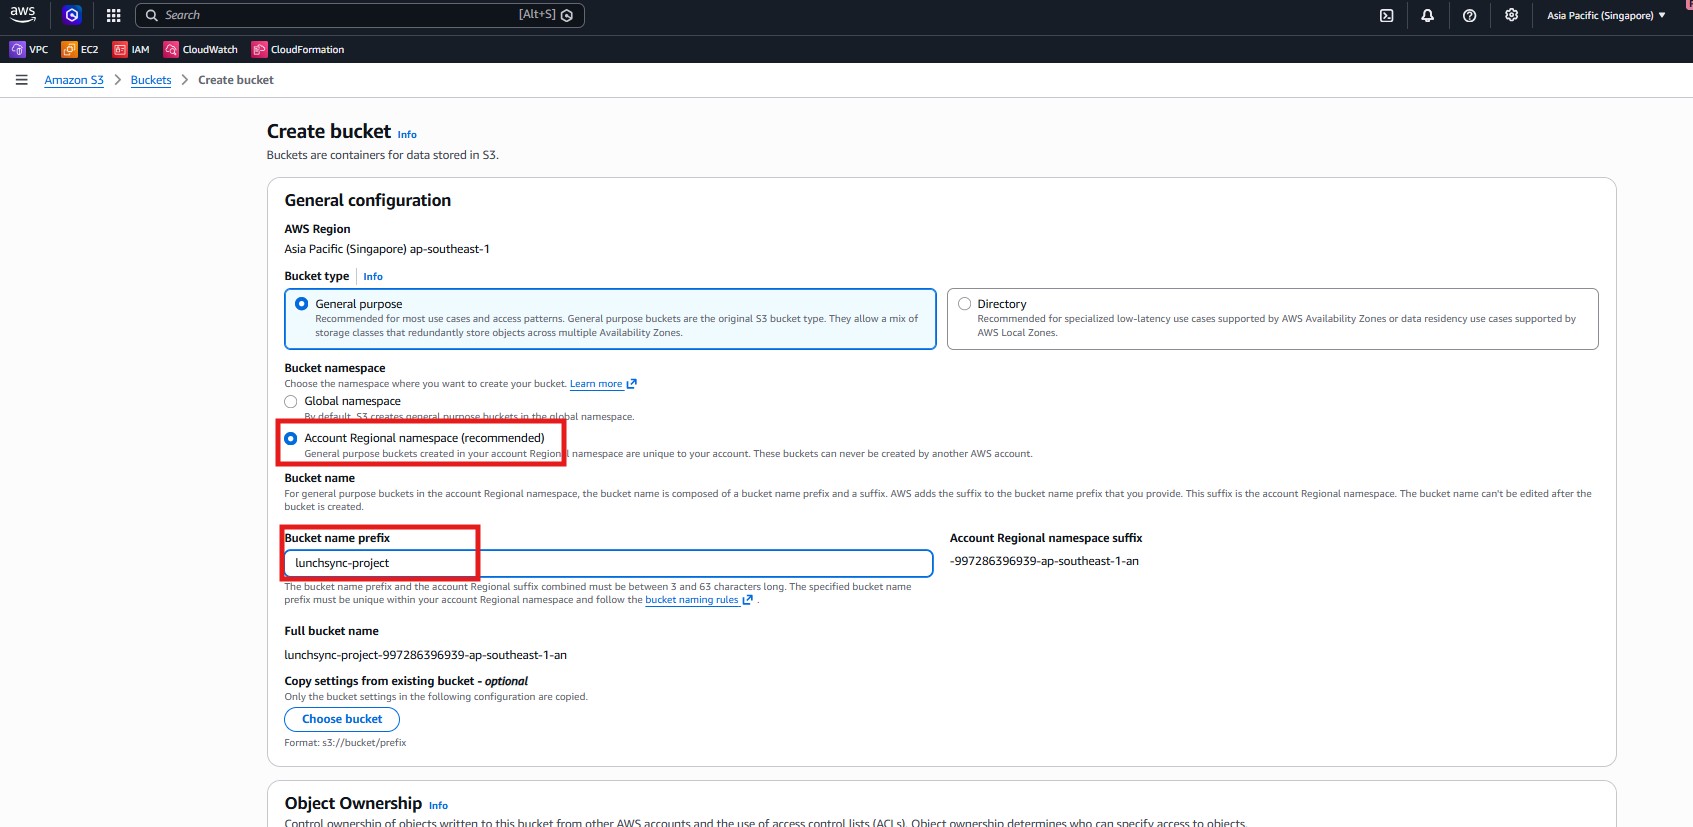
- Set the bucket prefix to
lunchsync-project, choose regionap-southeast-1, allow S3 to generate the full name, and keep the bucket private.
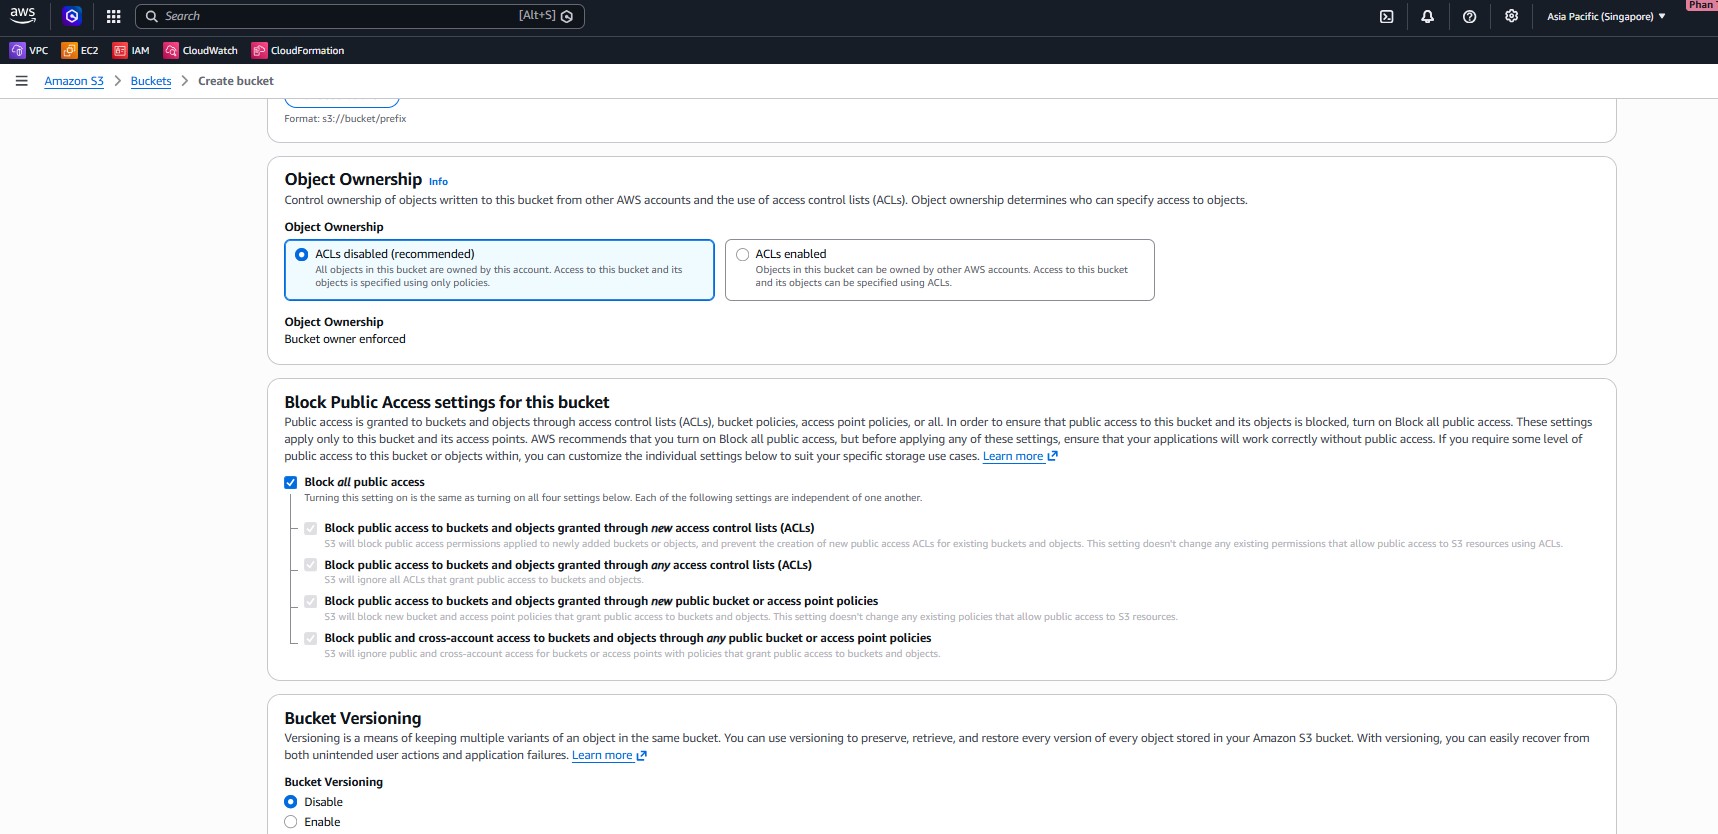
- Keep
ACLs disabled, enable Block all public access, do not enable versioning, and continue with a private bucket.
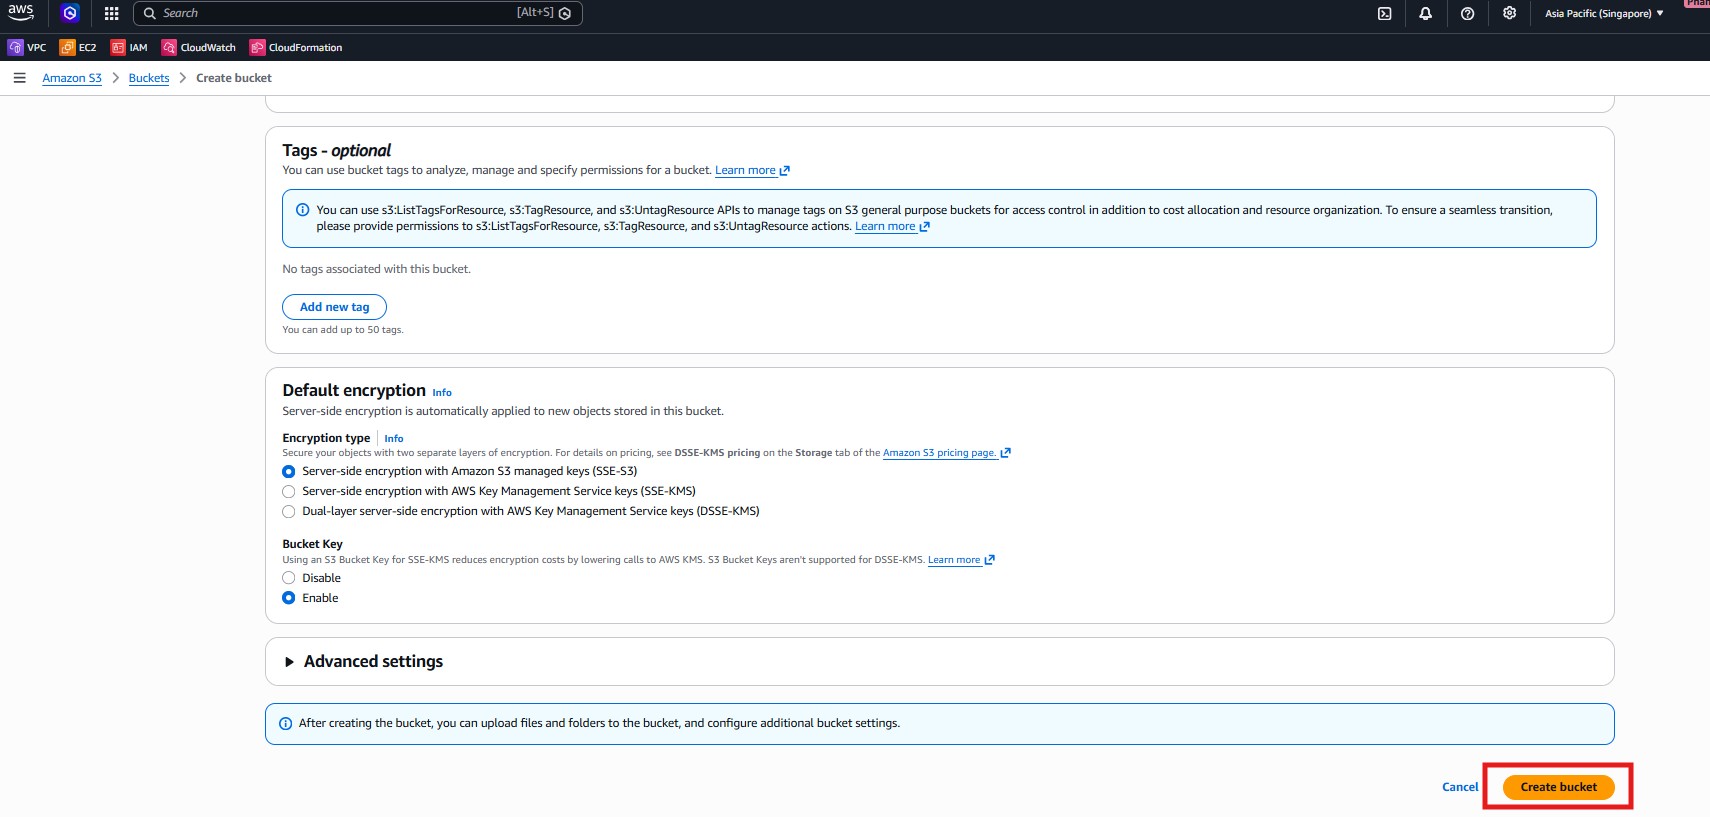
- Use default encryption
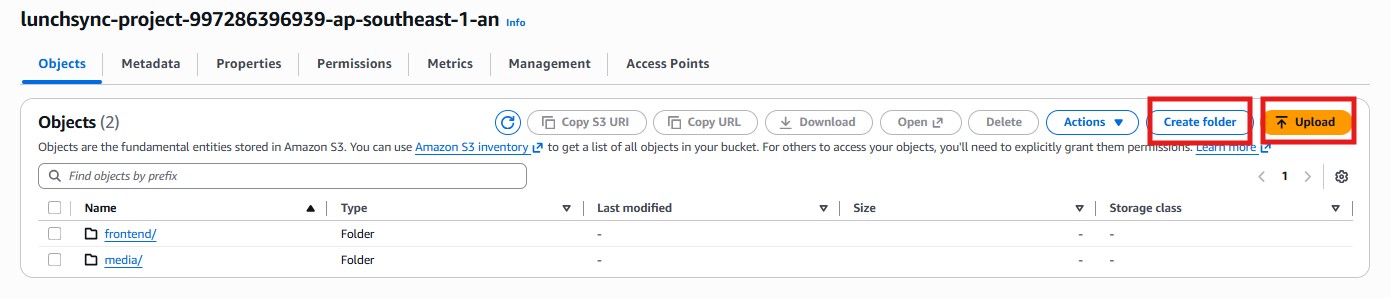
SSE-S3, create the bucket, then upload frontend content into folders such asfrontend/andmedia/.
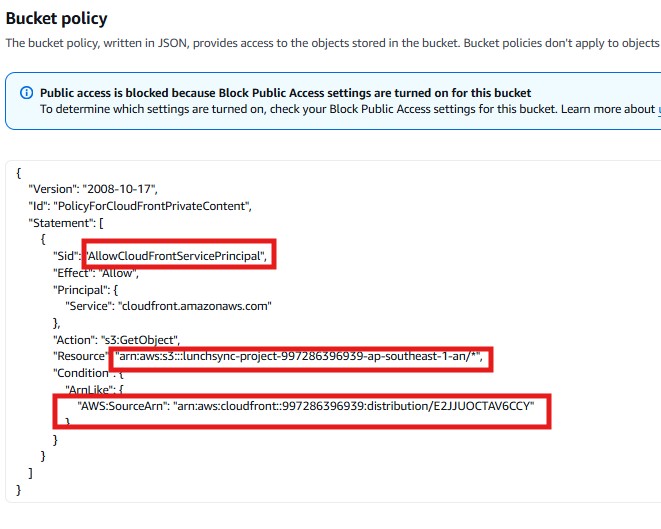
- After attaching the bucket to CloudFront, check the bucket policy to ensure only
cloudfront.amazonaws.comfrom your distribution can read objects.
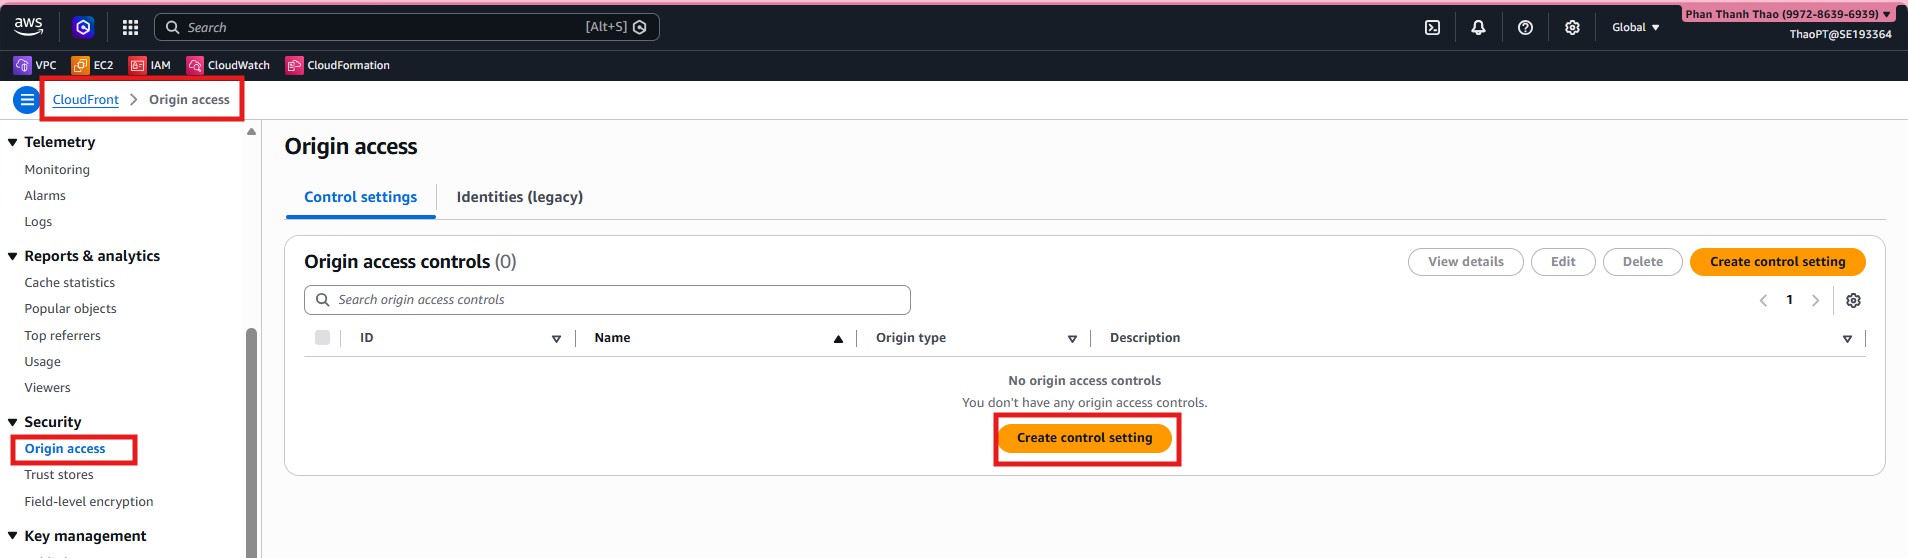
- Go to CloudFront > Origin access and create a new Origin Access Control (OAC) for the S3 bucket.
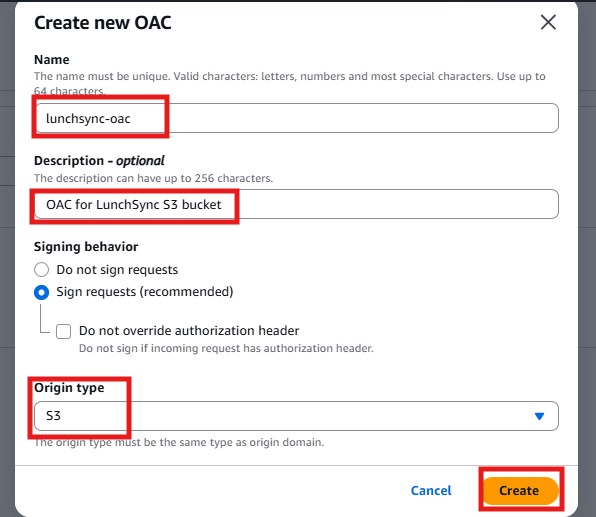
- Name the OAC
lunchsync-oac, add a clear description, and keep Sign requests enabled.
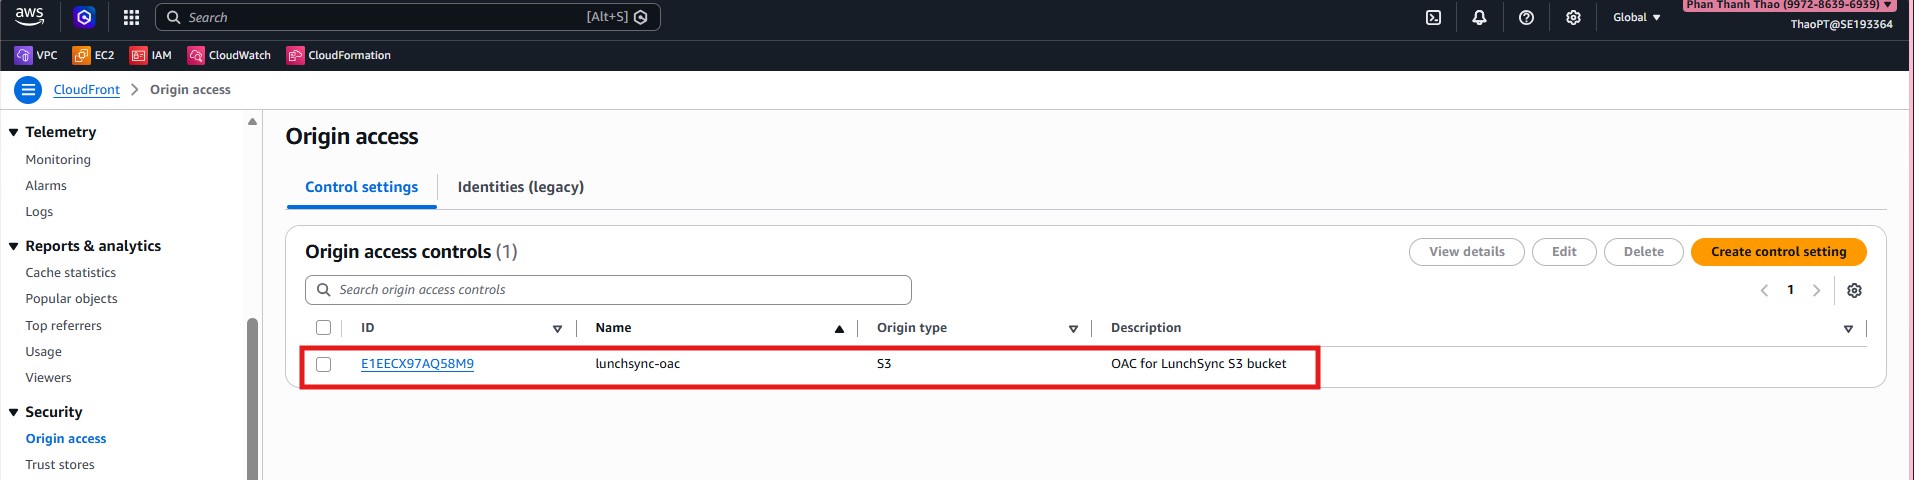
- Verify that
lunchsync-oachas been created successfully before proceeding.
- Go to CloudFront > Distributions and start creating a new distribution.
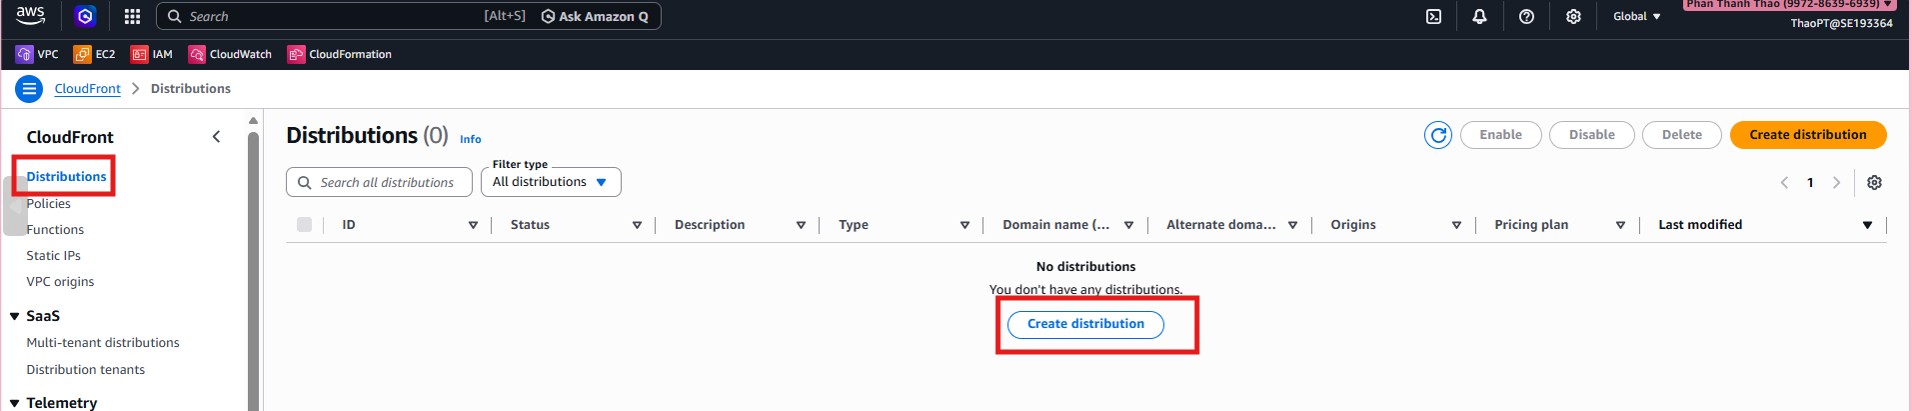
- Choose the distribution setup plan and continue the wizard.
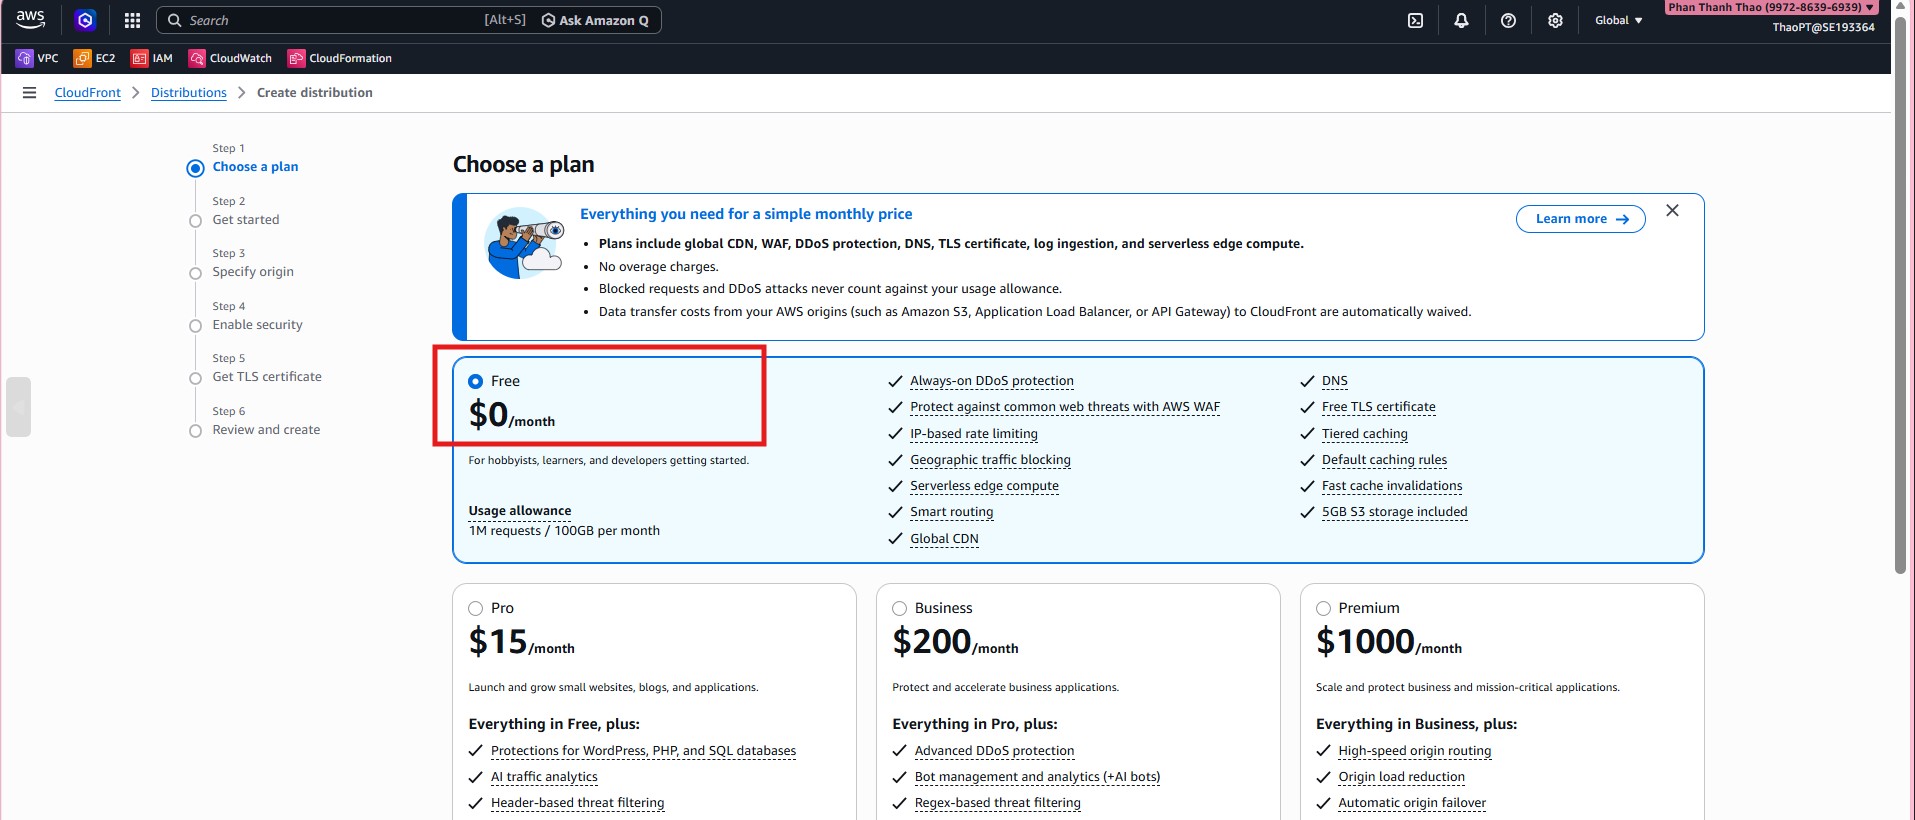
- Name the distribution
S3-Frontend, select Single website or app, and skip Route 53 domain setup in the initial wizard.

- In Specify origin, choose Amazon S3 as the origin type.
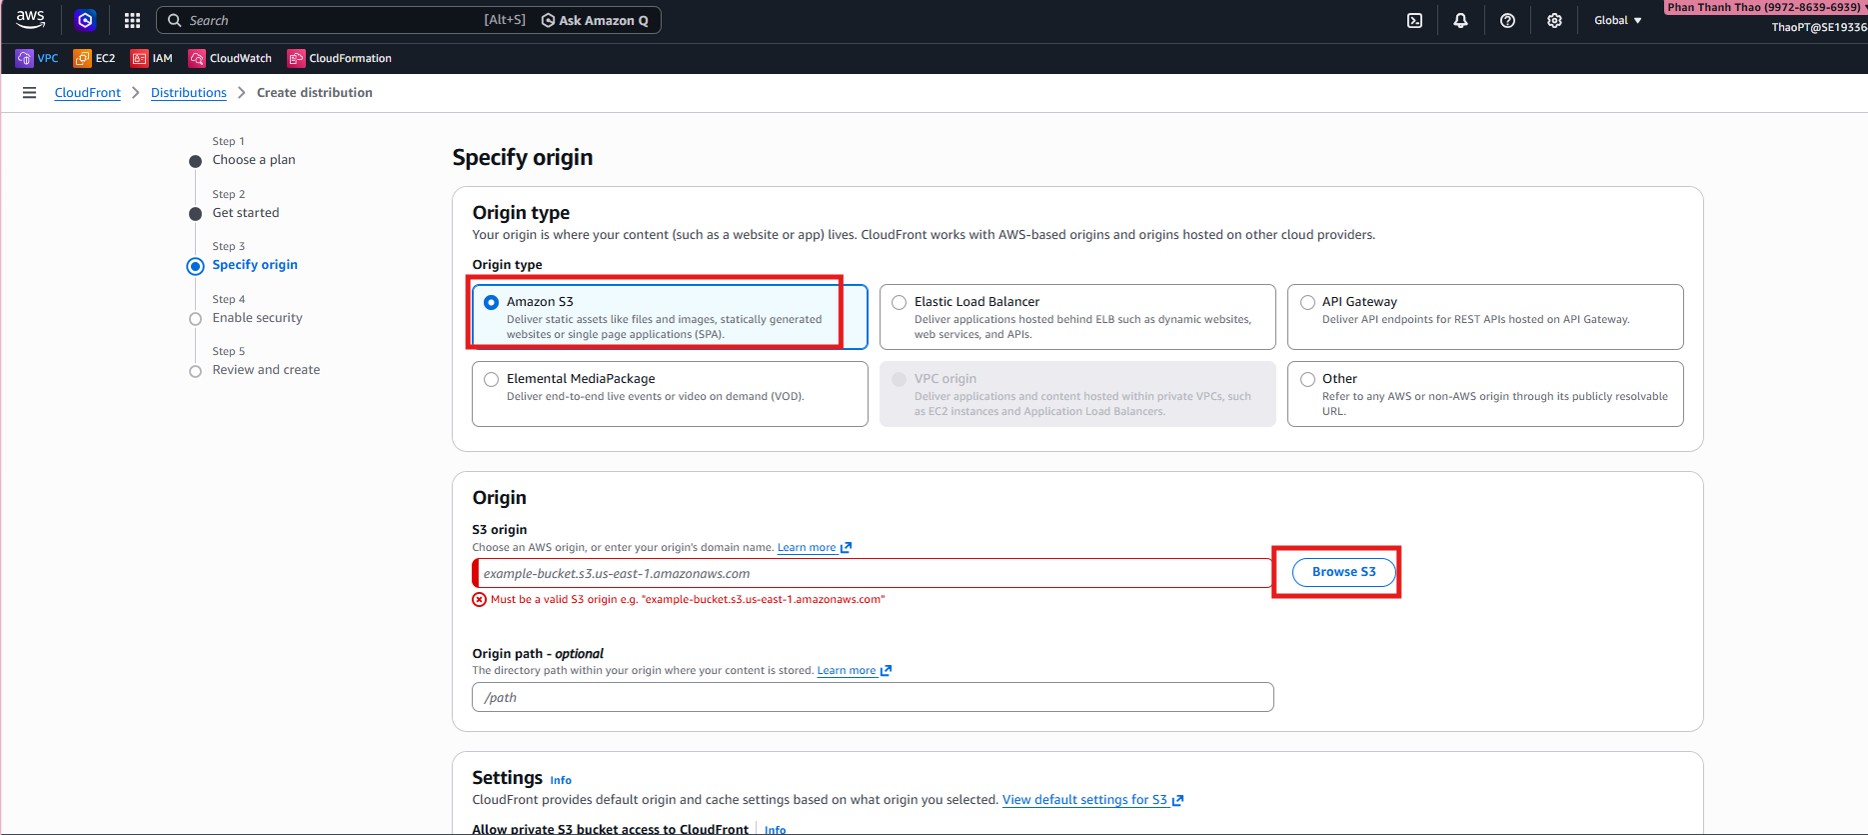
- Select the project S3 bucket as origin, set Origin path = /frontend, and allow CloudFront to access the private bucket.
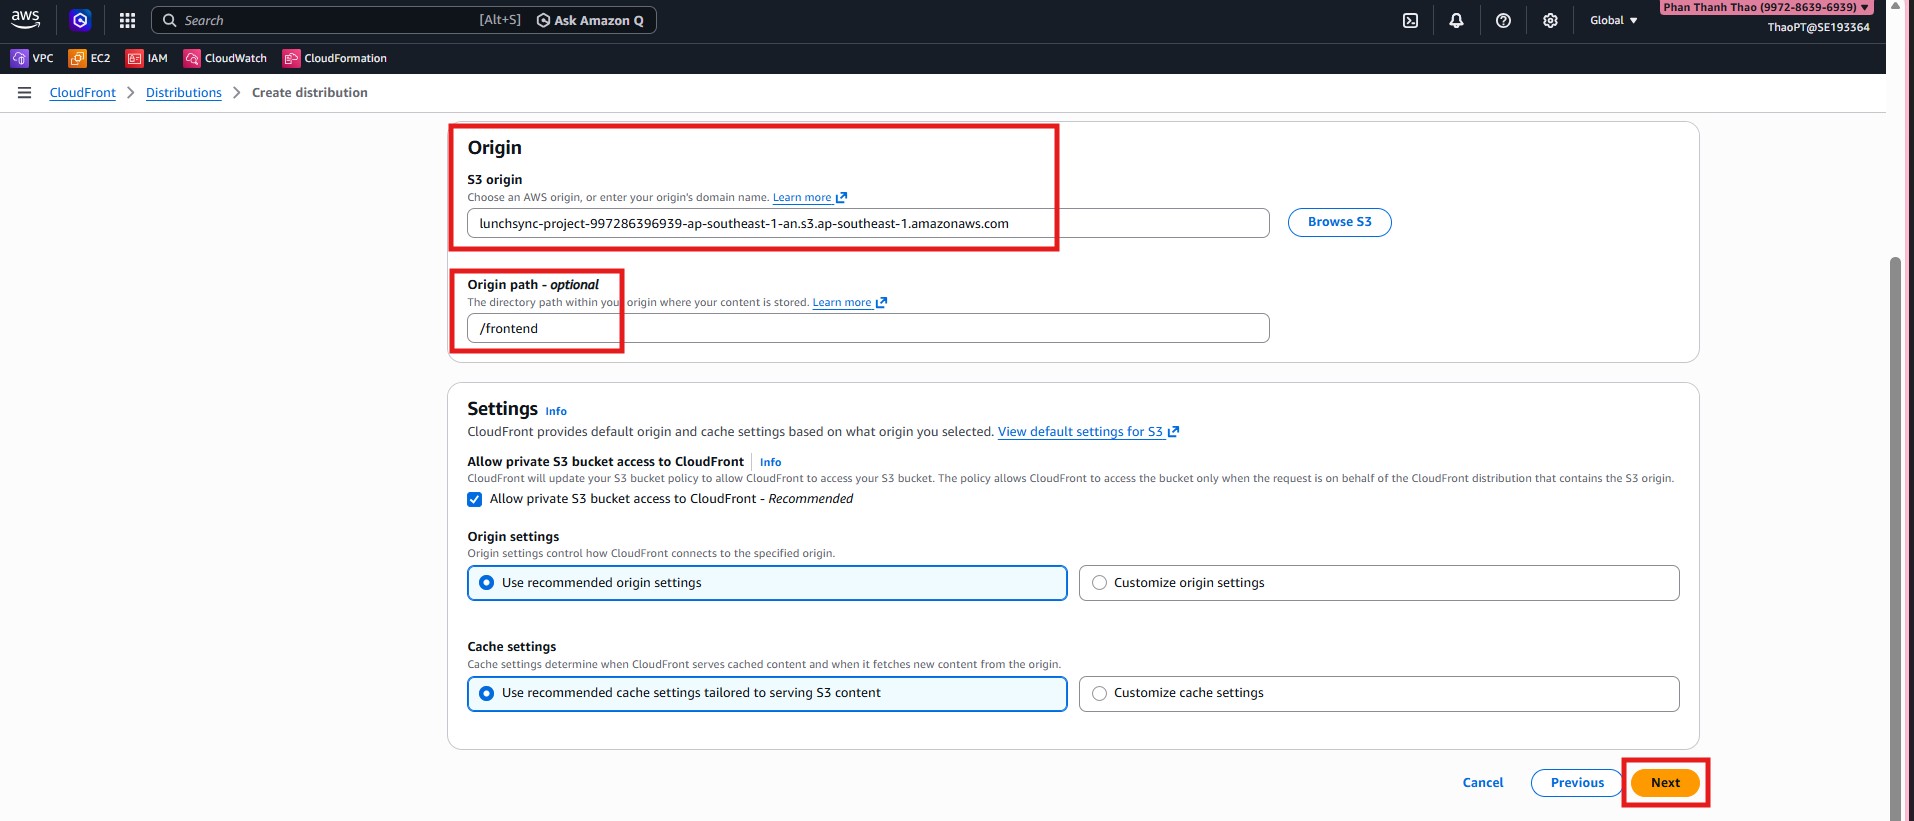
- Keep AWS recommended origin and cache settings for static S3 content.
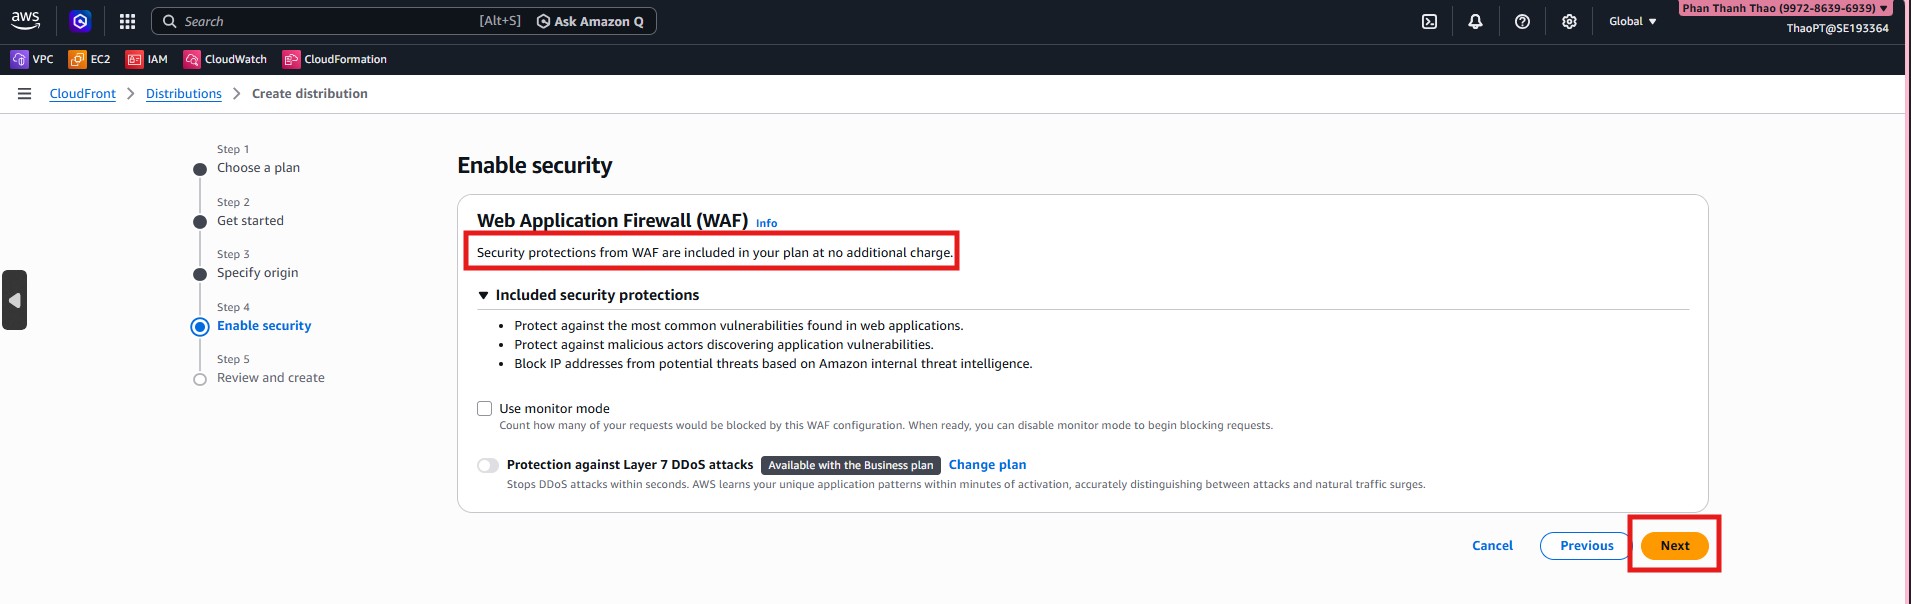
- In Enable security, keep default CloudFront/WAF protections.
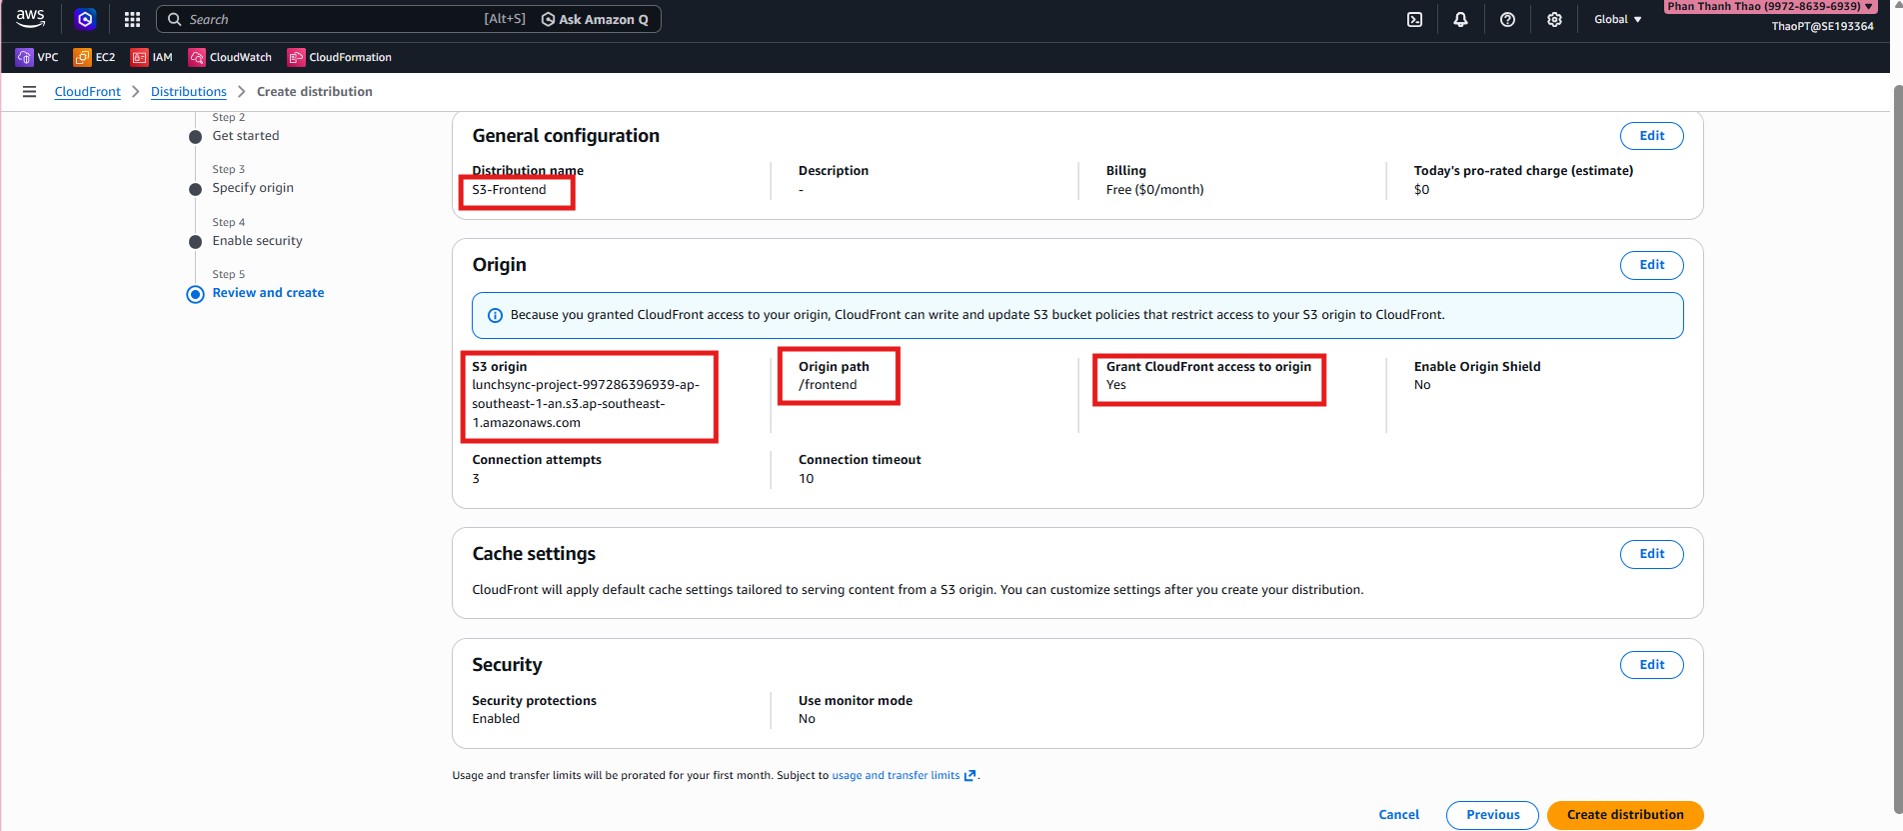
- Review configuration: S3 origin,
Origin path = /frontend, then create the distribution.

- After creation, open Origins tab to verify correct origin path and OAC.
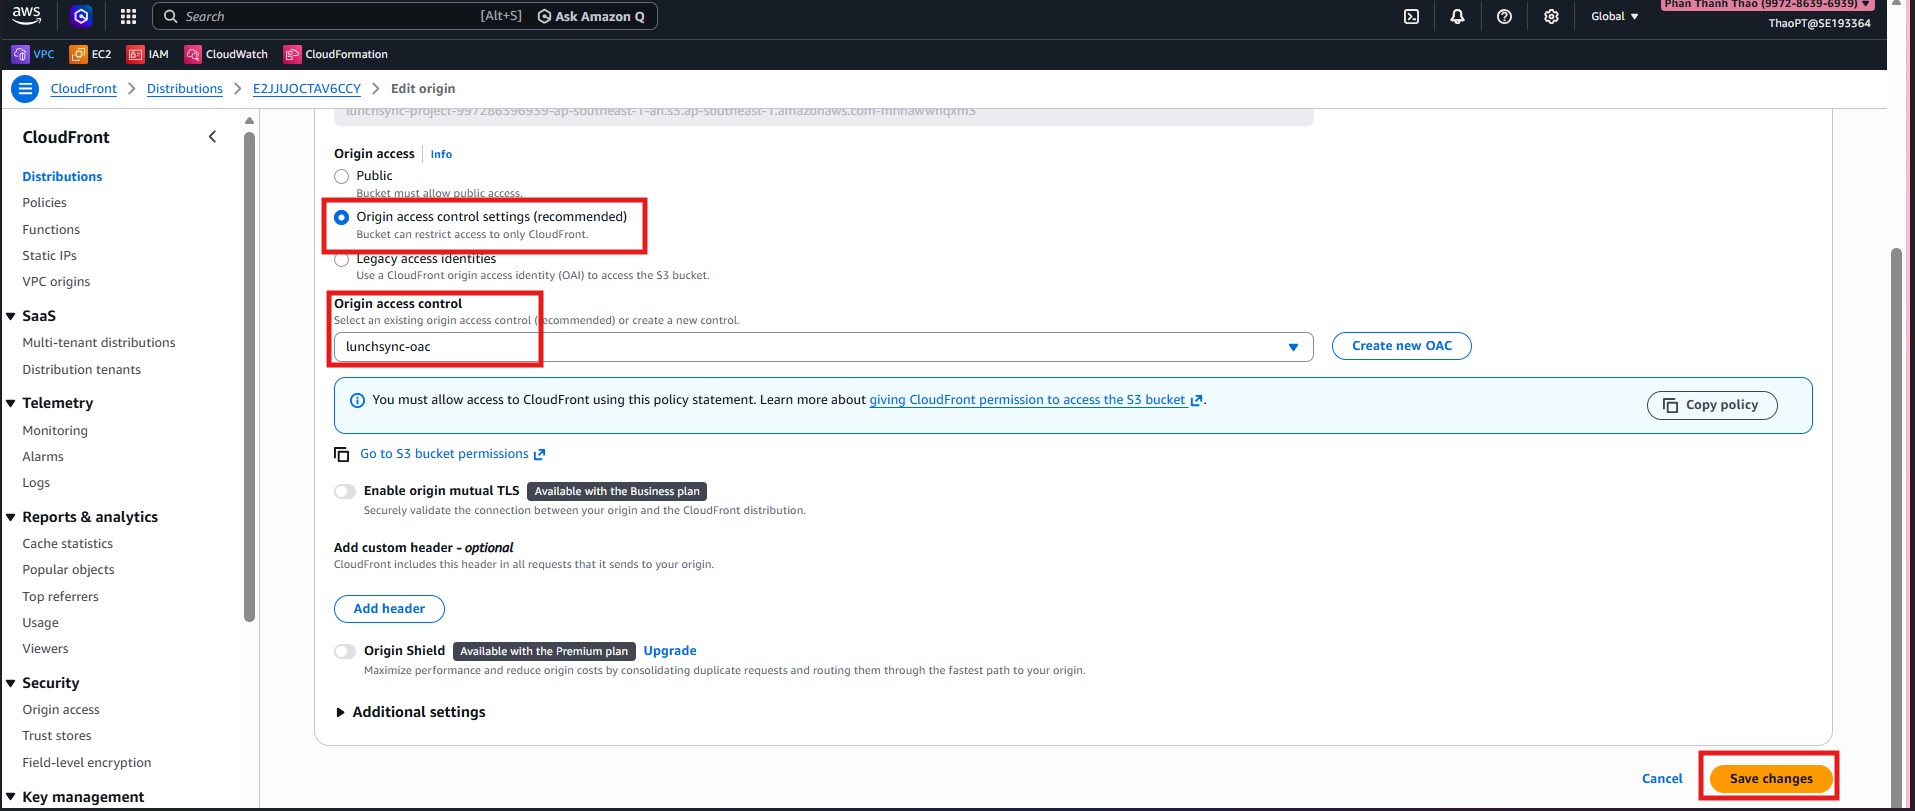
- If needed, edit origin to attach
lunchsync-oacand copy the generated policy into the S3 bucket policy.
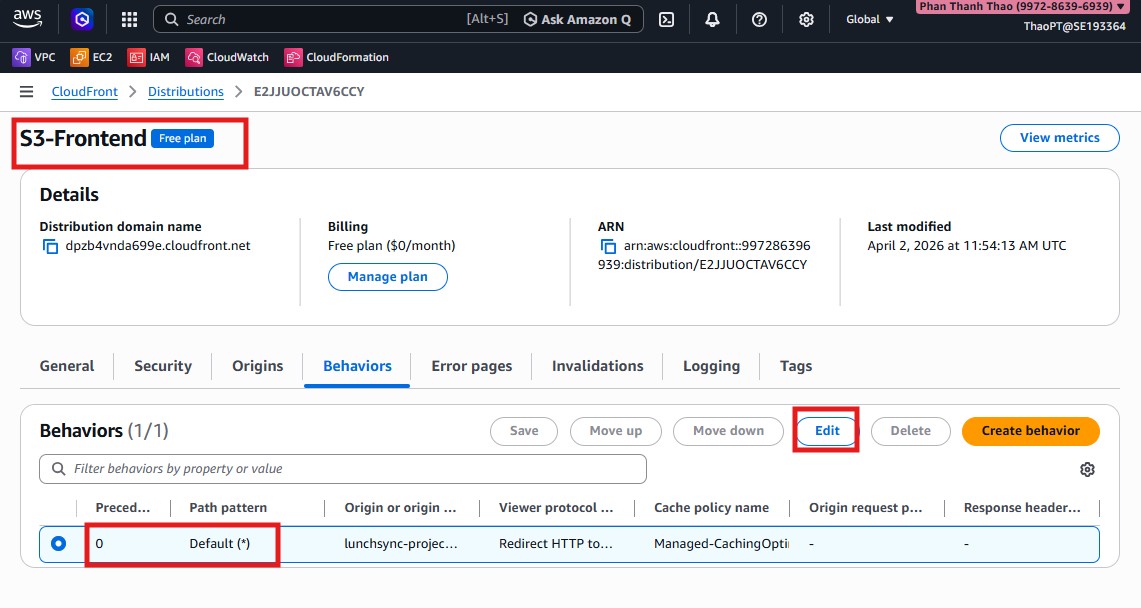
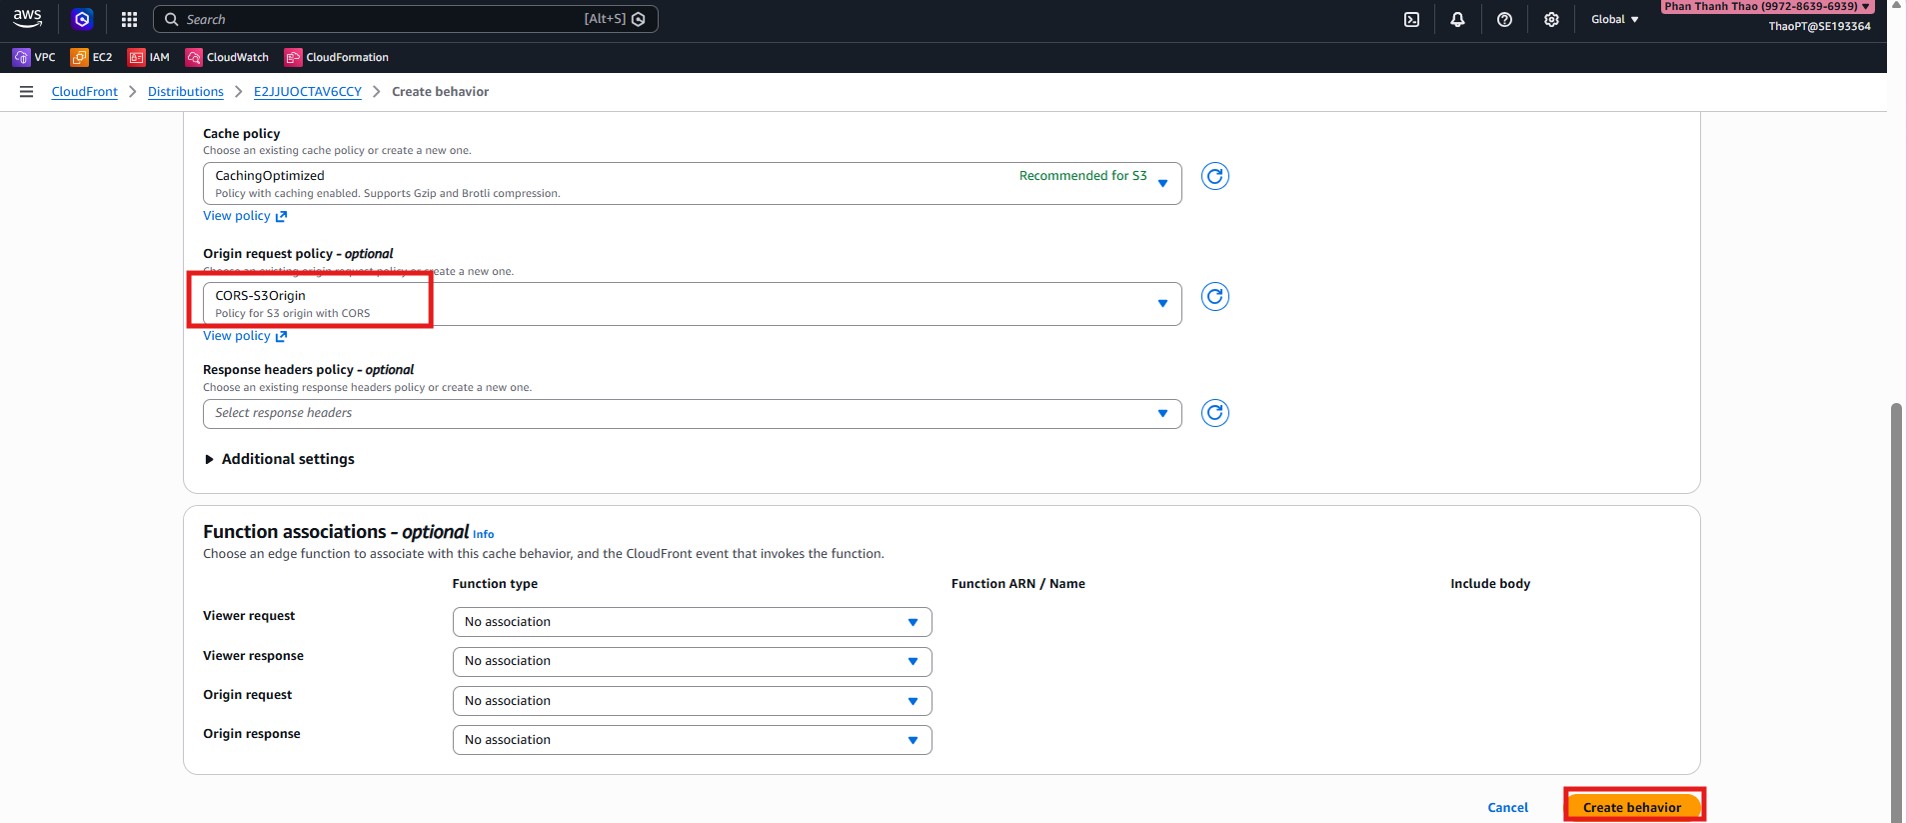
- Open Behaviors tab to configure default behavior.
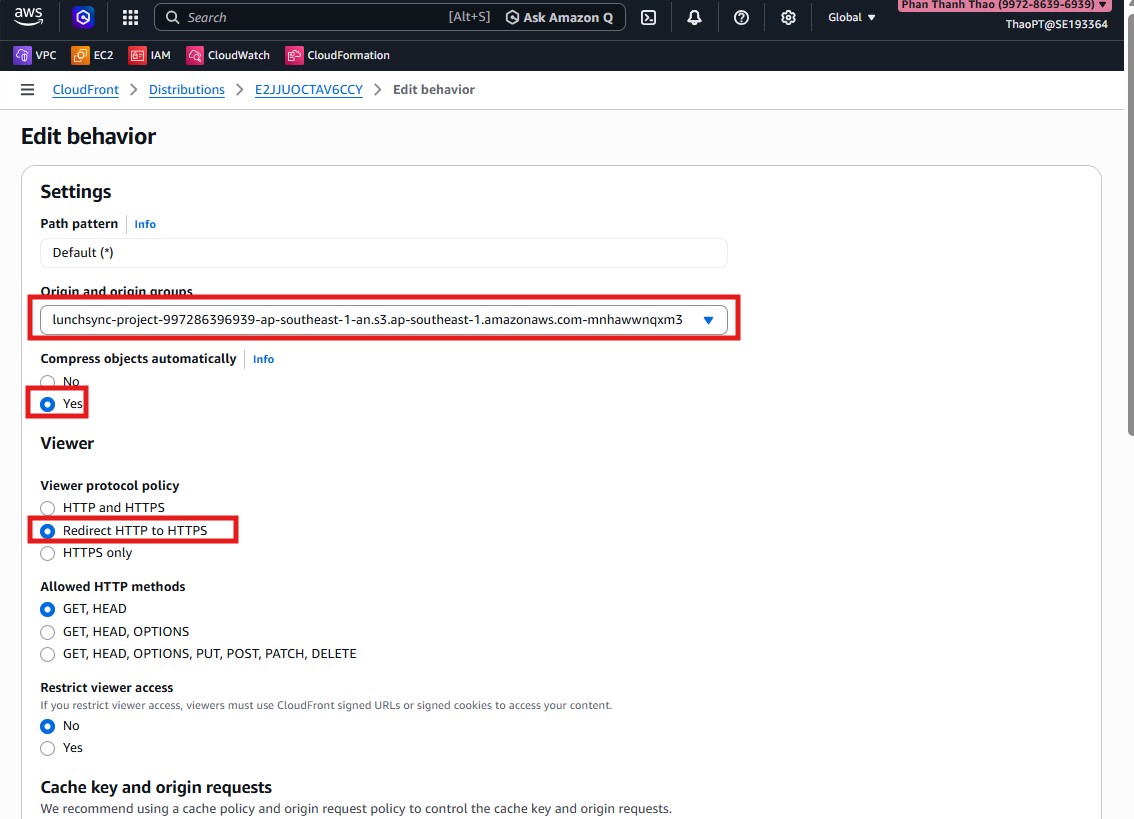
- Set Viewer protocol policy = Redirect HTTP to HTTPS.
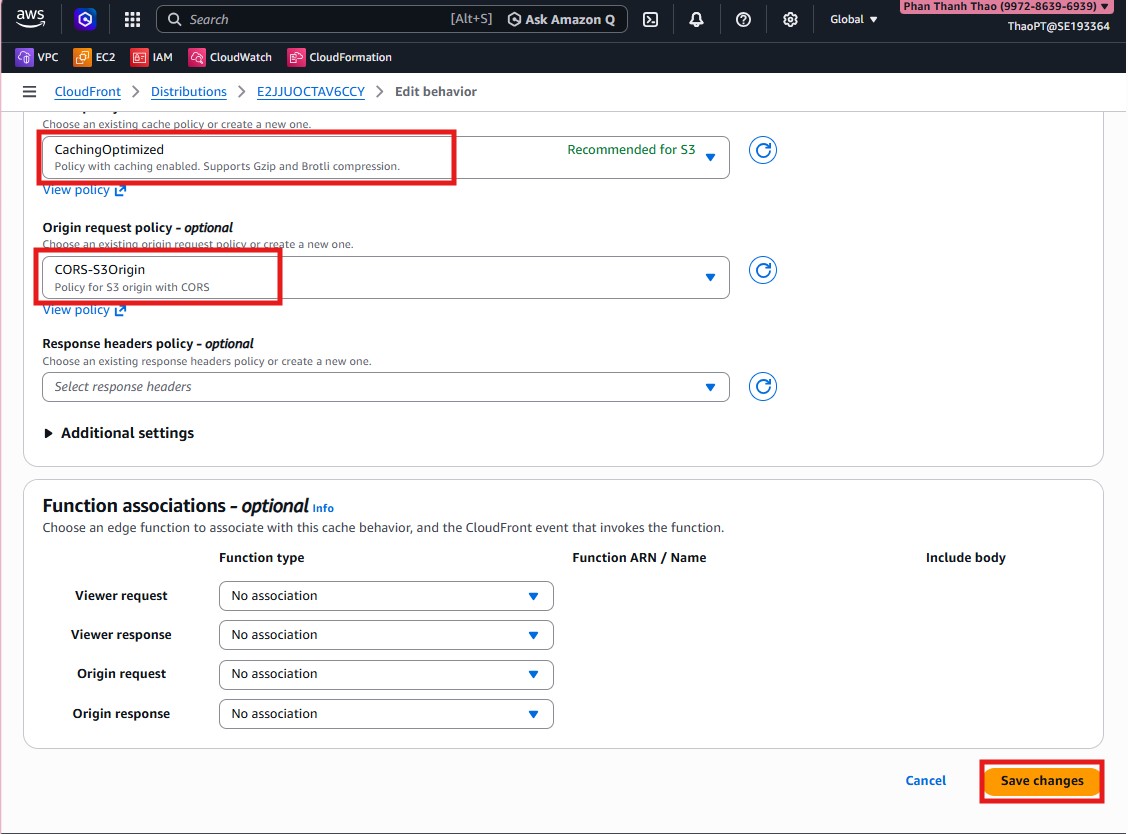
- Keep cache policy
CachingOptimizedand origin request policyCORS-S3Origin.
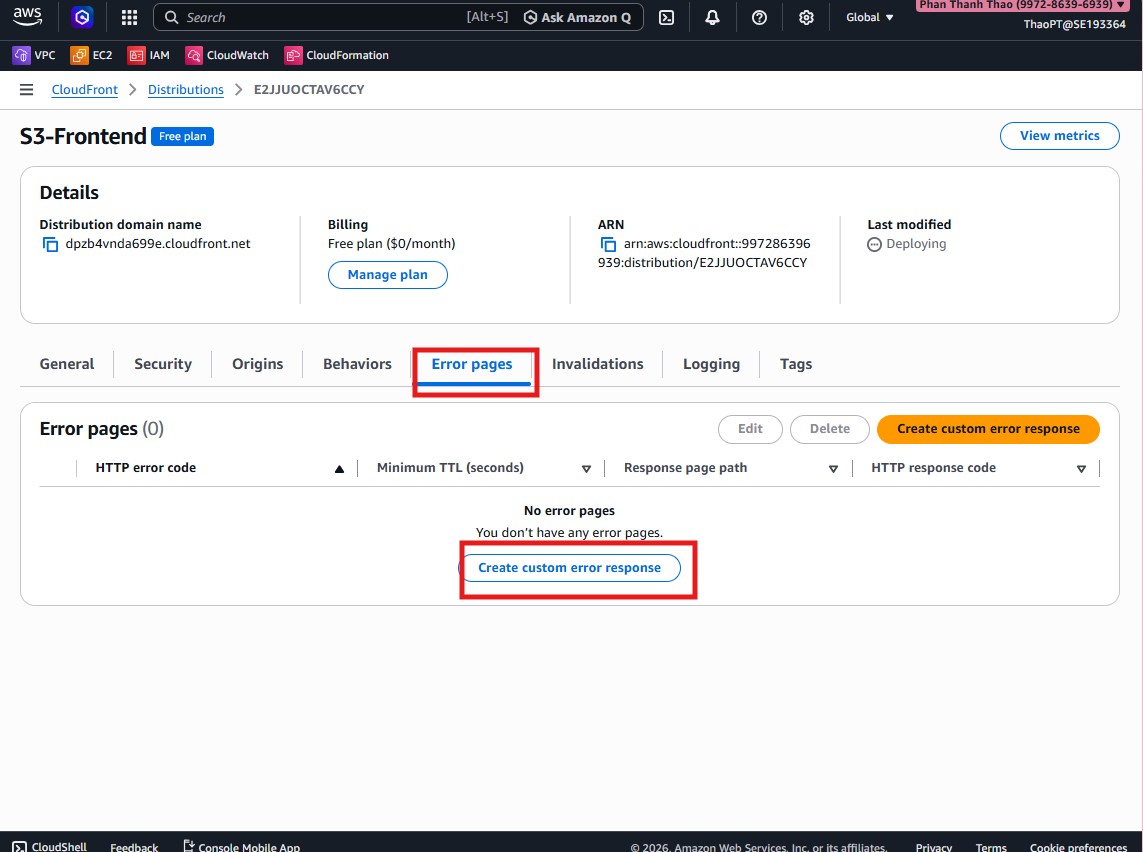
- Open Error pages and configure custom error response for SPA.
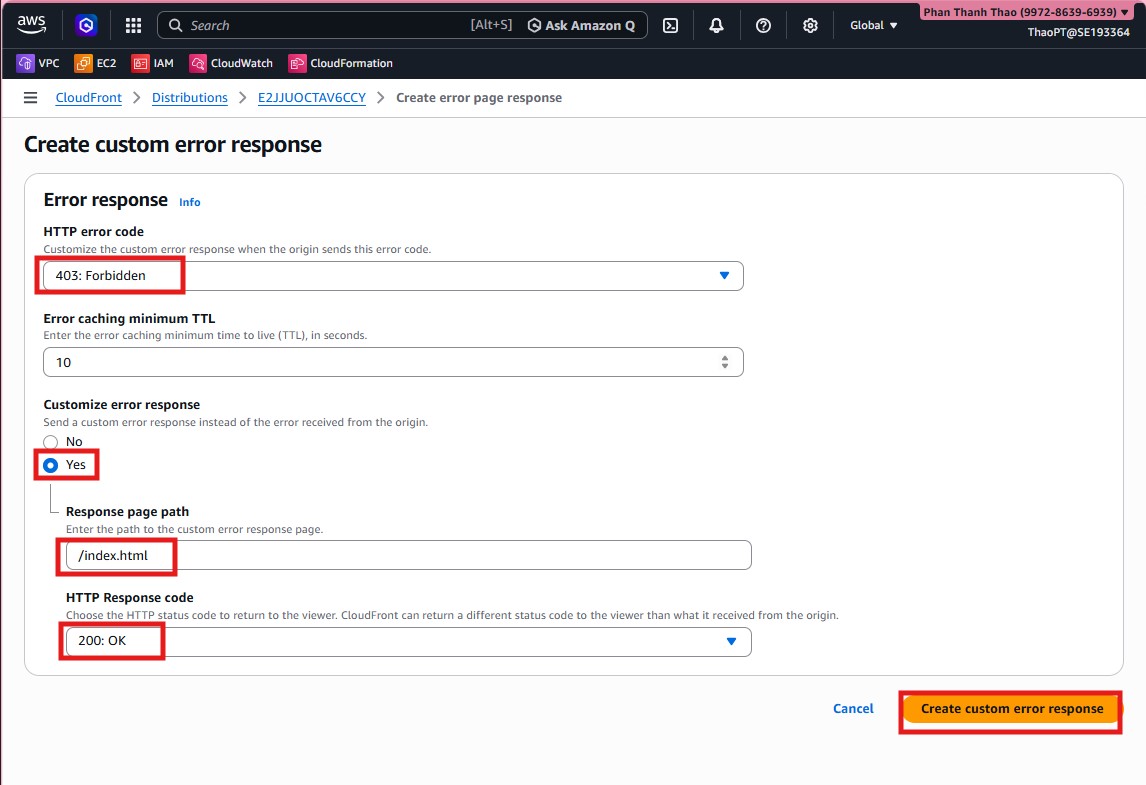
- Create a rule: when origin returns
403, respond with/index.htmland status200.

- Verify SPA fallback rule is saved.

- Go back to Origins and create a second origin for the backend ALB.
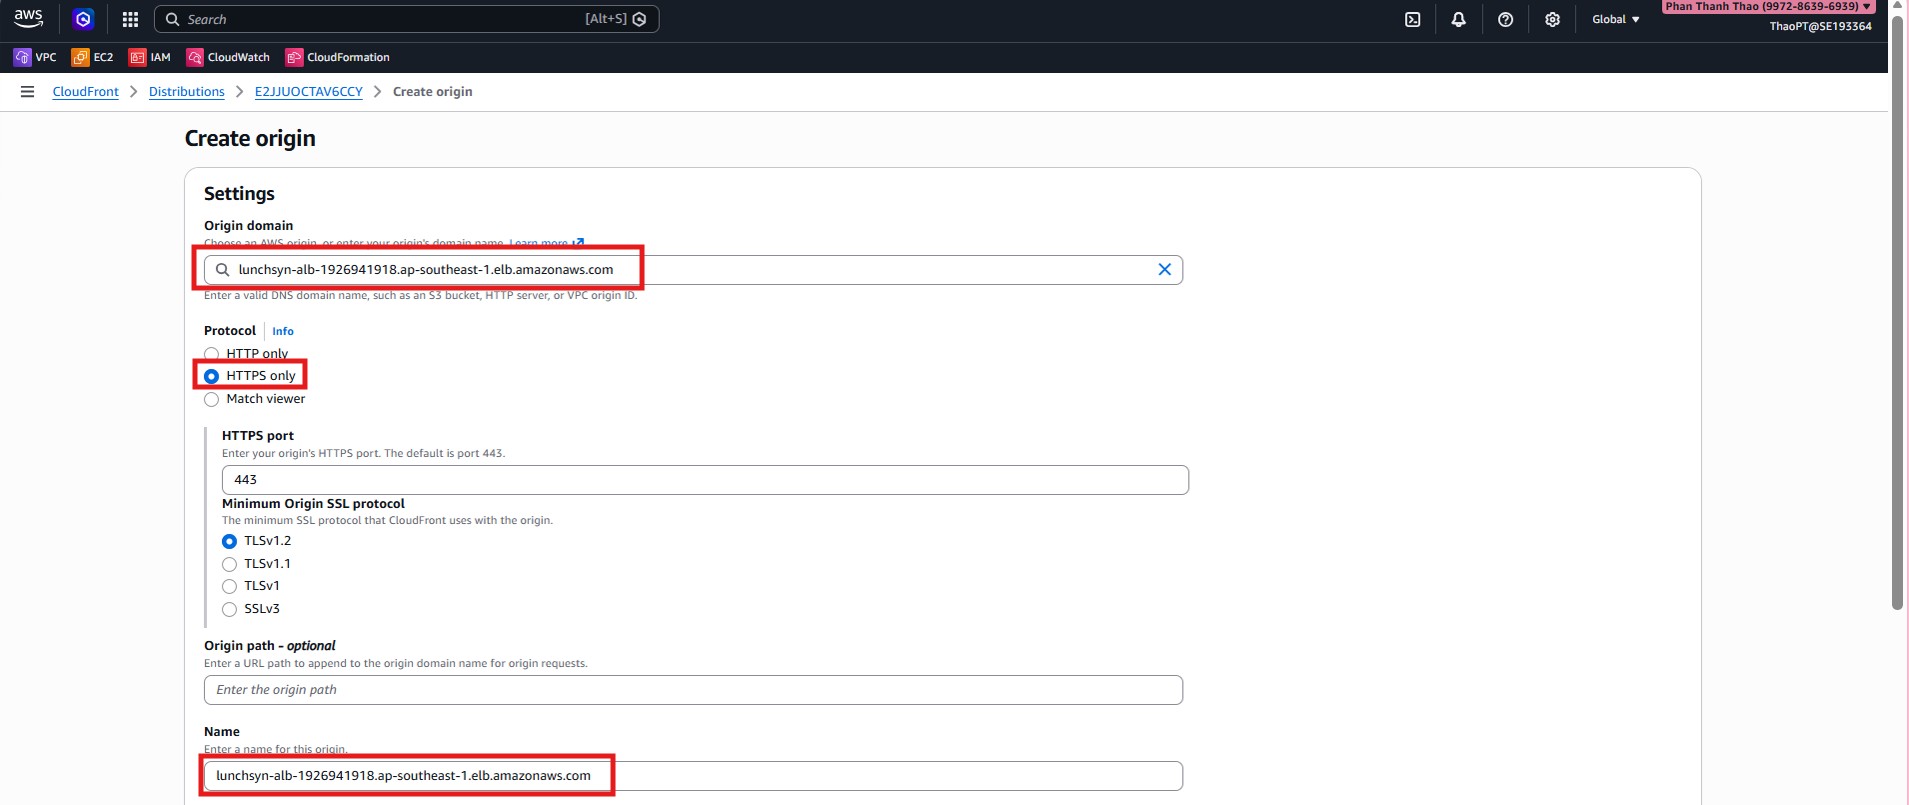
- Enter ALB DNS name, use HTTPS only for origin communication.
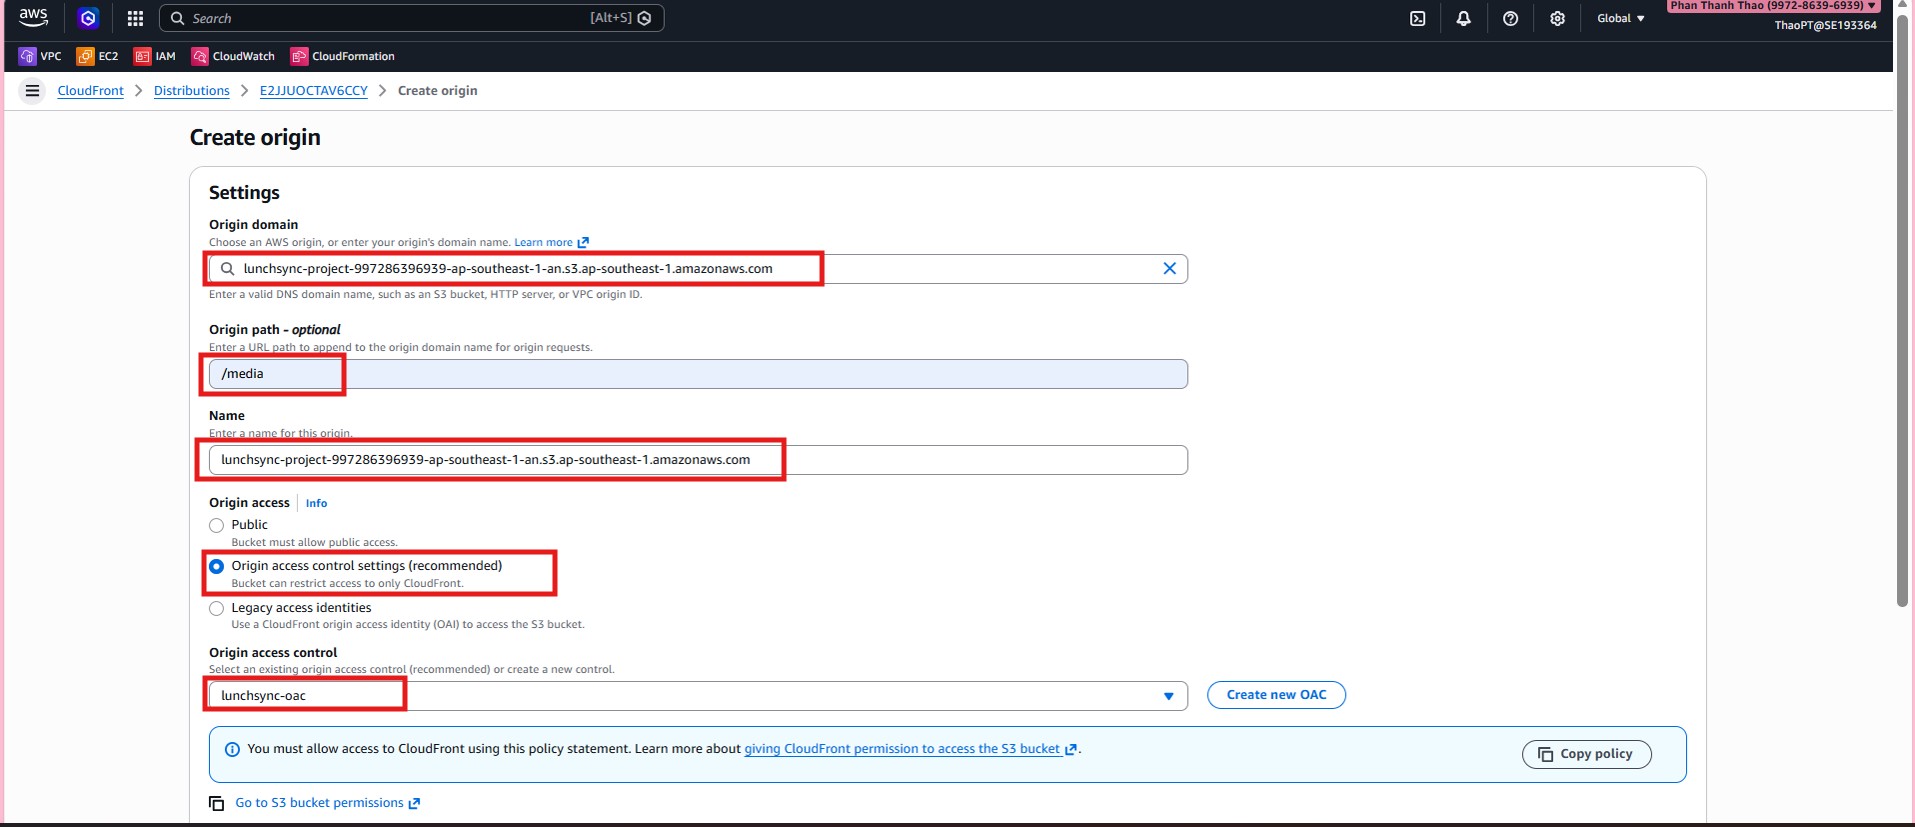
- Create a third origin for media using the same S3 bucket with Origin path = /media and attach OAC.
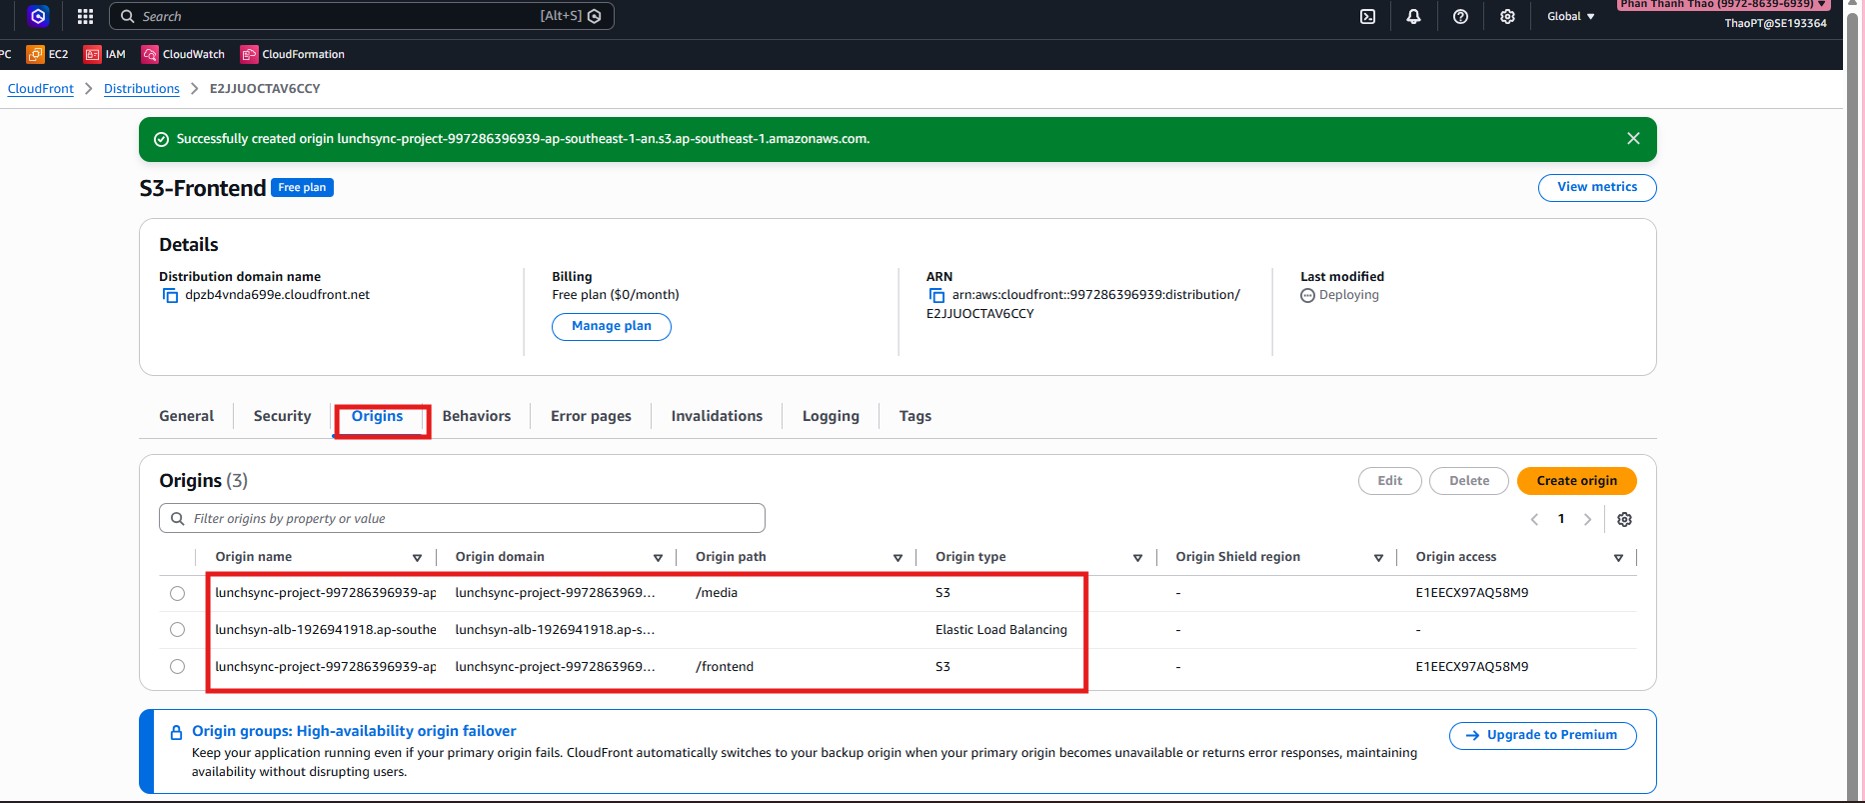
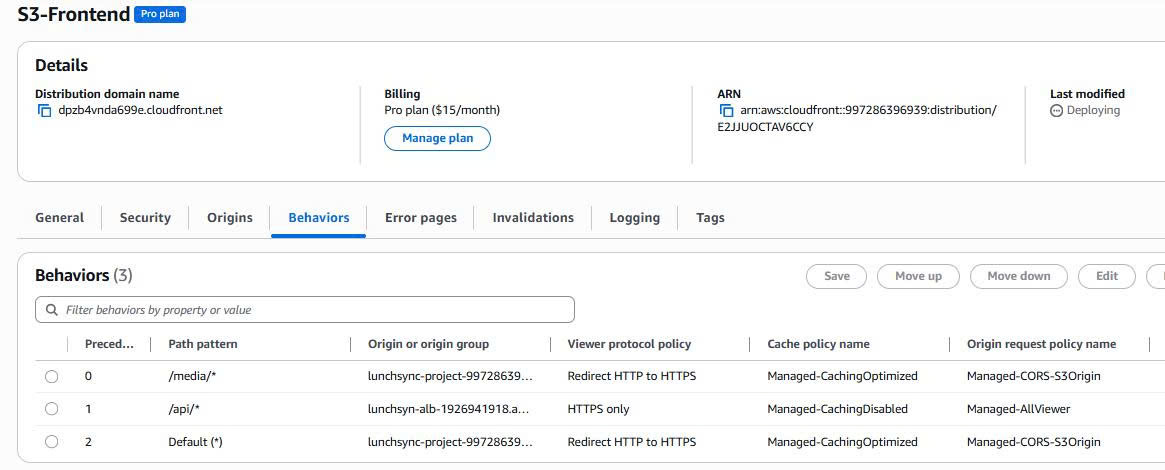
- Verify there are now 3 origins:
frontend,ALB backend, andmedia.
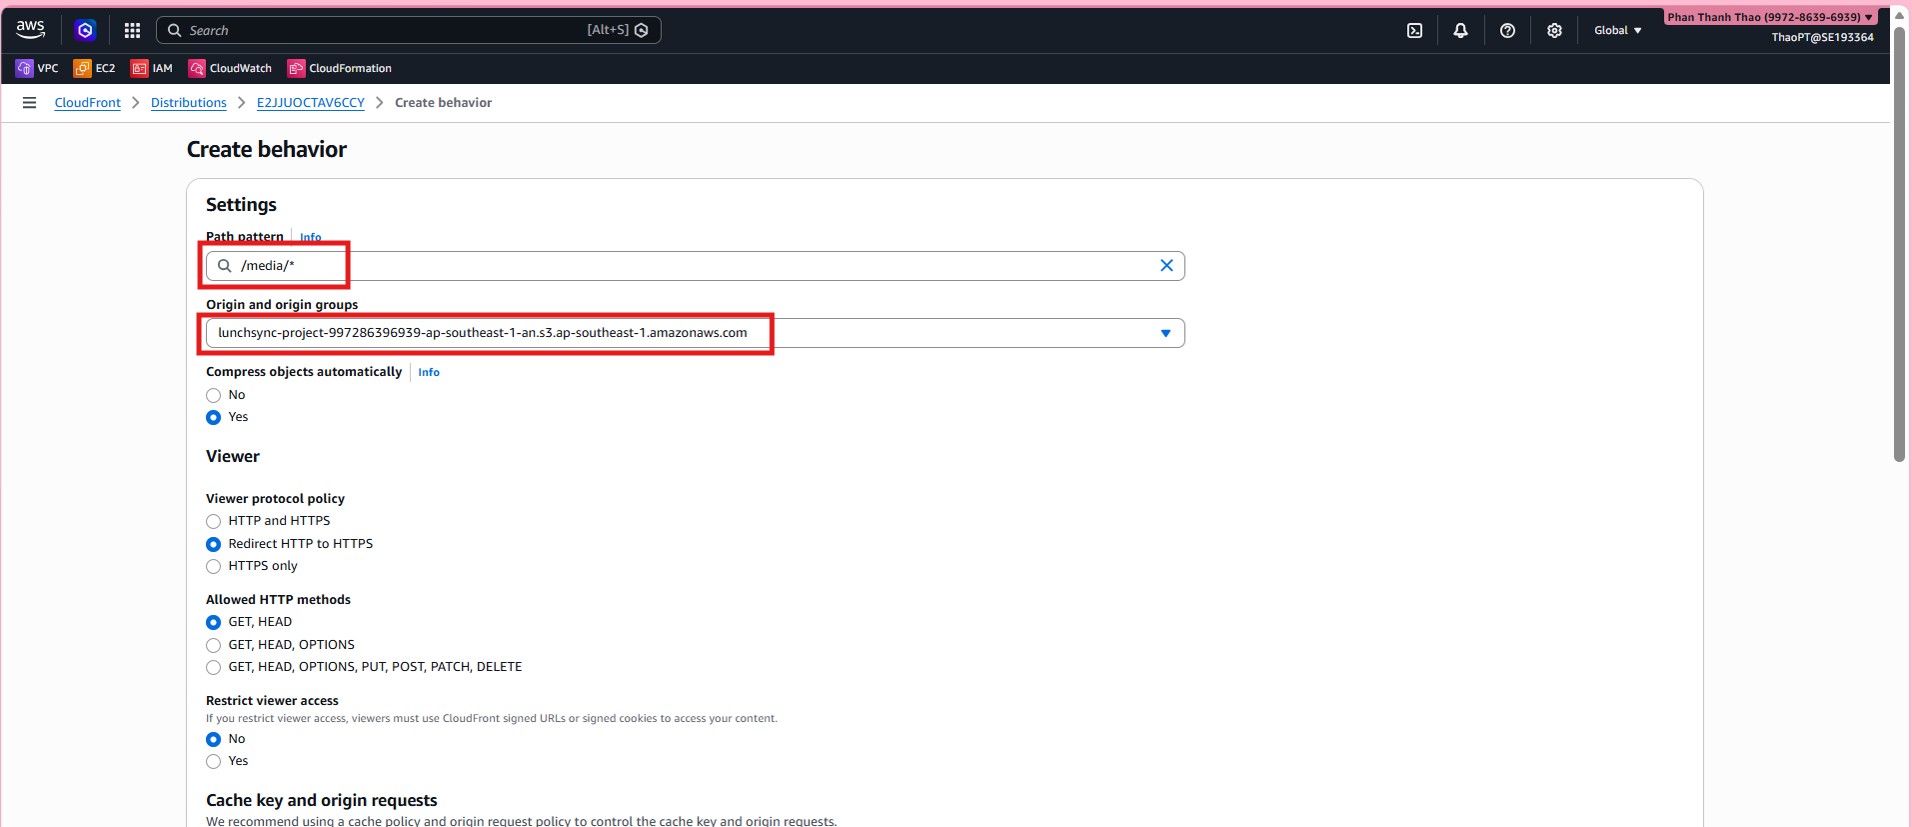
- Create behavior for
media/*, route to media origin, enforce HTTPS.
Create behavior for
api/*, route to ALB, set HTTPS only, disable caching, useAllViewerpolicy.Verify final behavior list.
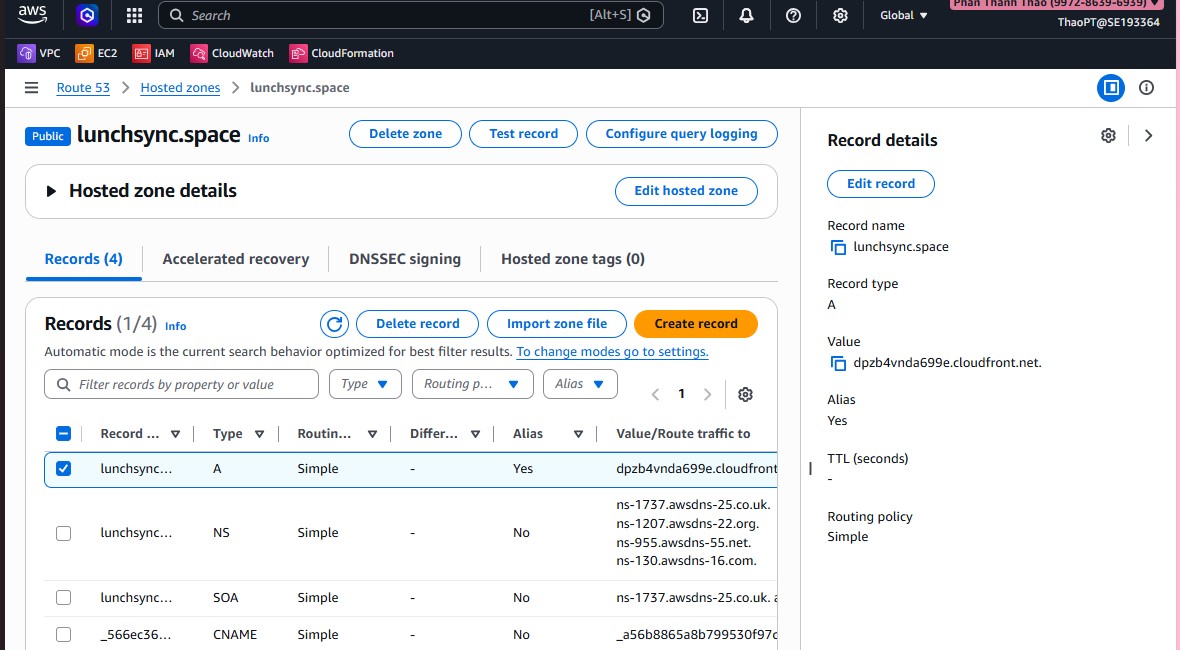
- Go to Route 53, open hosted zone
lunchsync.space.
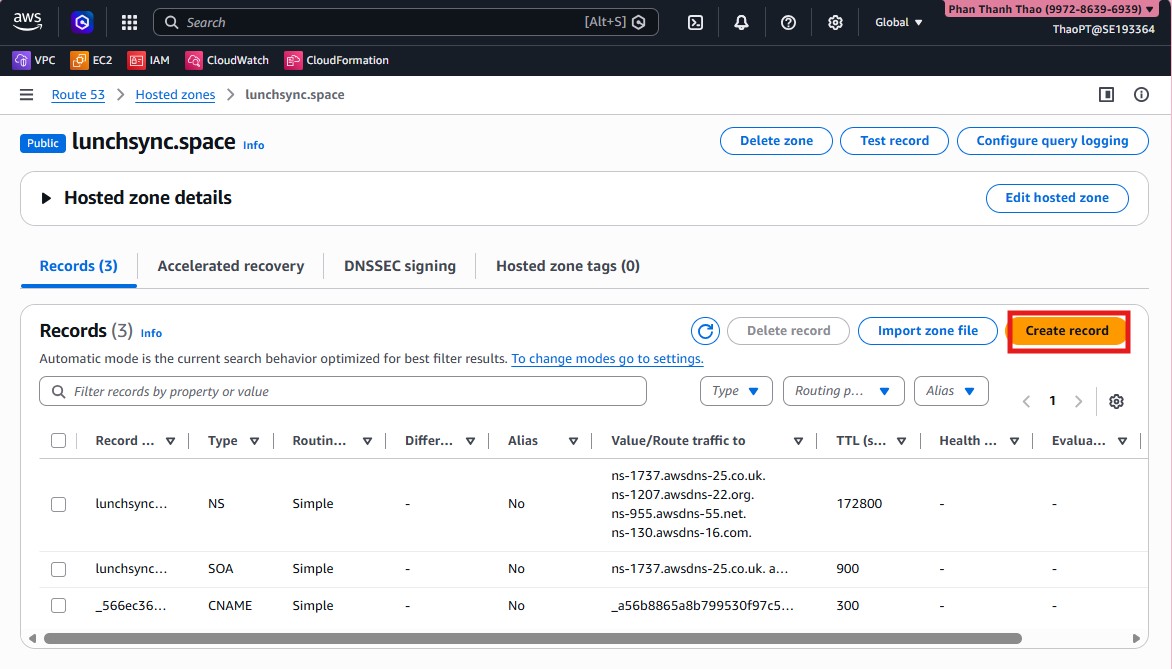
- Create an alias record at root domain pointing to CloudFront distribution.
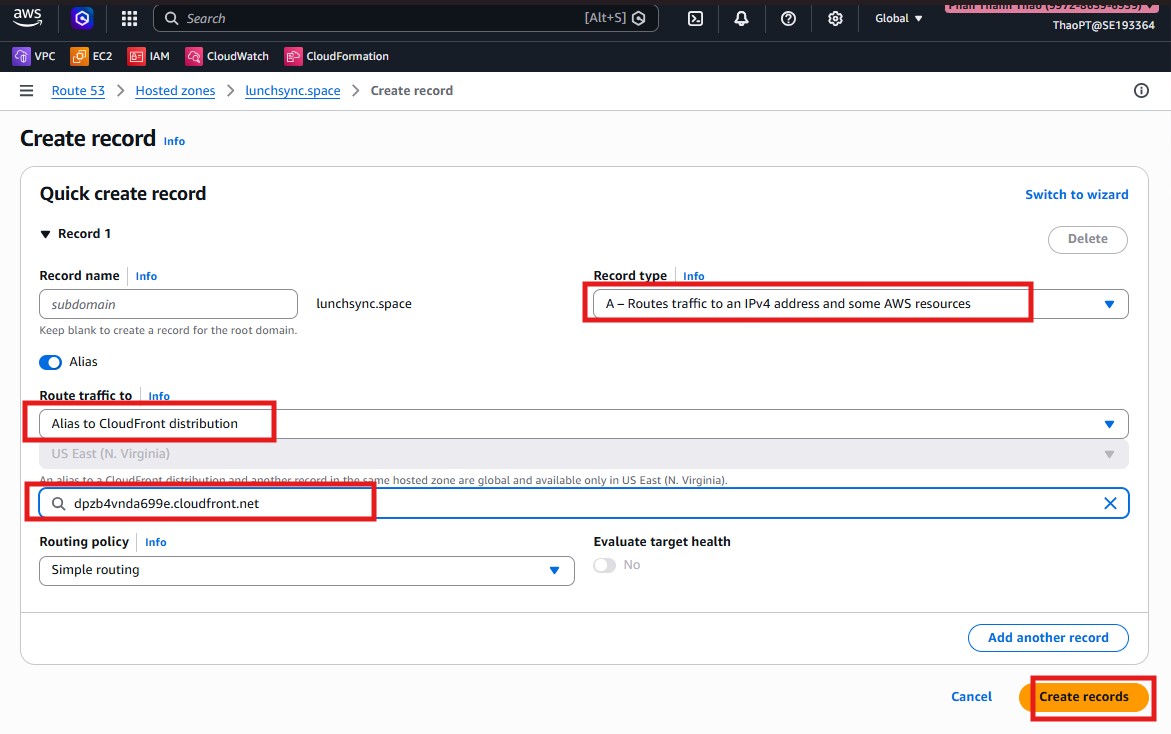
- Verify the alias record appears.
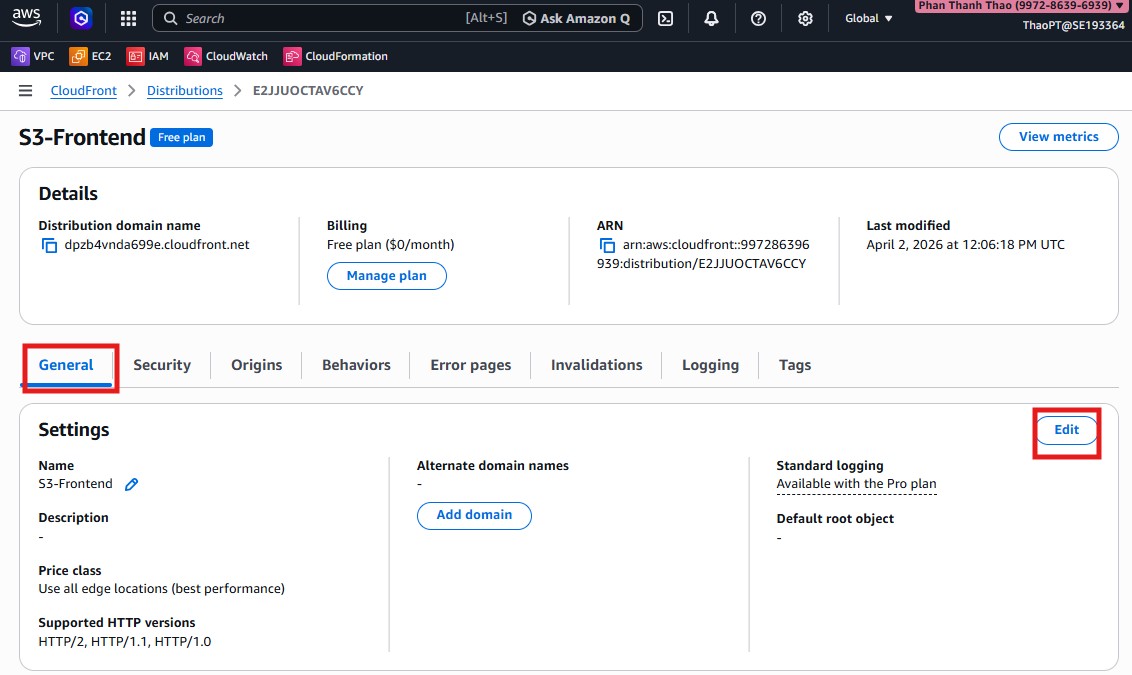
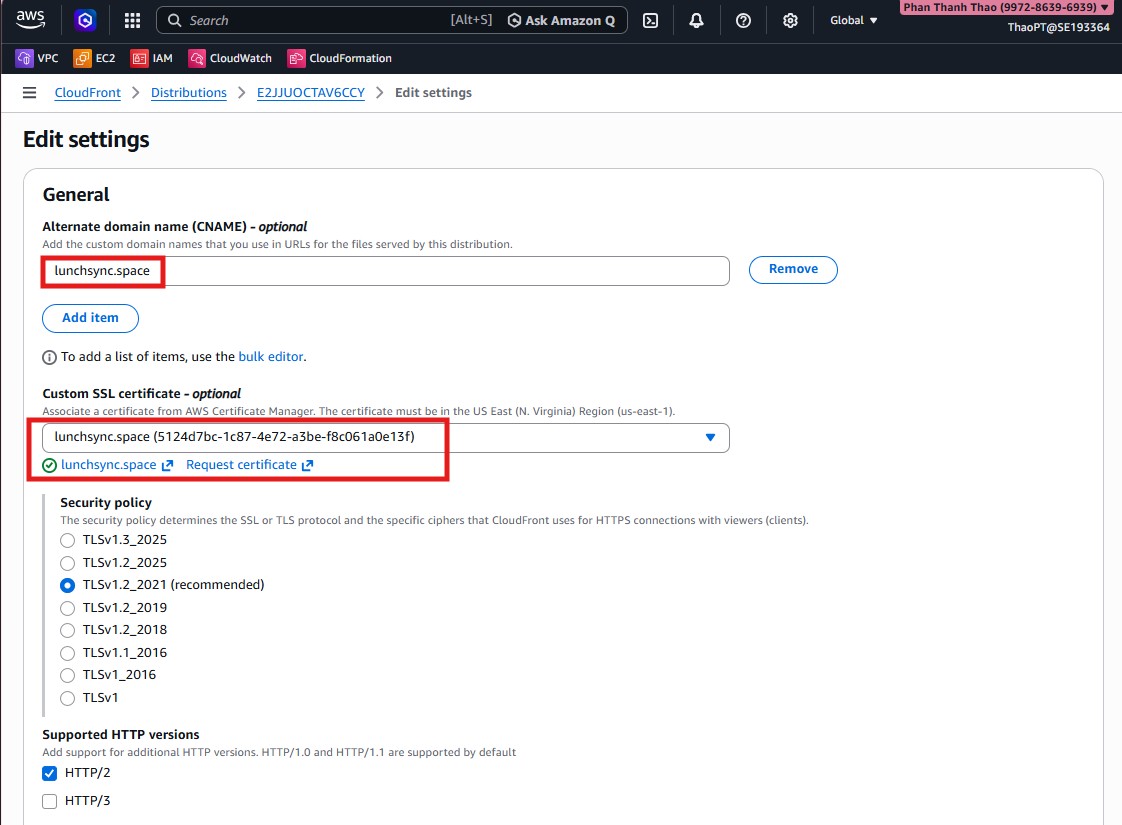
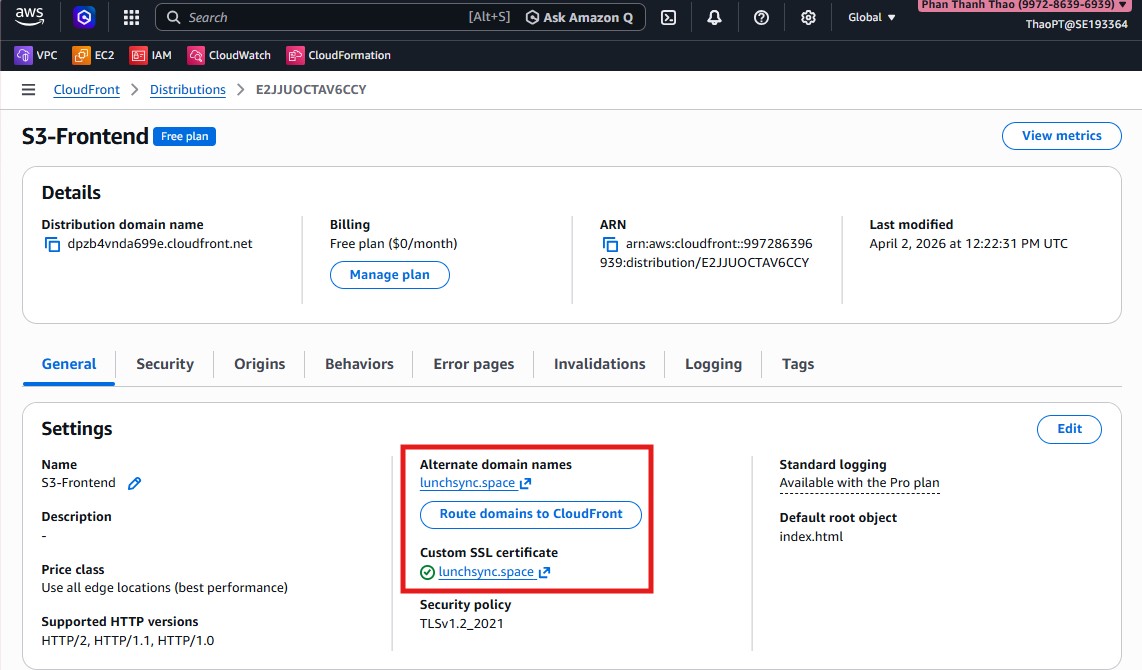
- Return to CloudFront settings, add Alternate domain (CNAME)
lunchsync.spaceand select ACM certificate inus-east-1.
- Set Default root object = index.html and enable HTTP versions (
HTTP/2,HTTP/3).
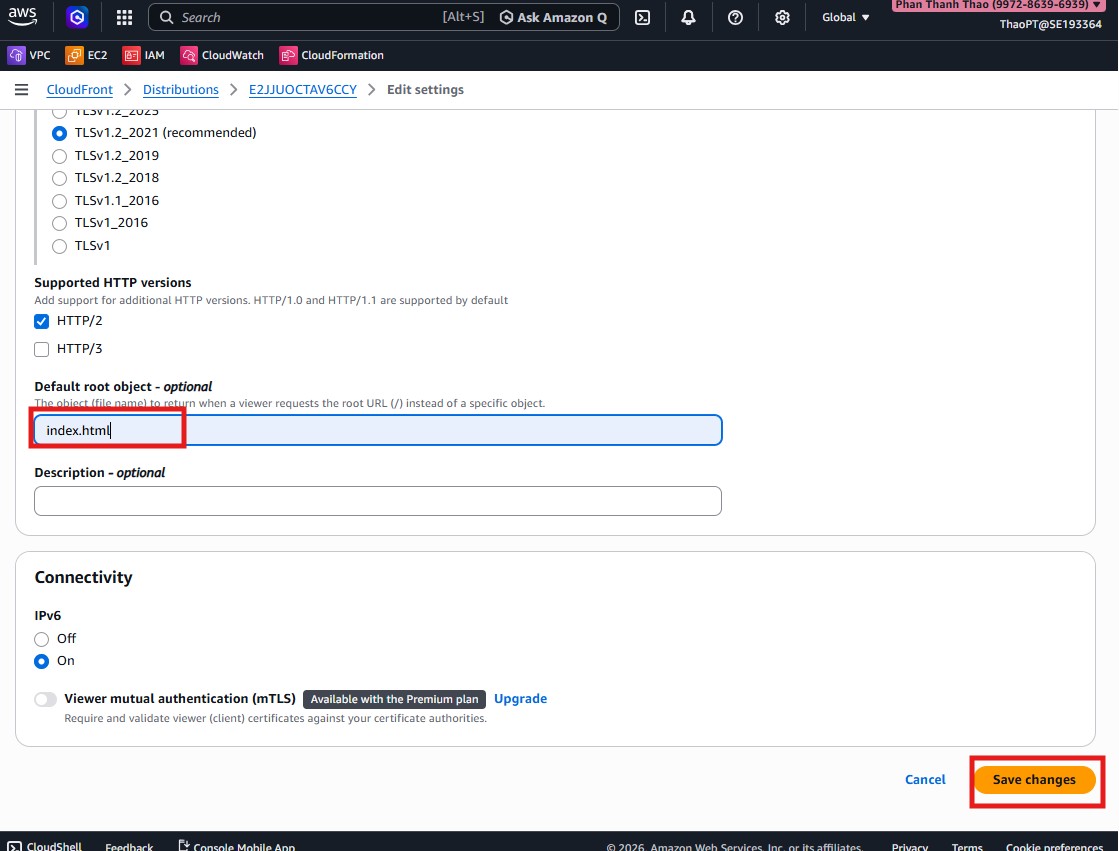
- Save settings and verify domain, certificate, and root object.
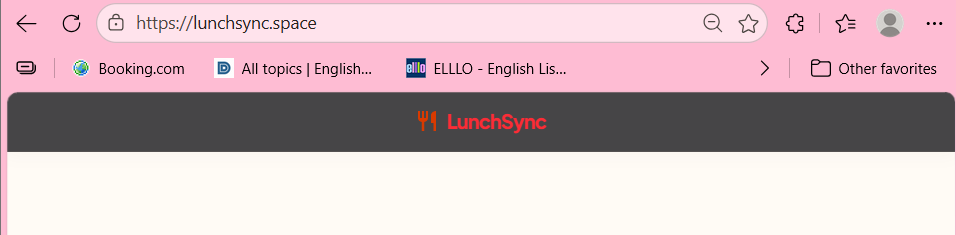
- Open
https://lunchsync.spaceto verify frontend is served via CloudFront.
- Test a media asset like
https://lunchsync.space/media/lunchsync.pngto confirmmedia/*behavior works correctly.
