VPC, Security Group, and ALB
Overview
This section presents the configuration steps for VPC, Target Group, ALB, and Security Group in the network layer.
Implementation steps
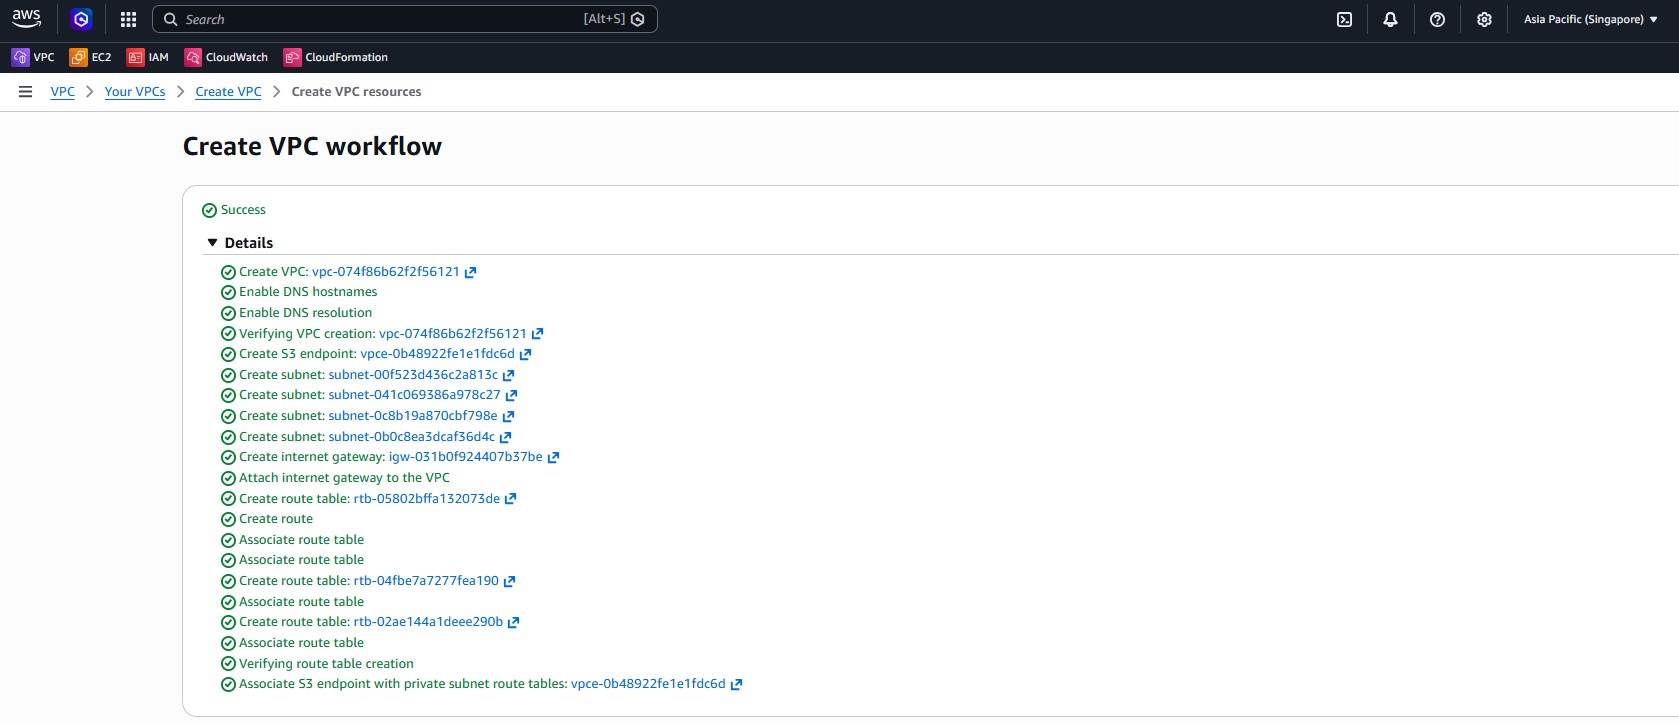
- Open the VPC console, choose Create VPC, and use the VPC and more template so AWS generates the base networking components.
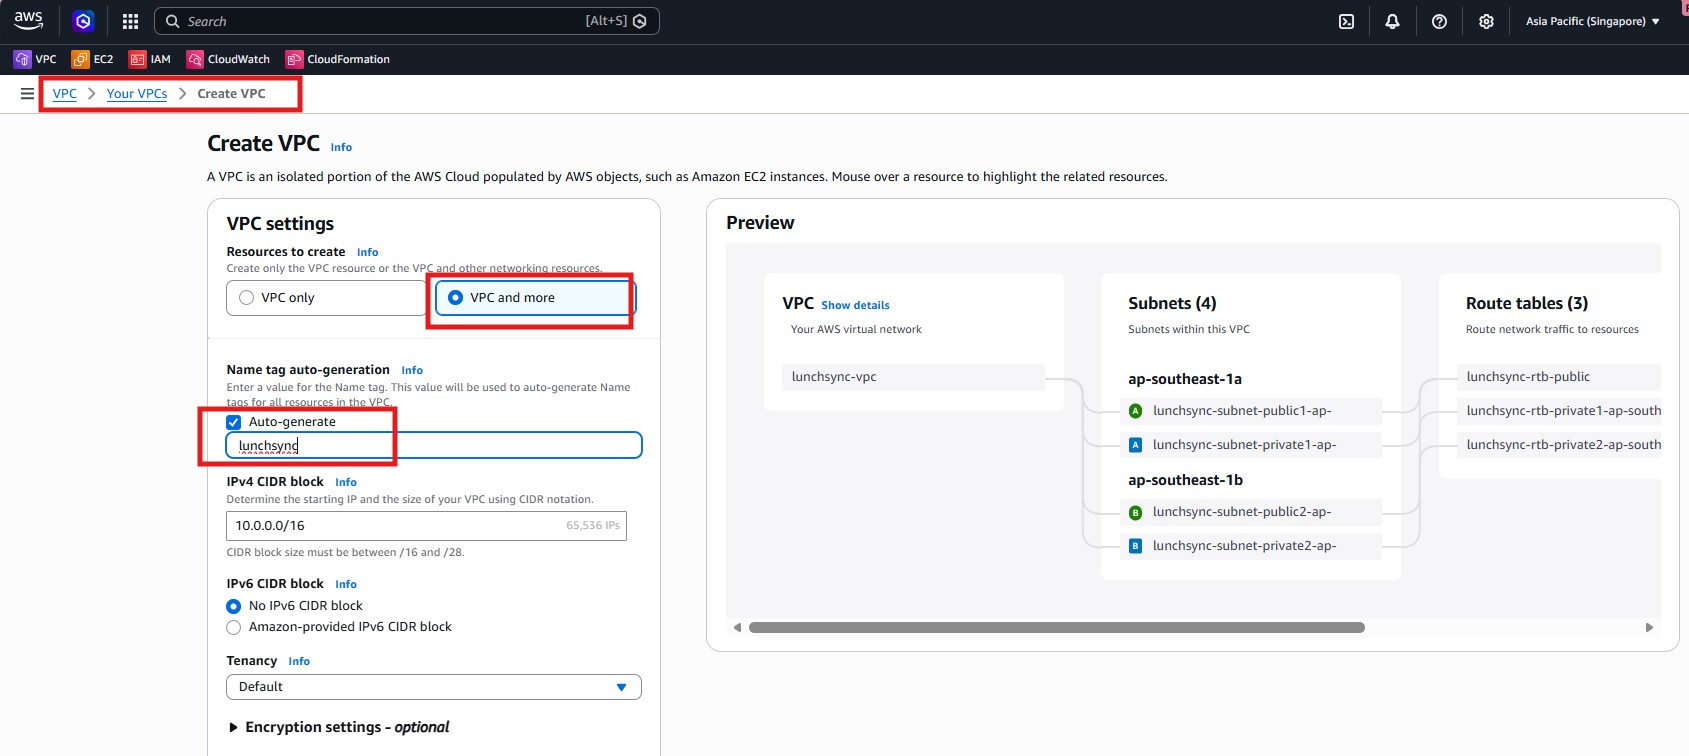
- Name the VPC
lunchsync-vpc, use CIDR10.0.0.0/16, and create 2 AZs, 2 public subnets, and 2 private subnets.
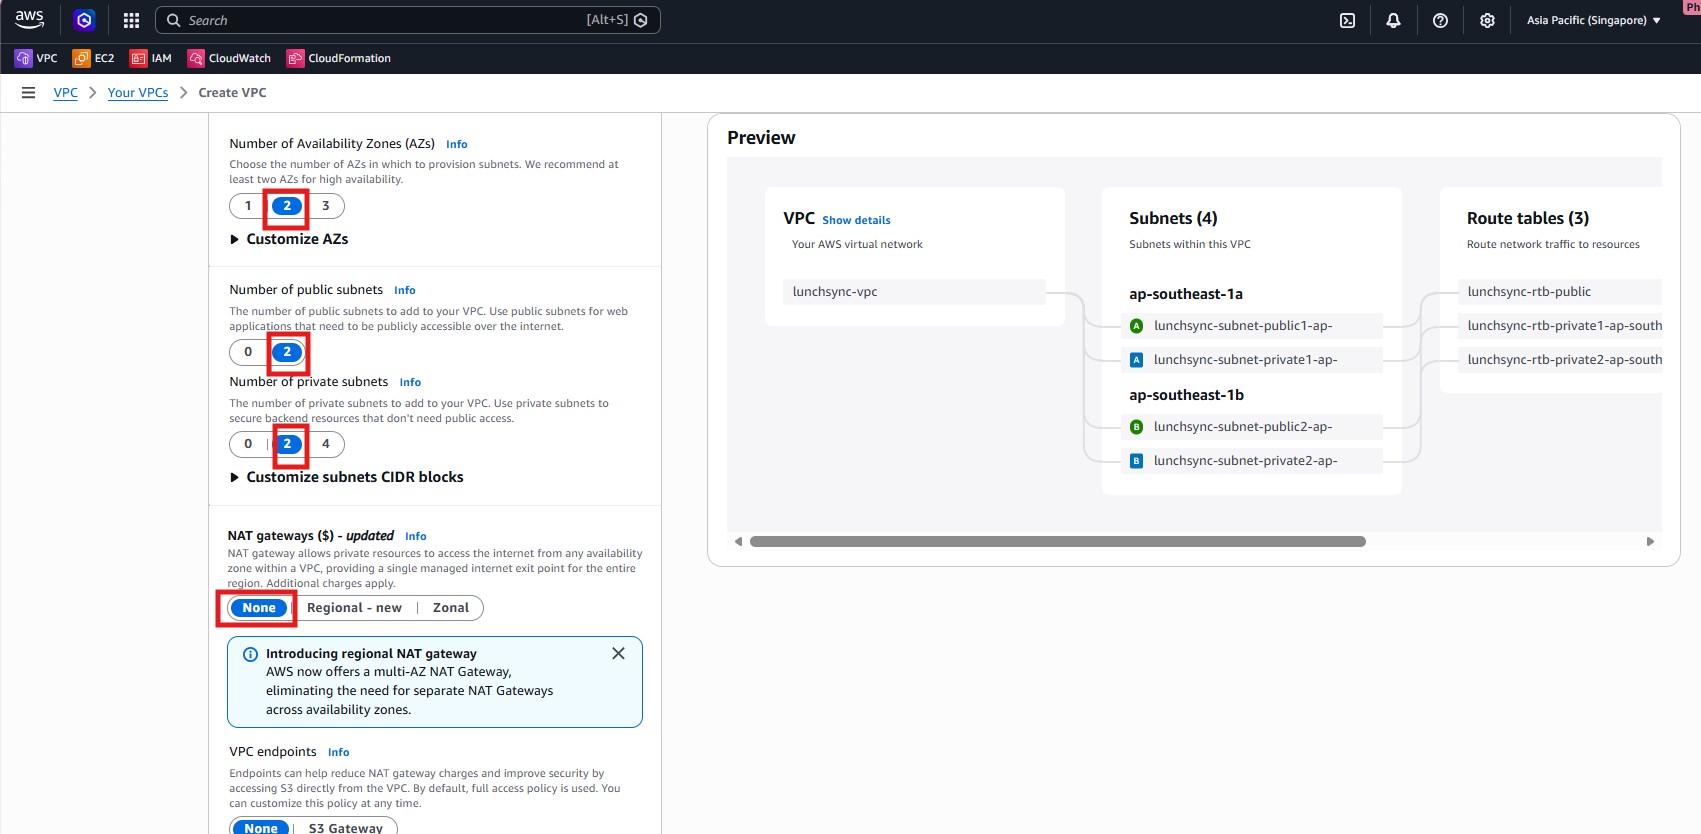
- Set NAT gateways to
None, enable the S3 Gateway Endpoint, and keep Enable DNS hostnames / DNS resolution turned on so private subnets can still reach S3.
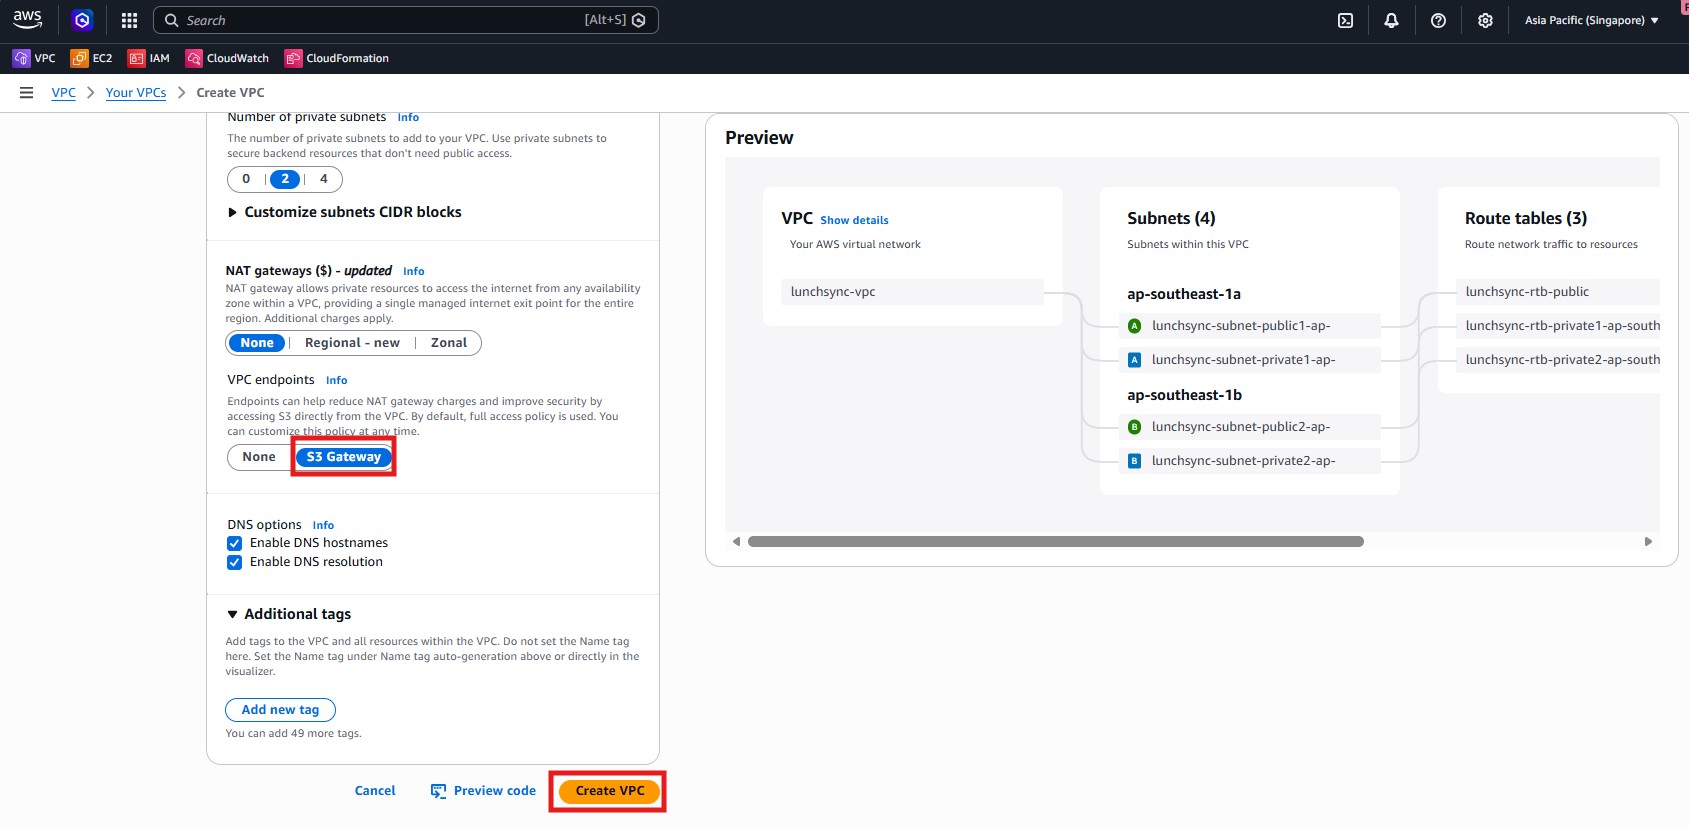
- Create the VPC and verify that AWS provisioned the public/private subnets, route tables, internet gateway, and S3 endpoint.
- Move to EC2 > Target Groups and begin creating the backend target group.
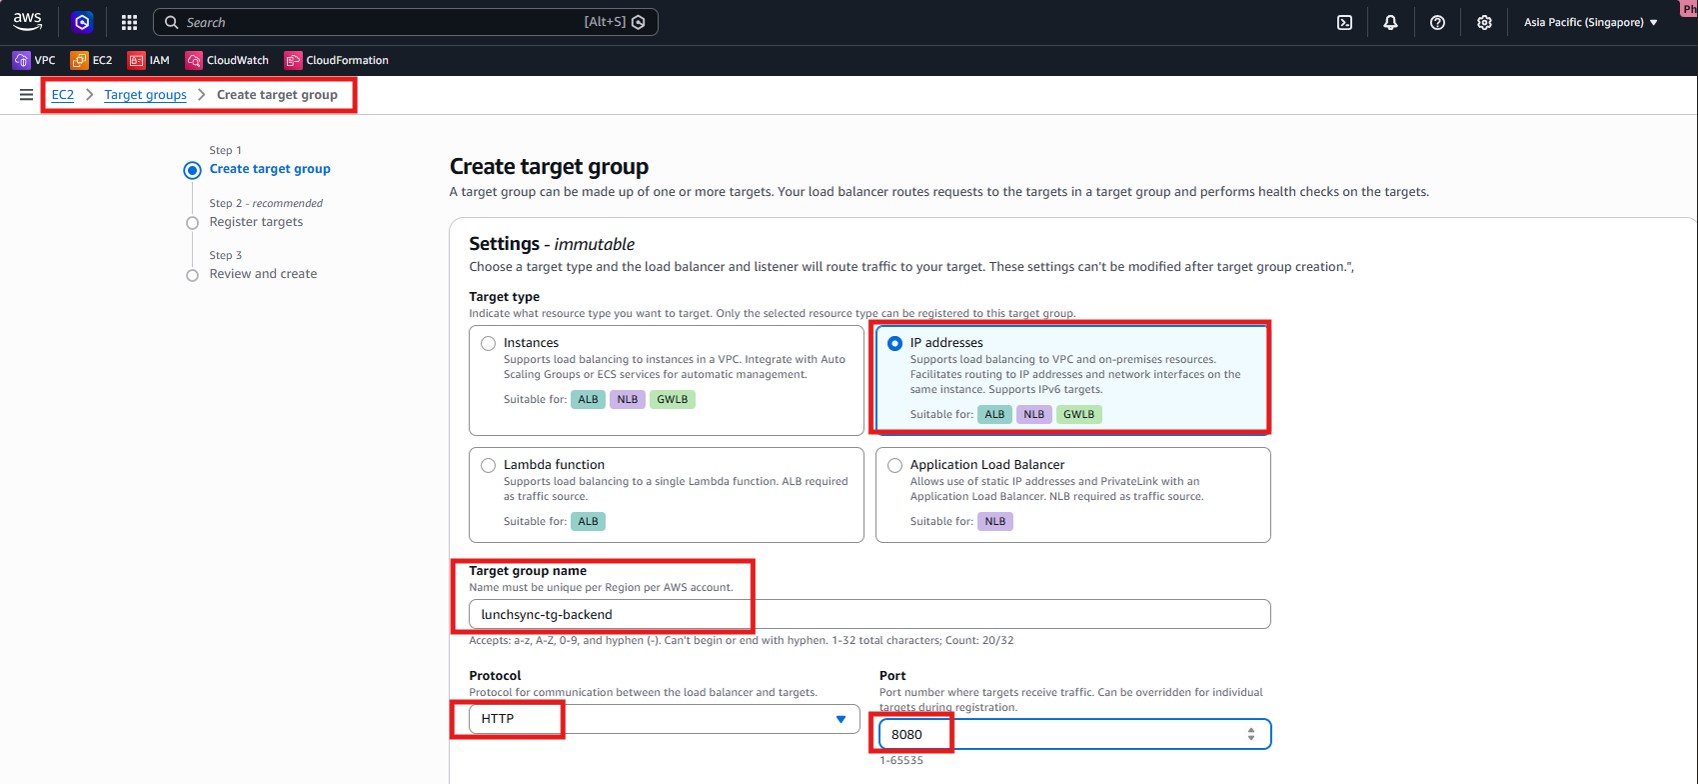
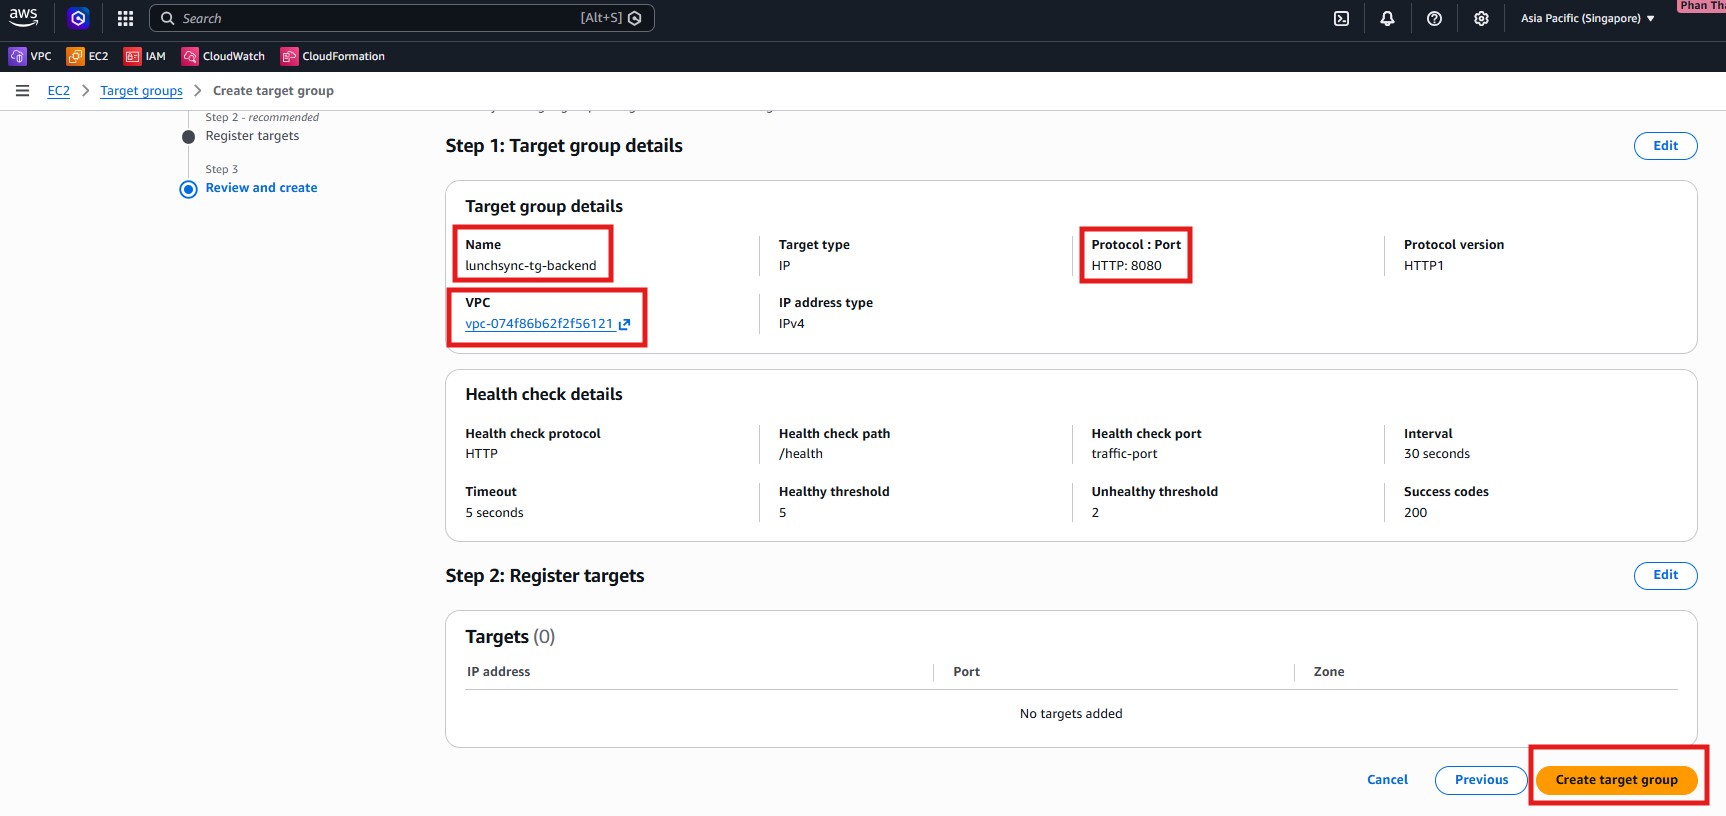
- Select Target type = IP addresses, name it
lunchsync-tg-backend, and use protocolHTTPon port8080.
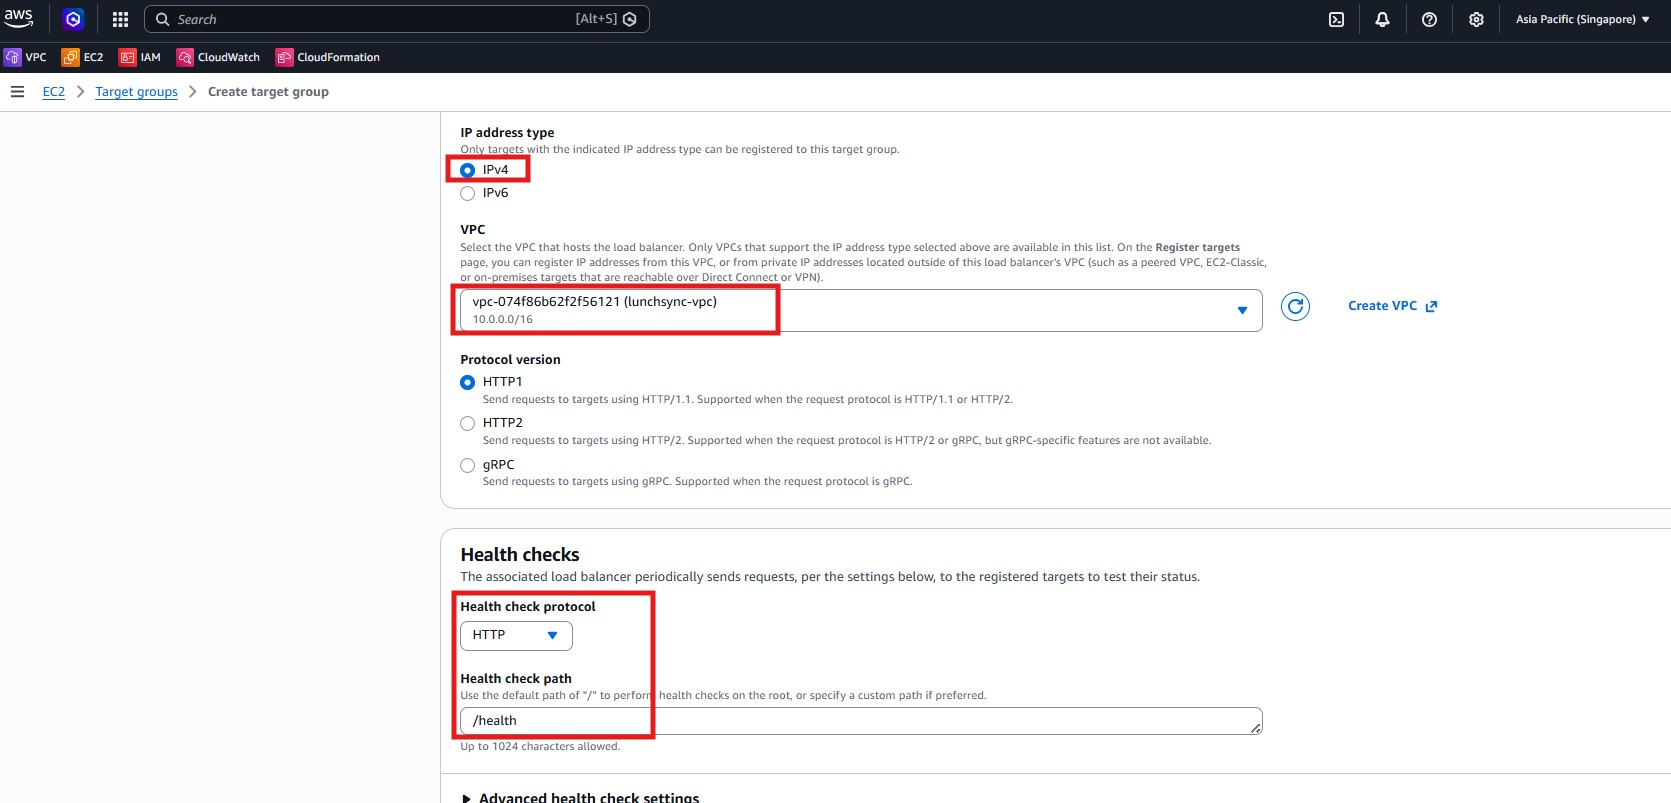
- Attach the target group to
lunchsync-vpc, keep Protocol version = HTTP1, and set the health check path to/health.
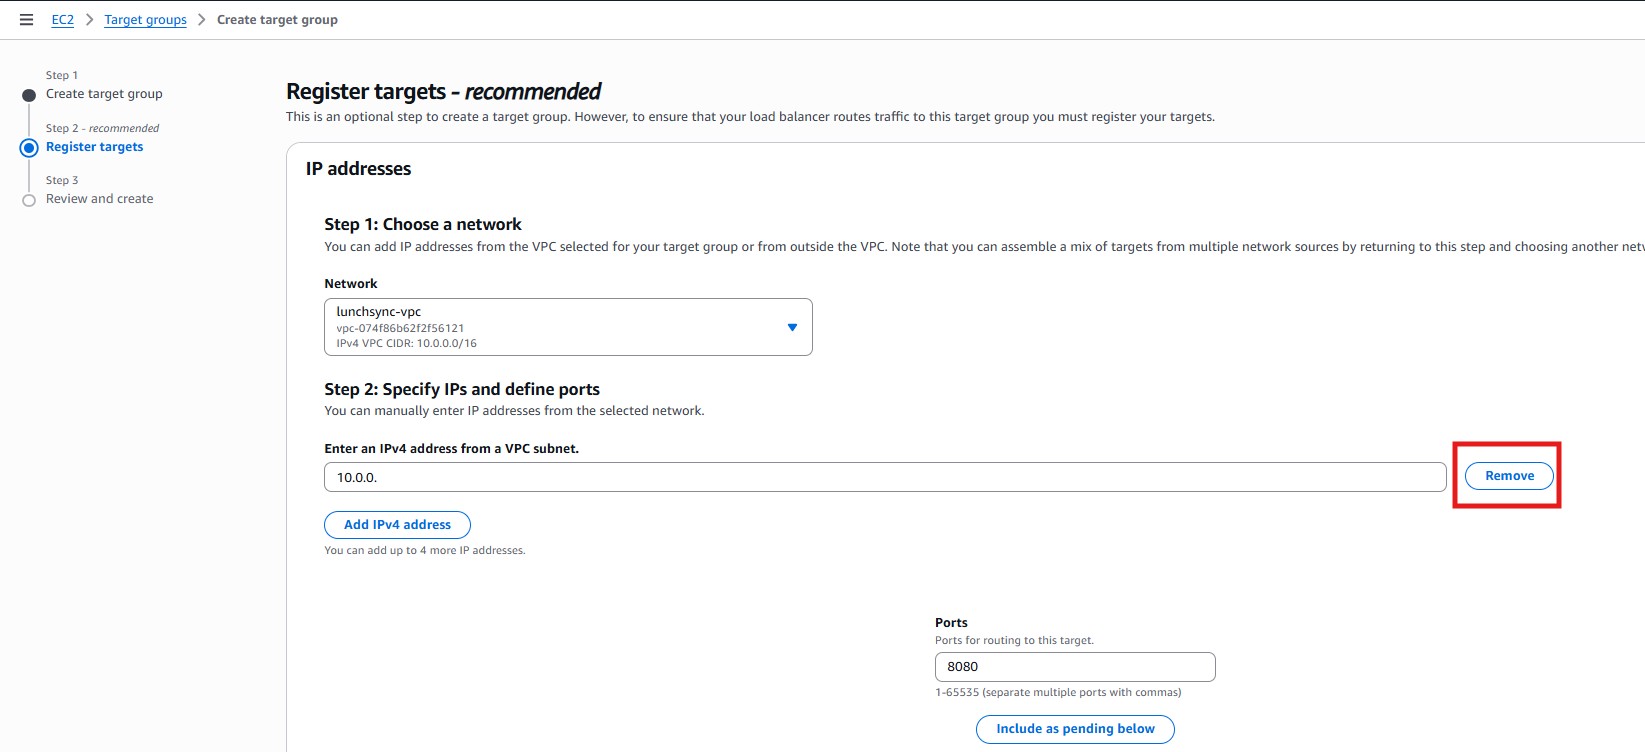
- In Register targets, note that ECS will register task IPs later, so you can continue without adding manual IPs now.
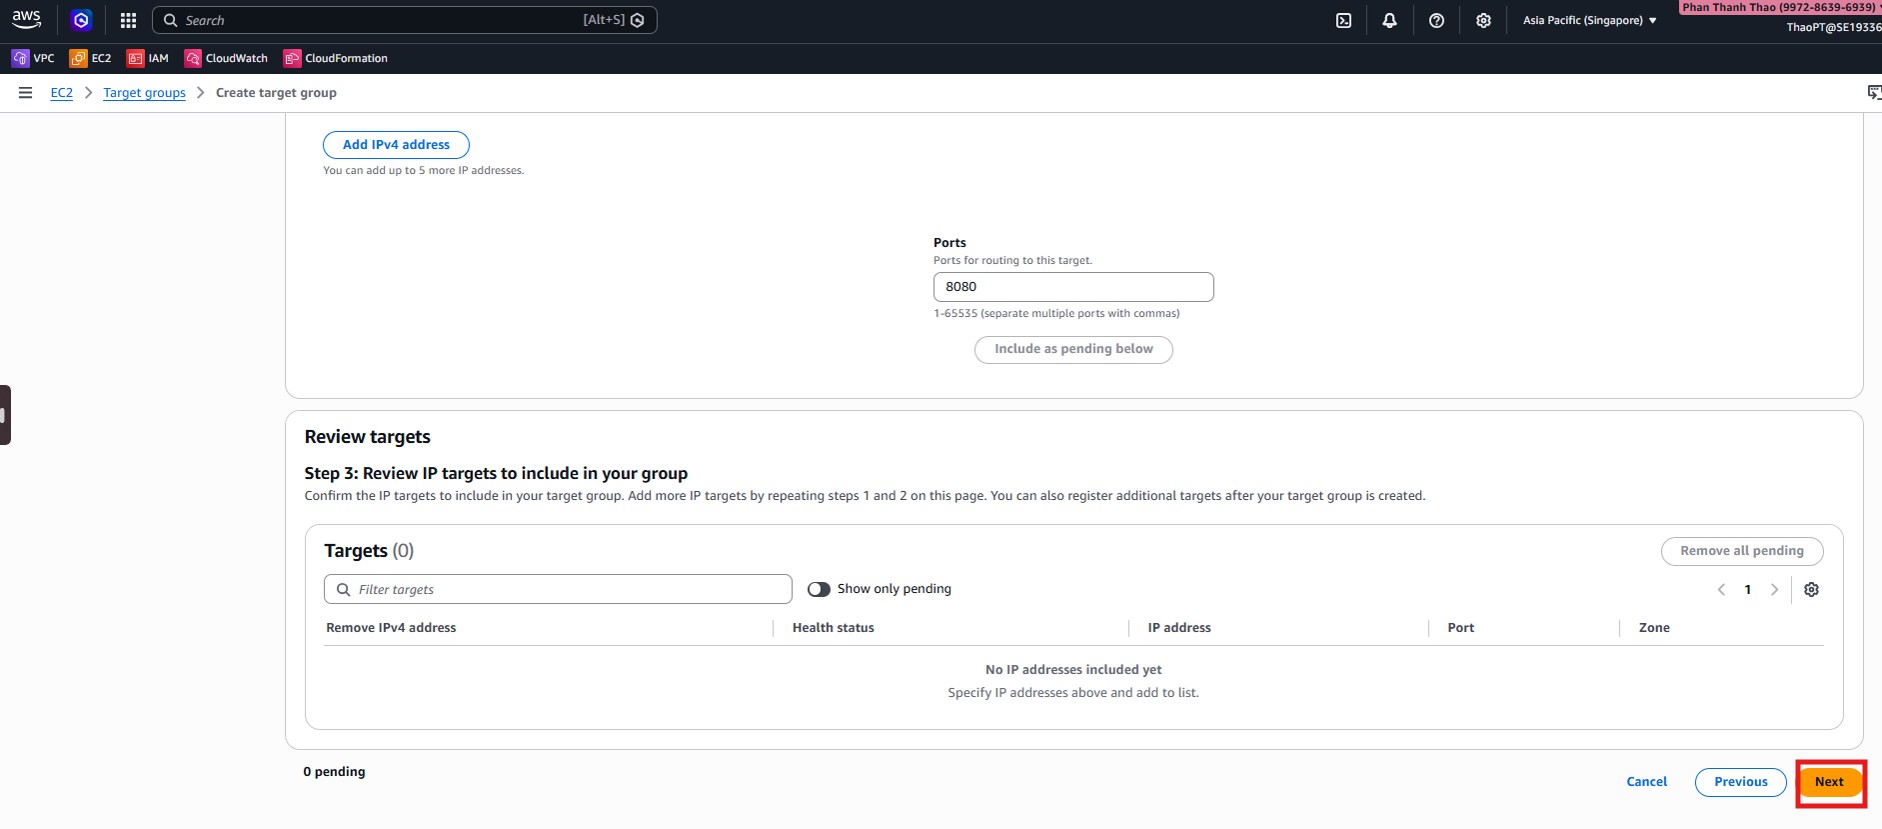
- Review the final target group settings: protocol
HTTP:8080, health check ontraffic-port, path/health, and success code200.
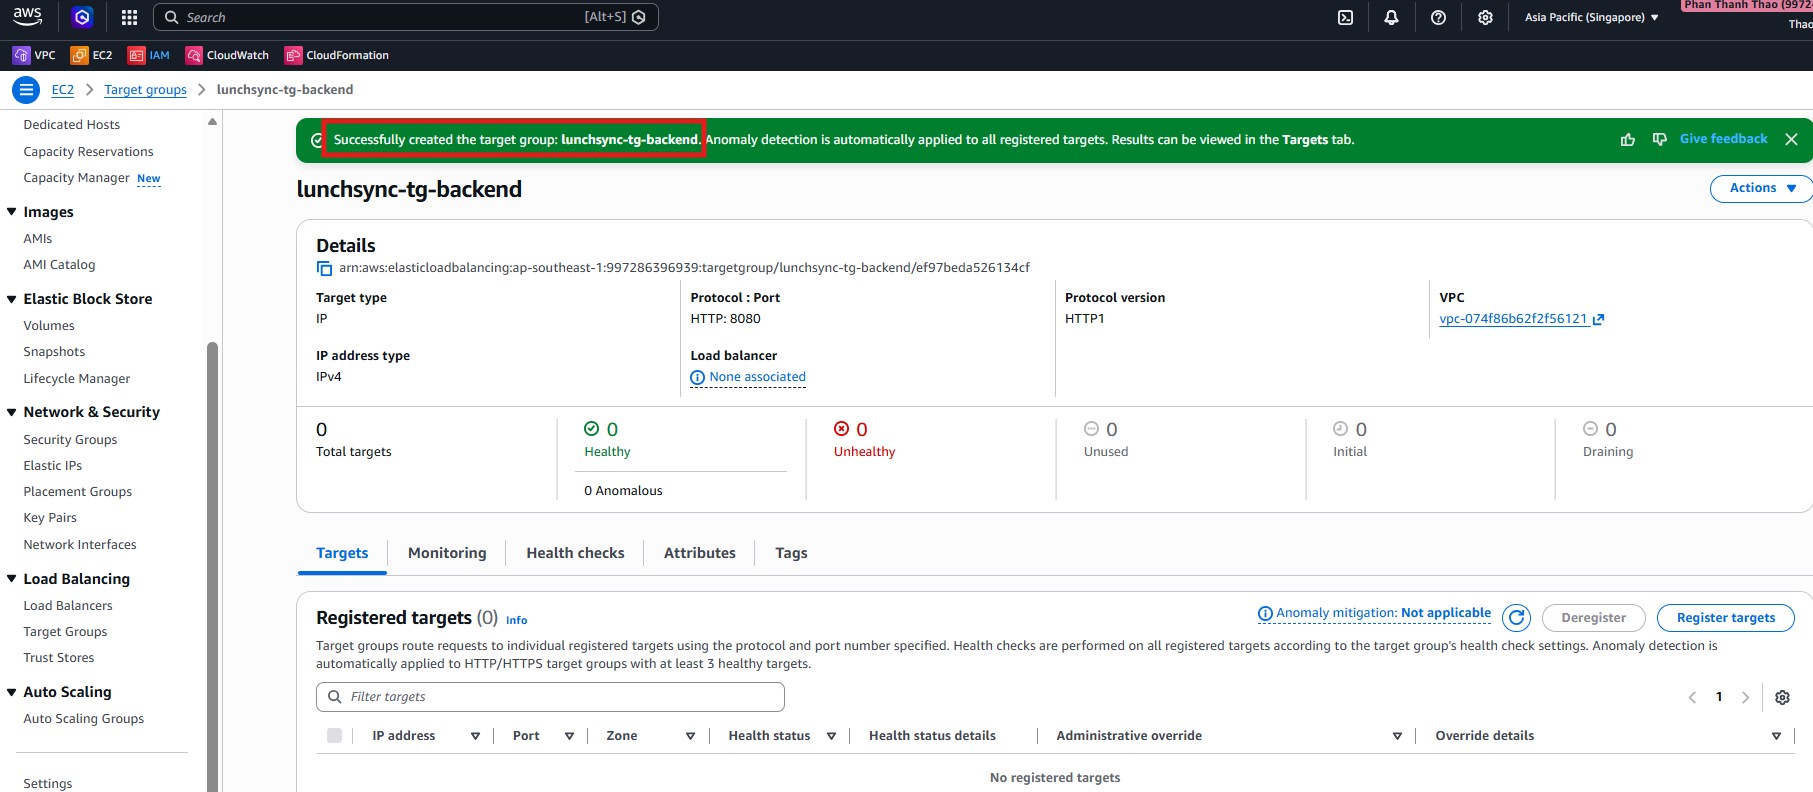
- After creation, confirm that
lunchsync-tg-backendexists and currently has no registered targets.
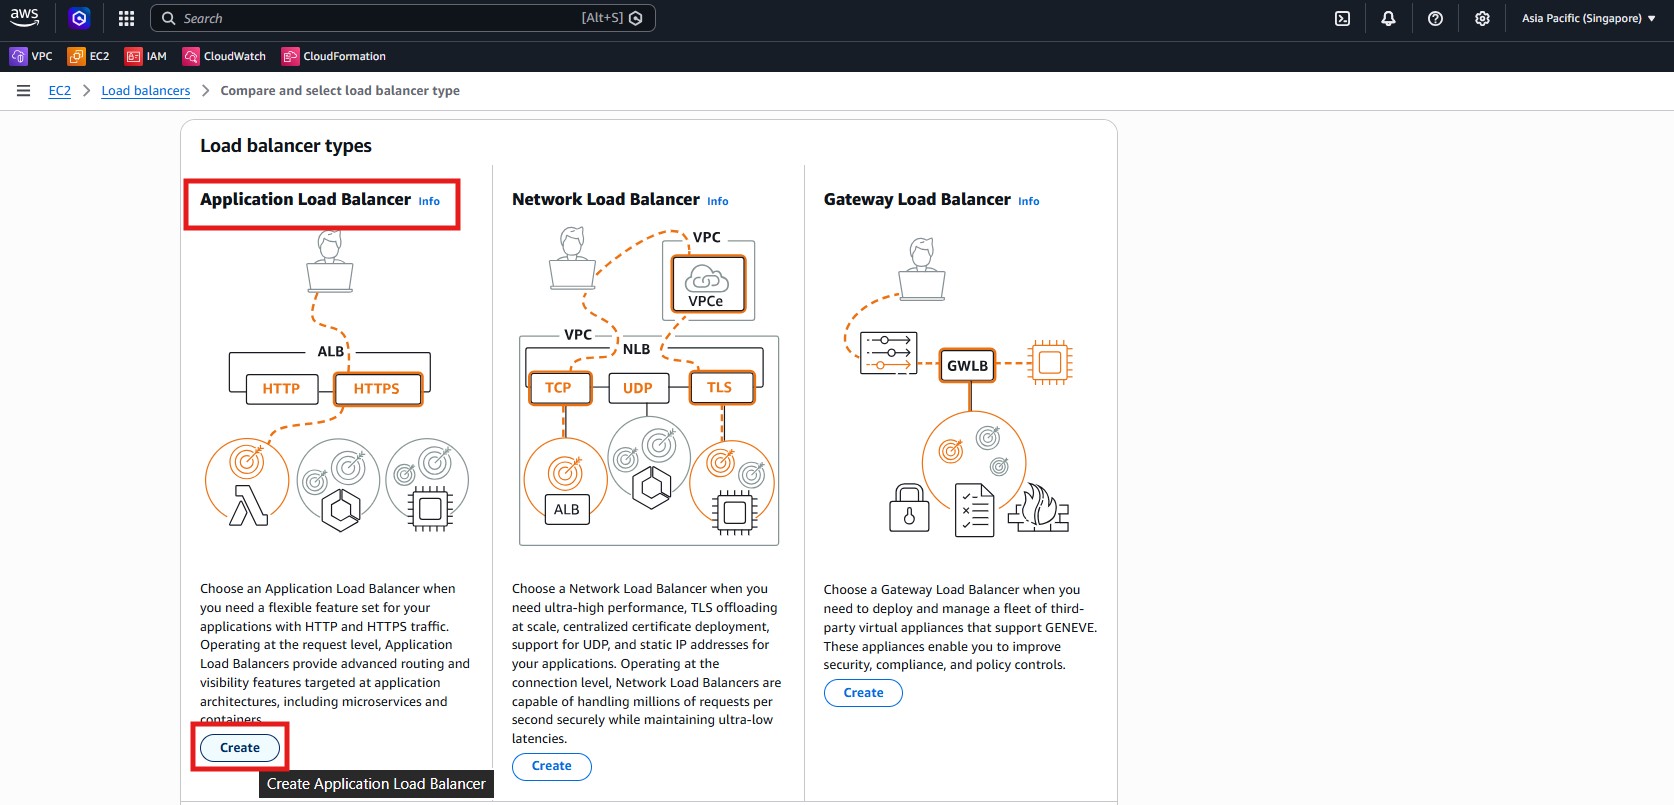
- Open EC2 > Load Balancers and start creating a new load balancer.
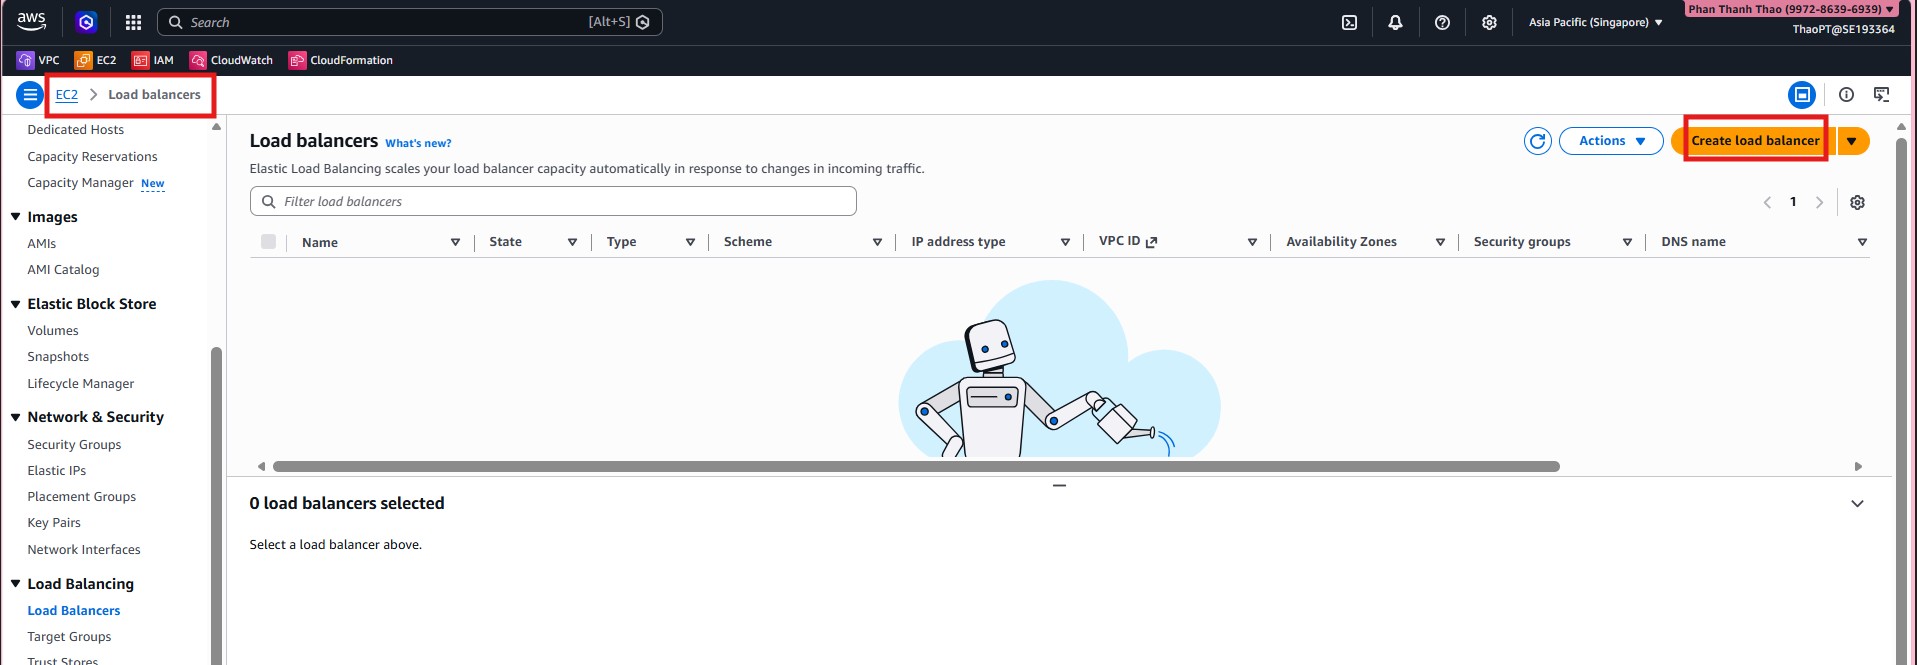
- Choose Application Load Balancer.
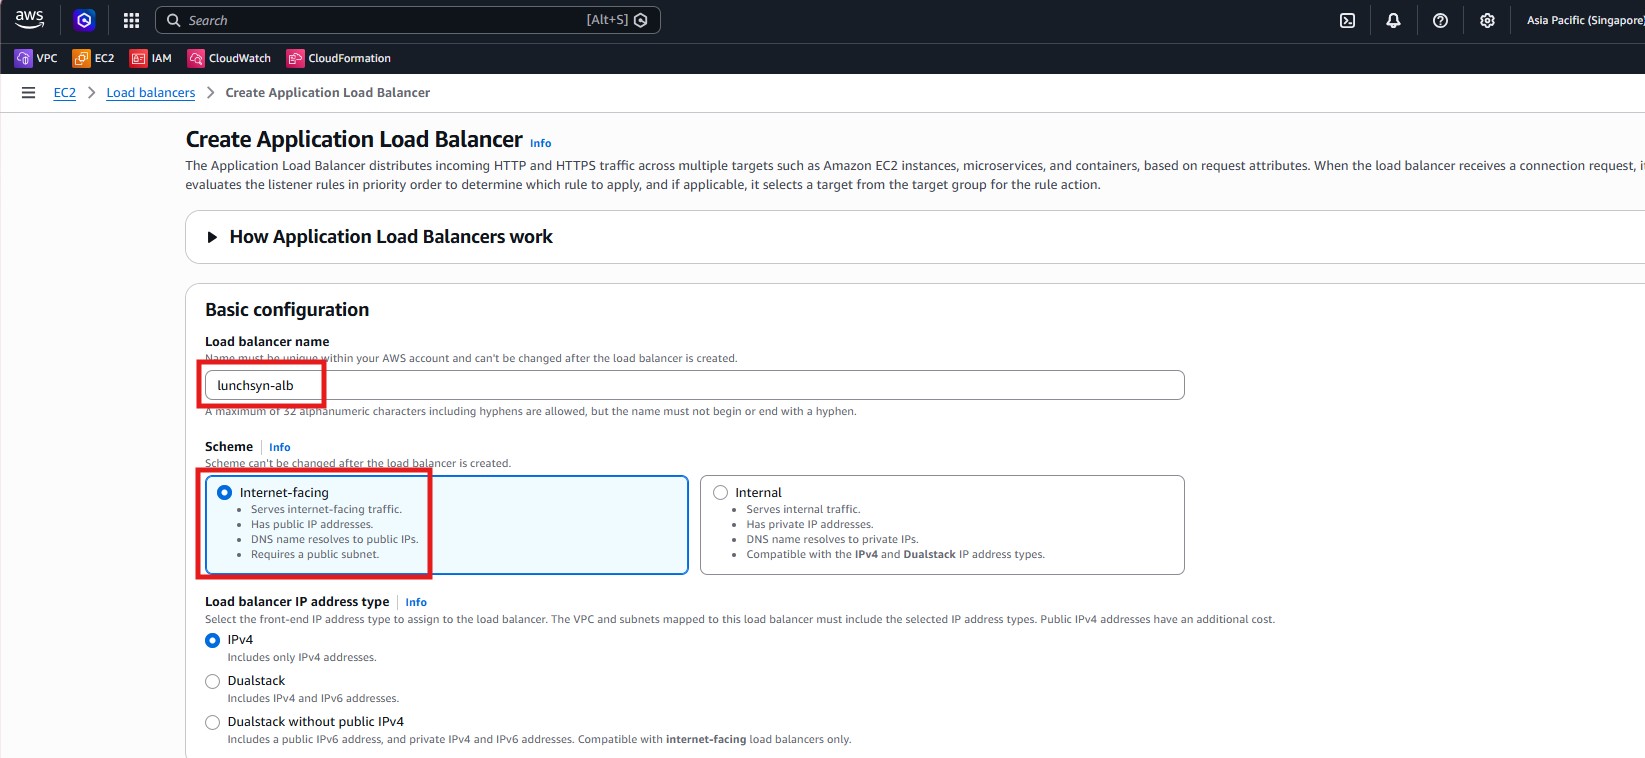
- Name it
lunchsyn-alb, chooseInternet-facing, and keepIPv4.
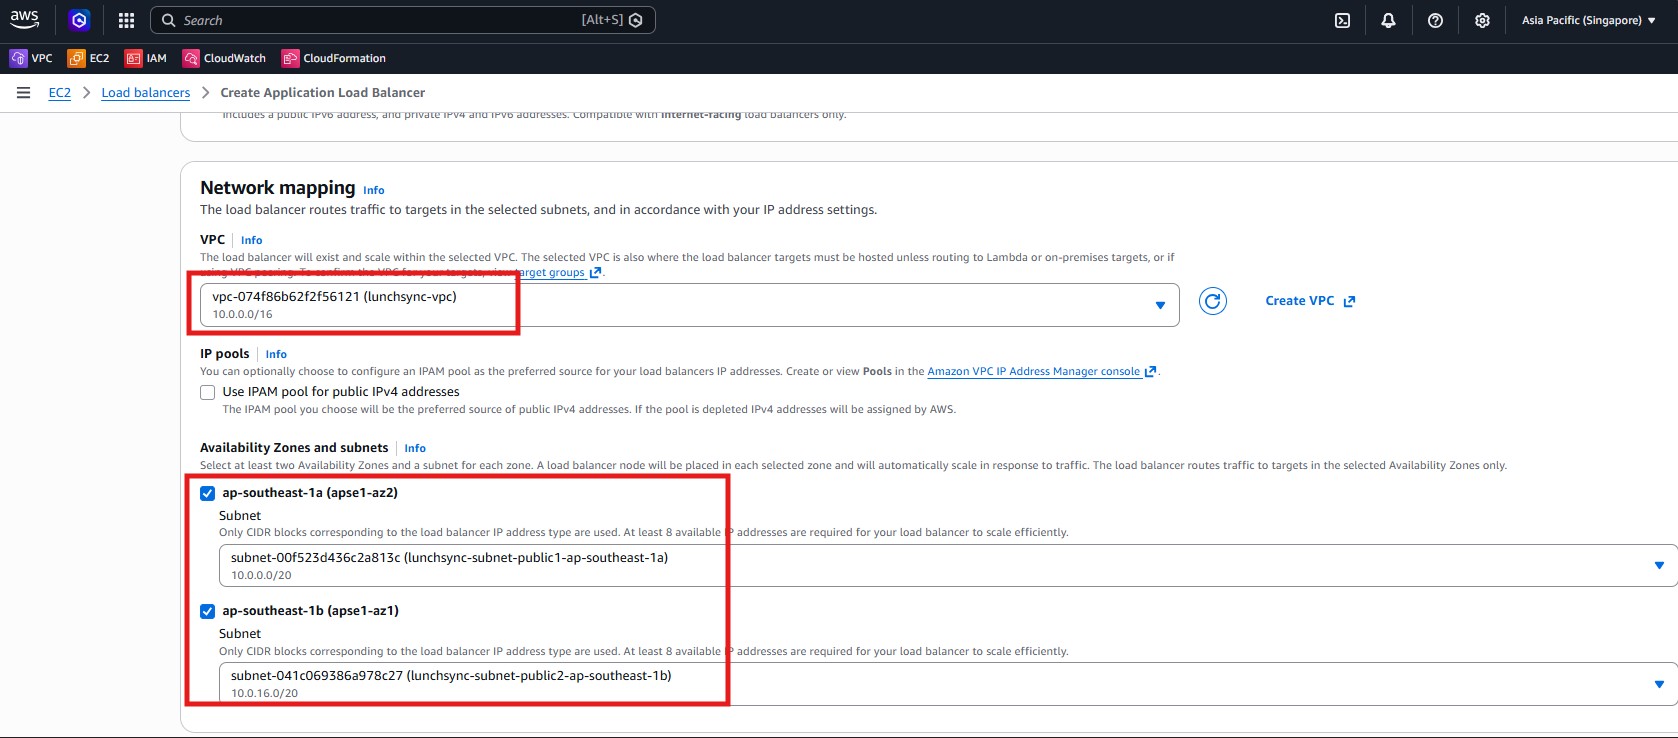
- Select
lunchsync-vpcand attach the ALB to the two public subnetslunchsync-subnet-public1andlunchsync-subnet-public2.
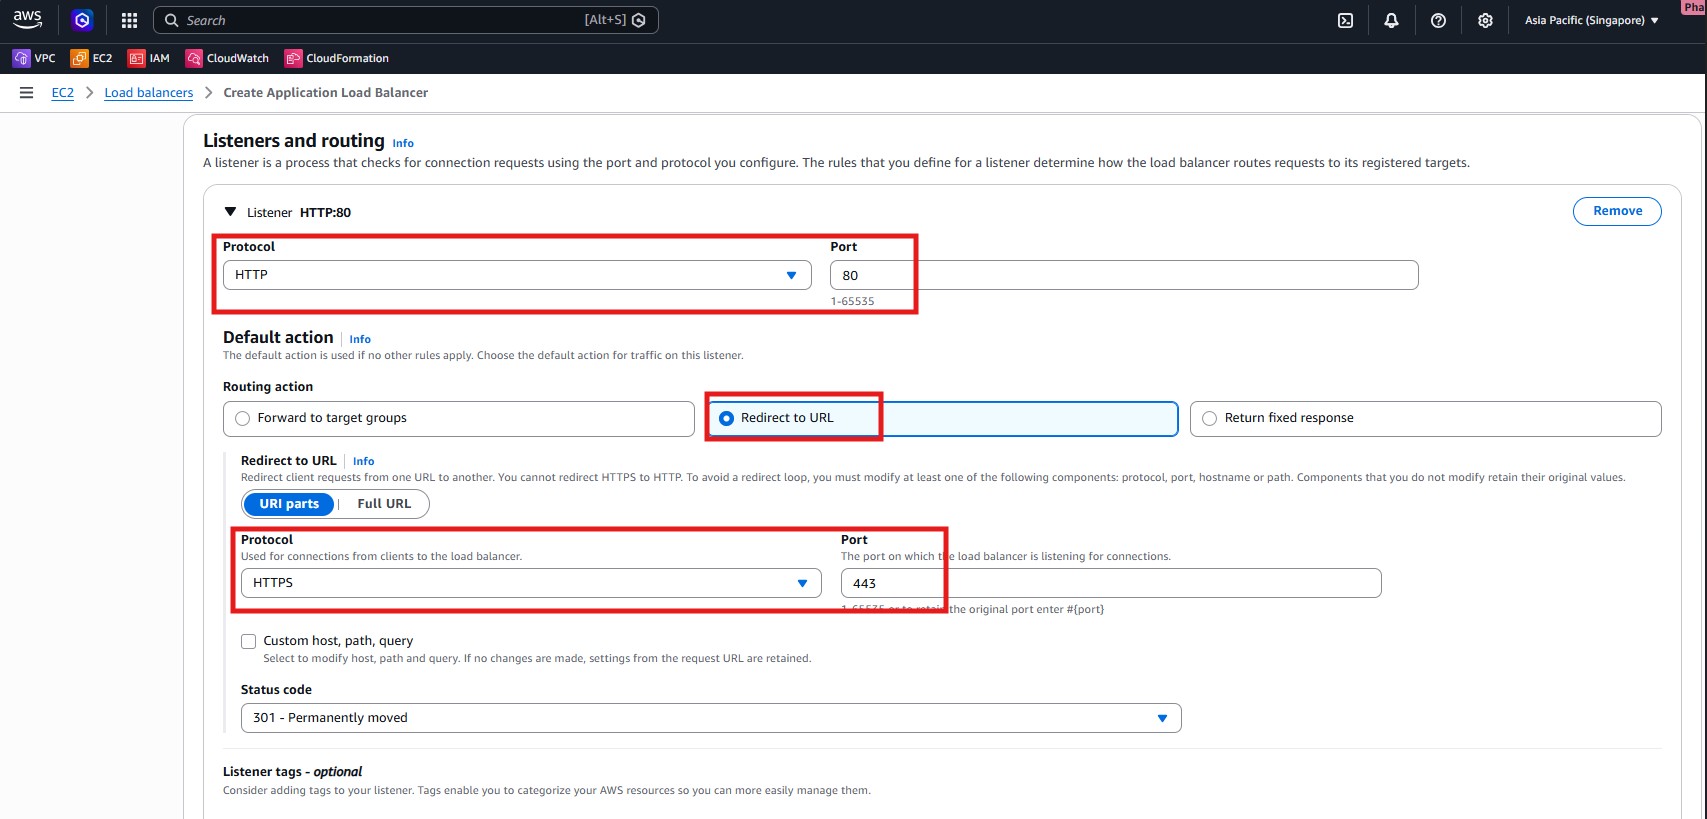
- Create listener
HTTP:80with the action Redirect to HTTPS and status code301.
- Create listener
HTTPS:443and forward its default action tolunchsync-tg-backend.
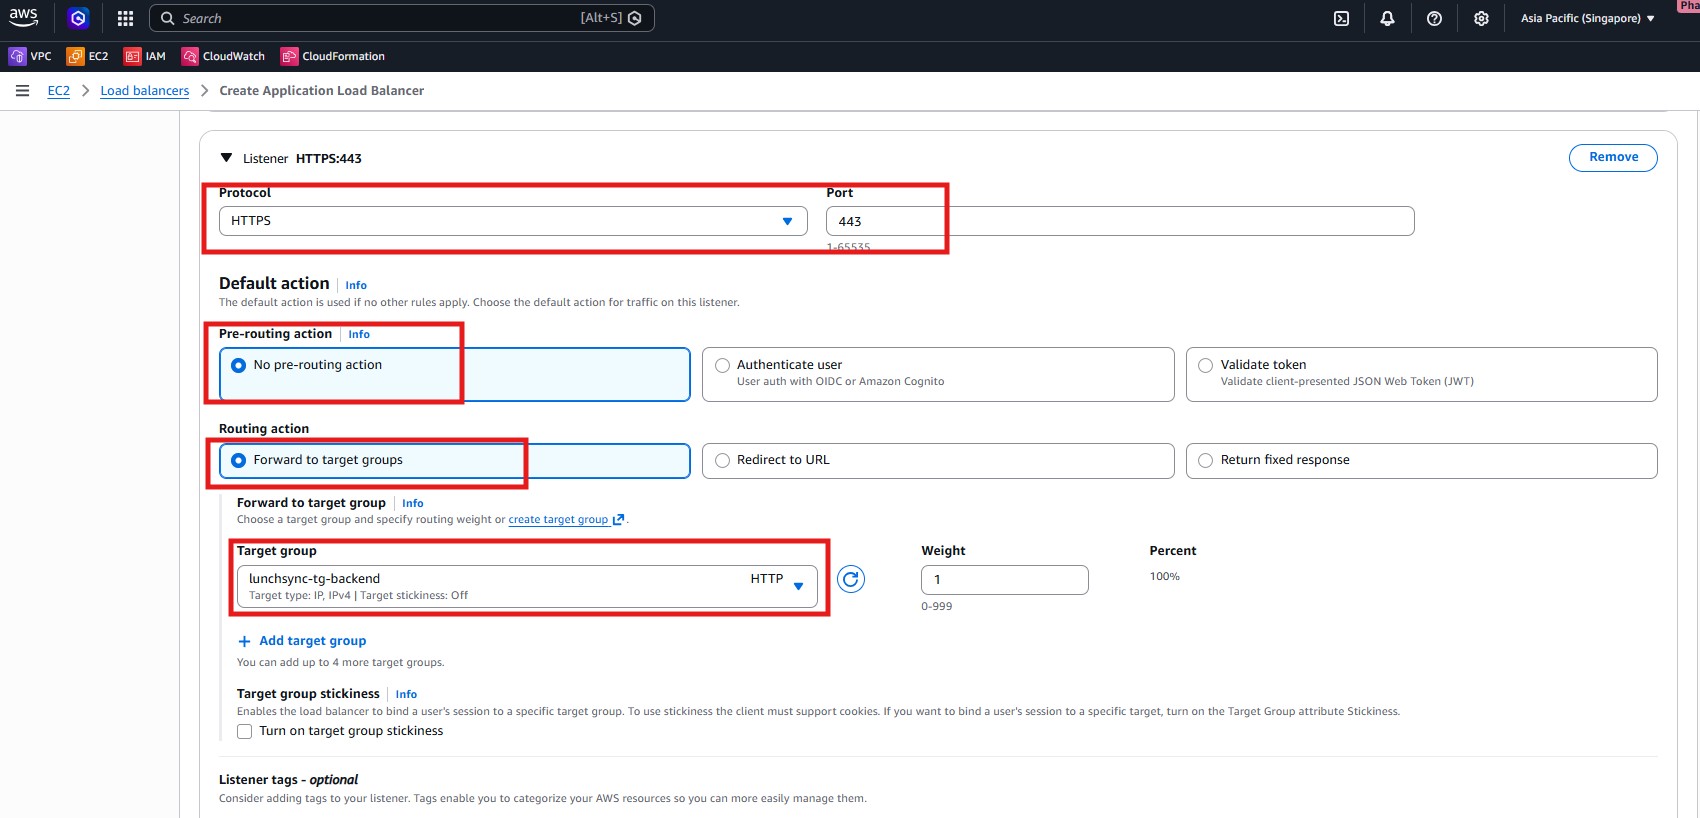
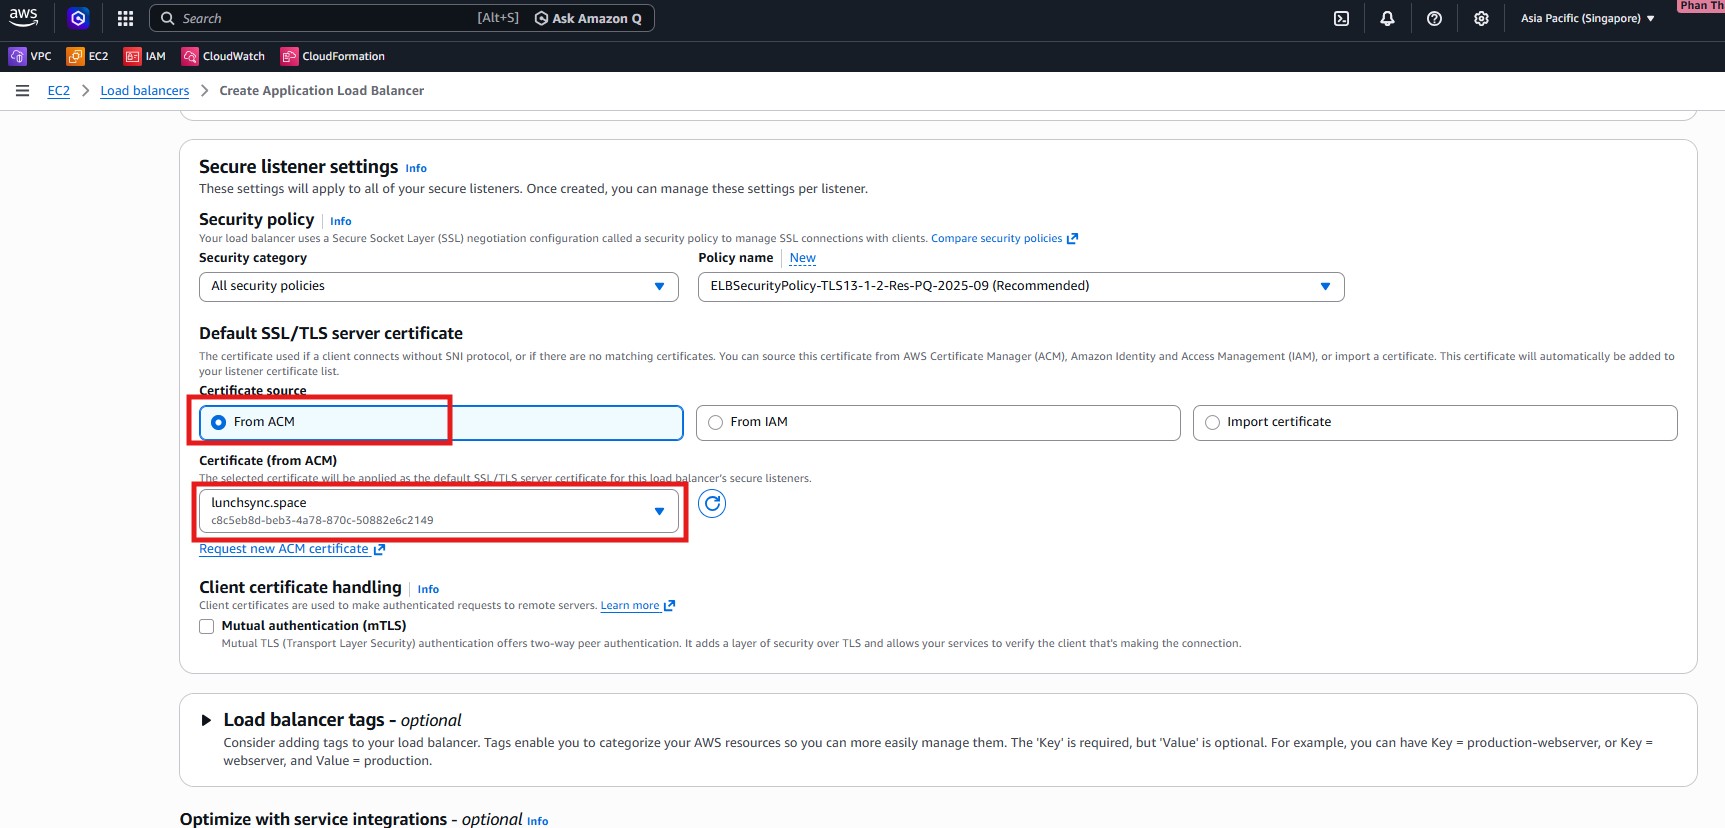
- In Secure listener settings, select the ACM certificate for
lunchsync.spaceand keep the recommended security policy.
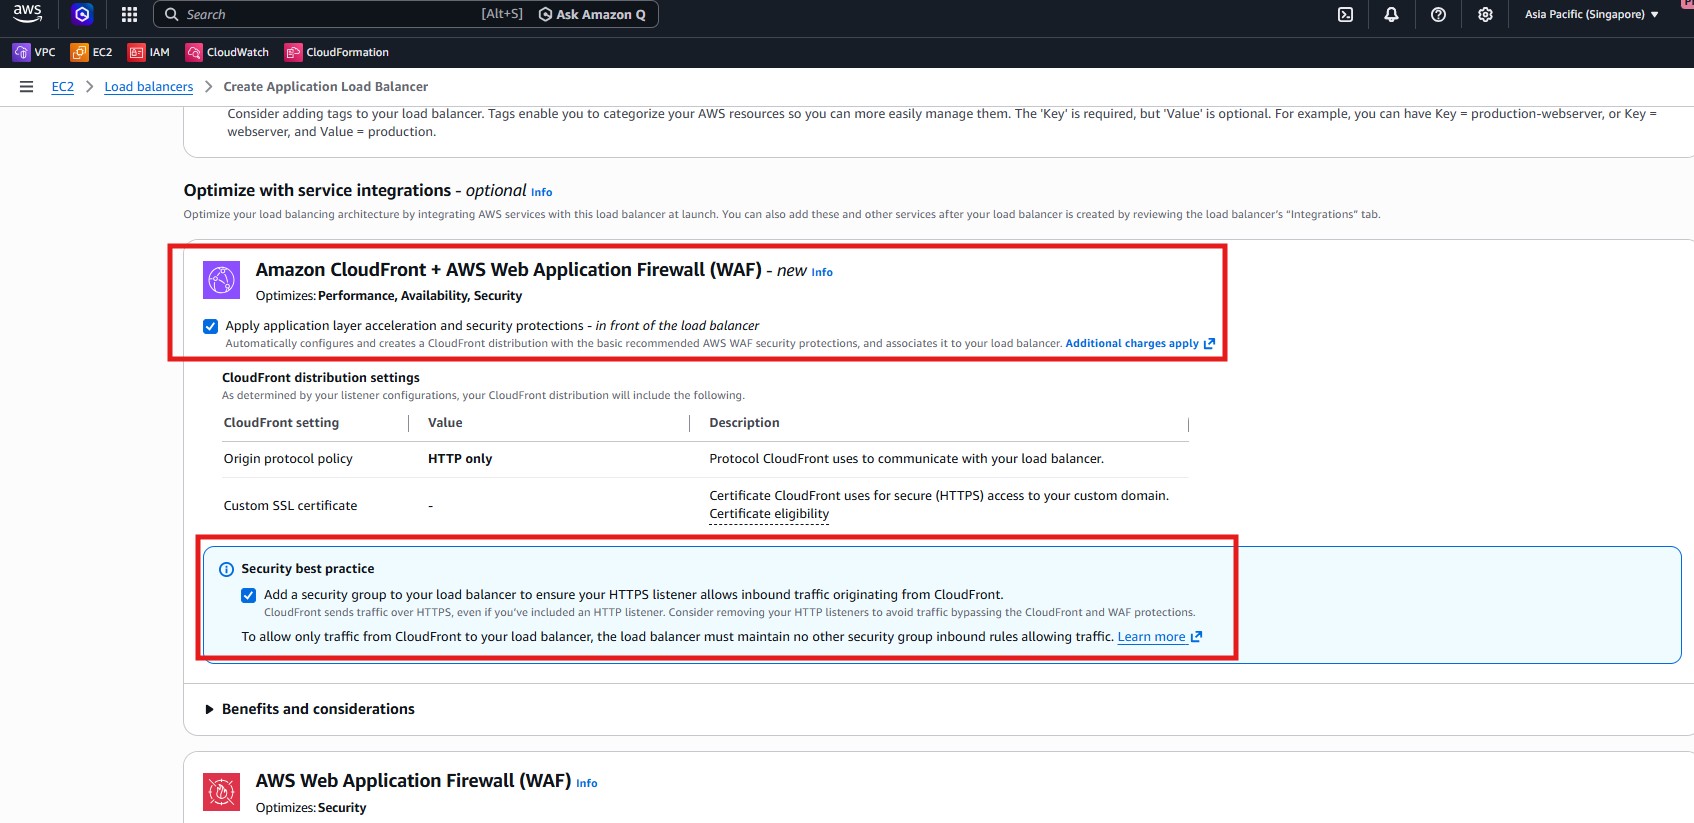
- Review the integration section as well, especially if you plan to limit ALB access so traffic only comes through CloudFront later.
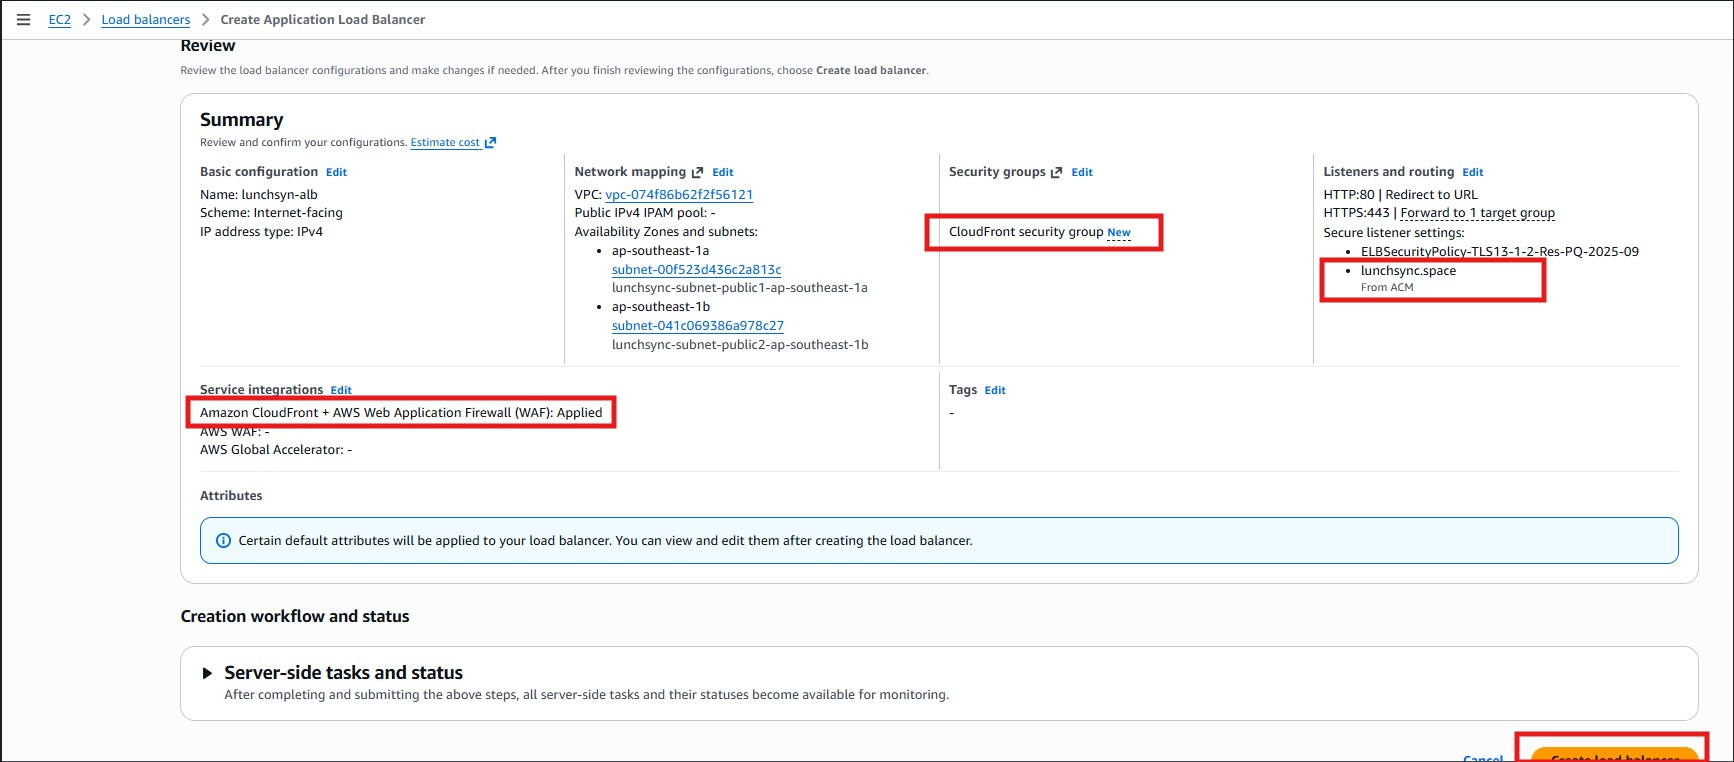
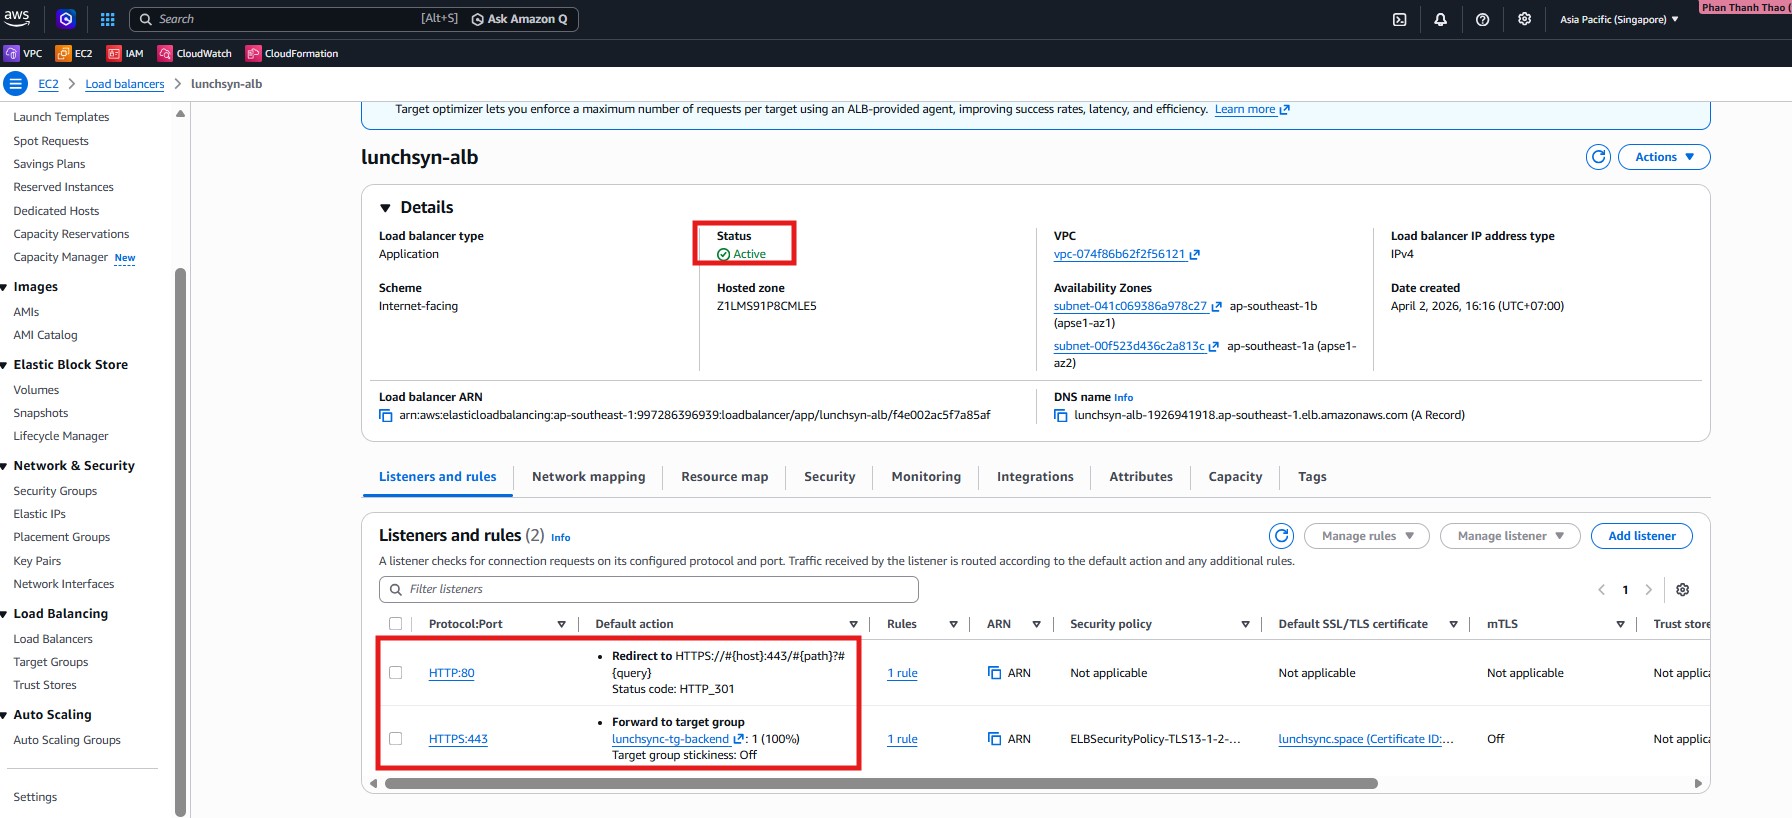
- Review the summary page: 2 public subnets,
80 -> 443, and443 -> lunchsync-tg-backend, then create the load balancer.
- After the ALB is created, inspect Listeners and rules to confirm that
HTTP:80redirects andHTTPS:443forwards correctly.
- Open the Security tab, verify the attached security group, and keep the ALB DNS name for the CloudFront section.
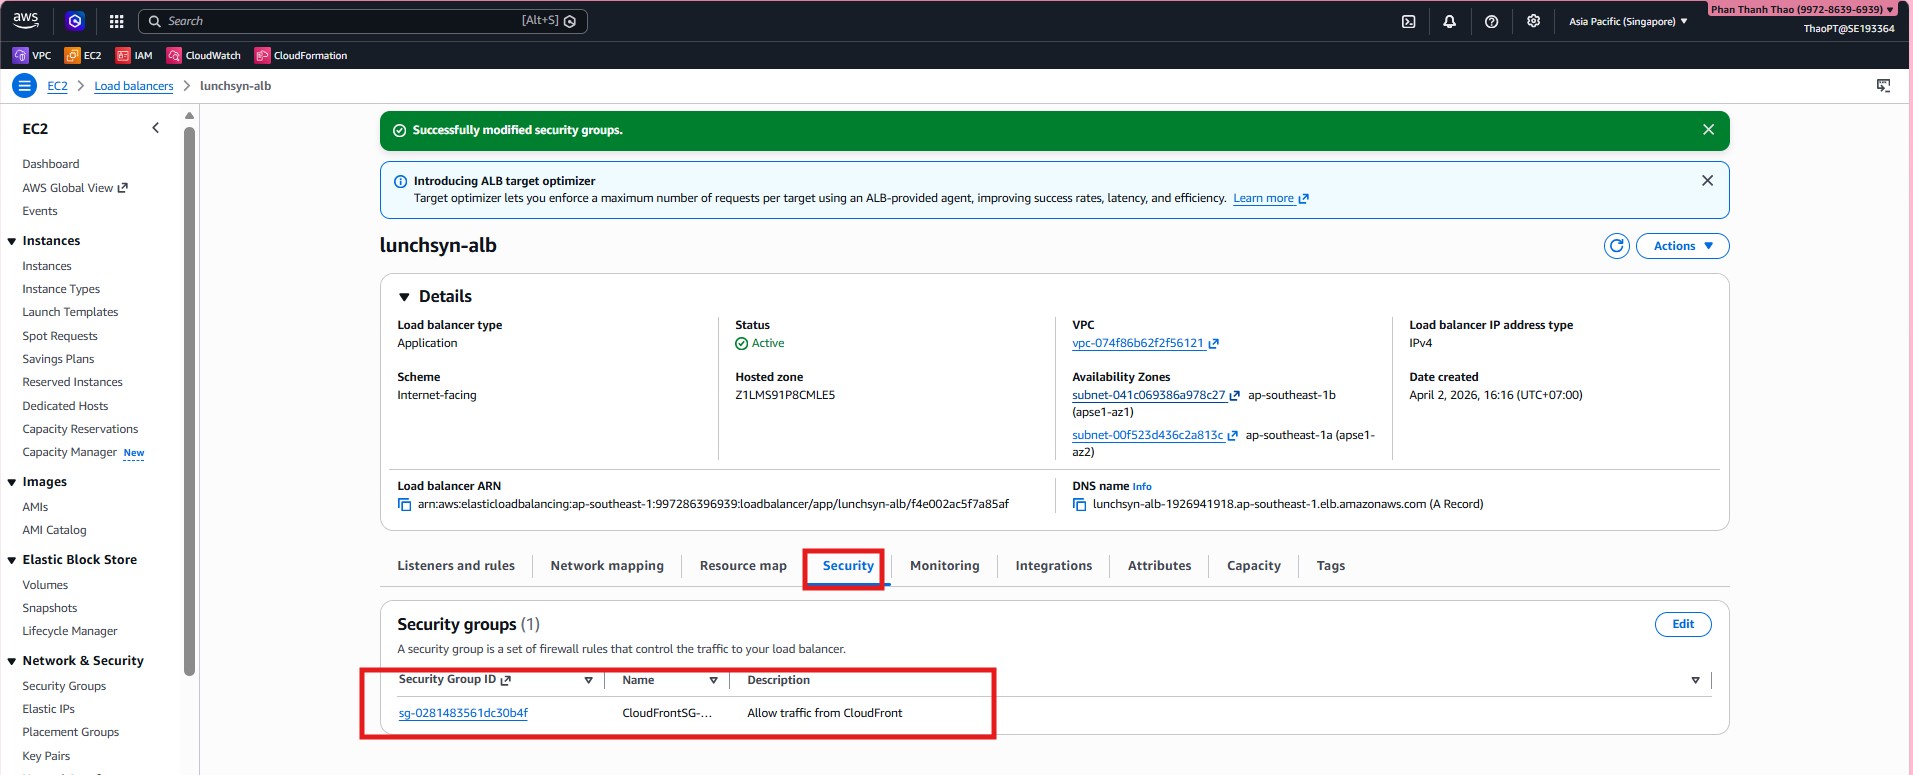
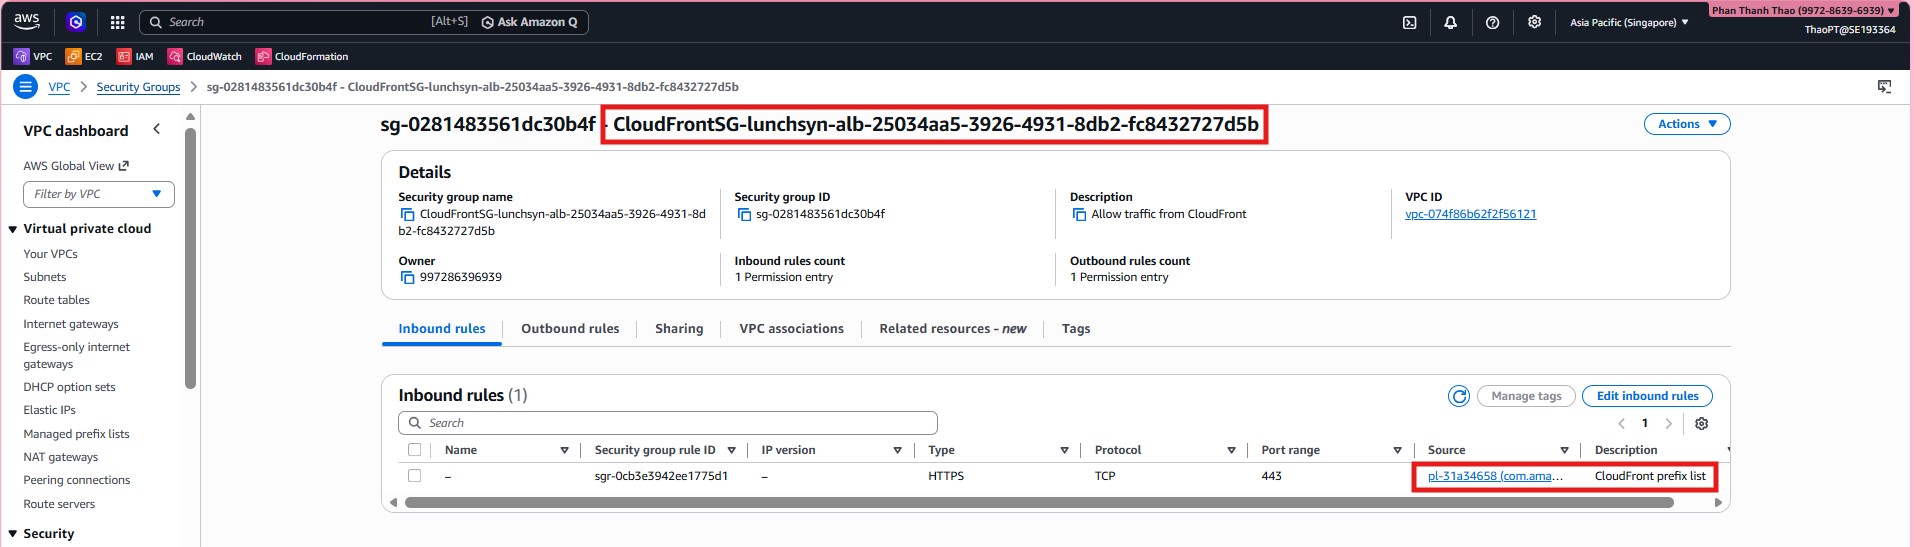
- Confirm that the ALB security group is now scoped to CloudFront or the relevant prefix list rather than being broadly open to the internet.
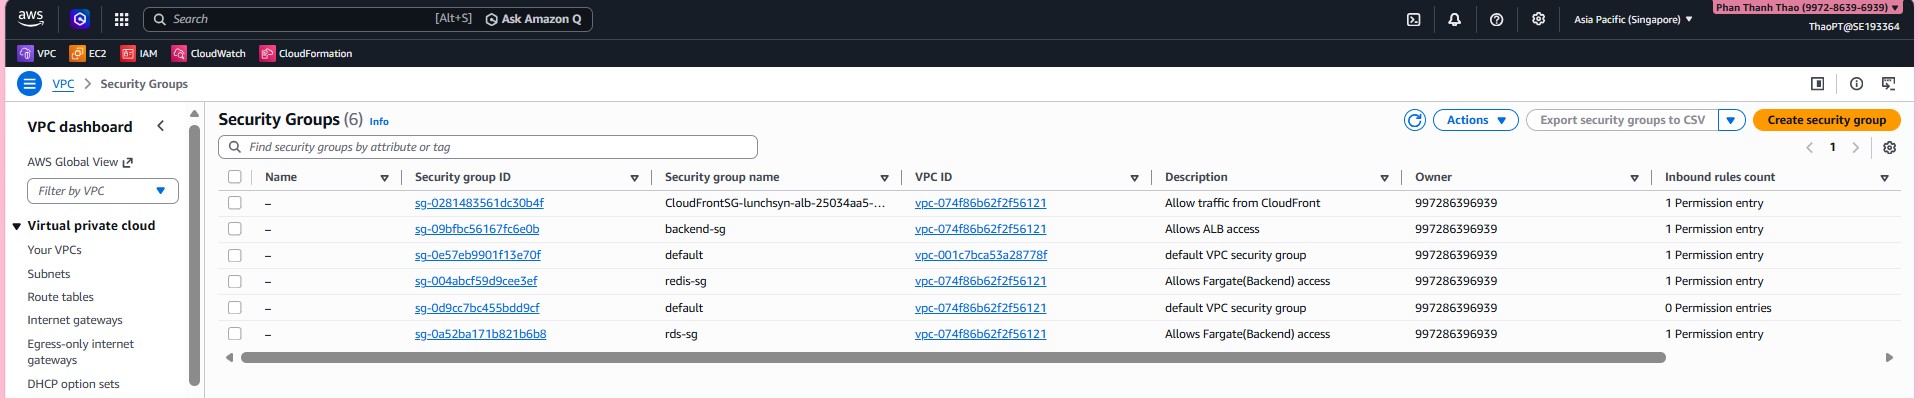
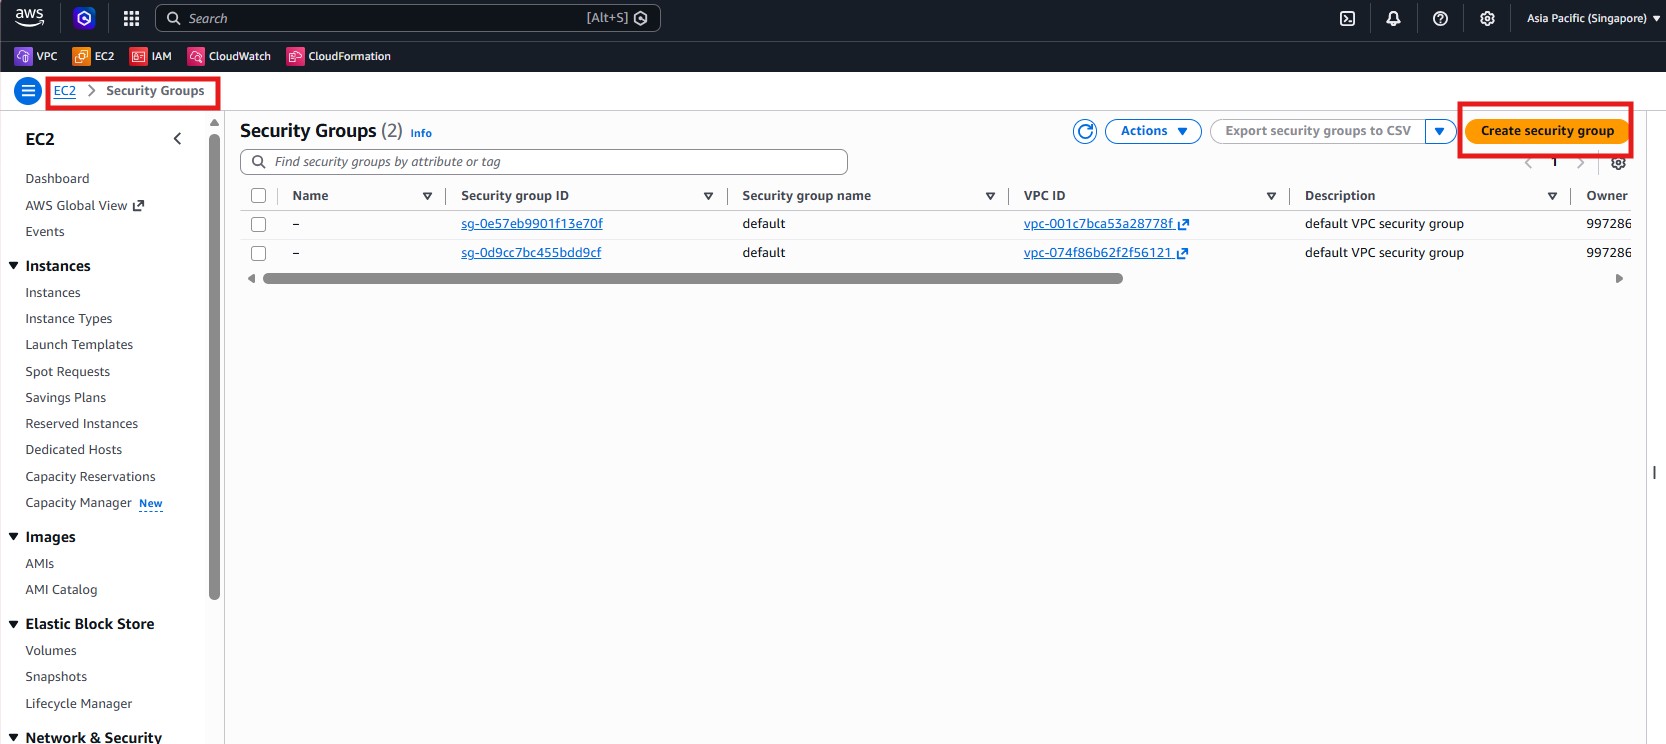
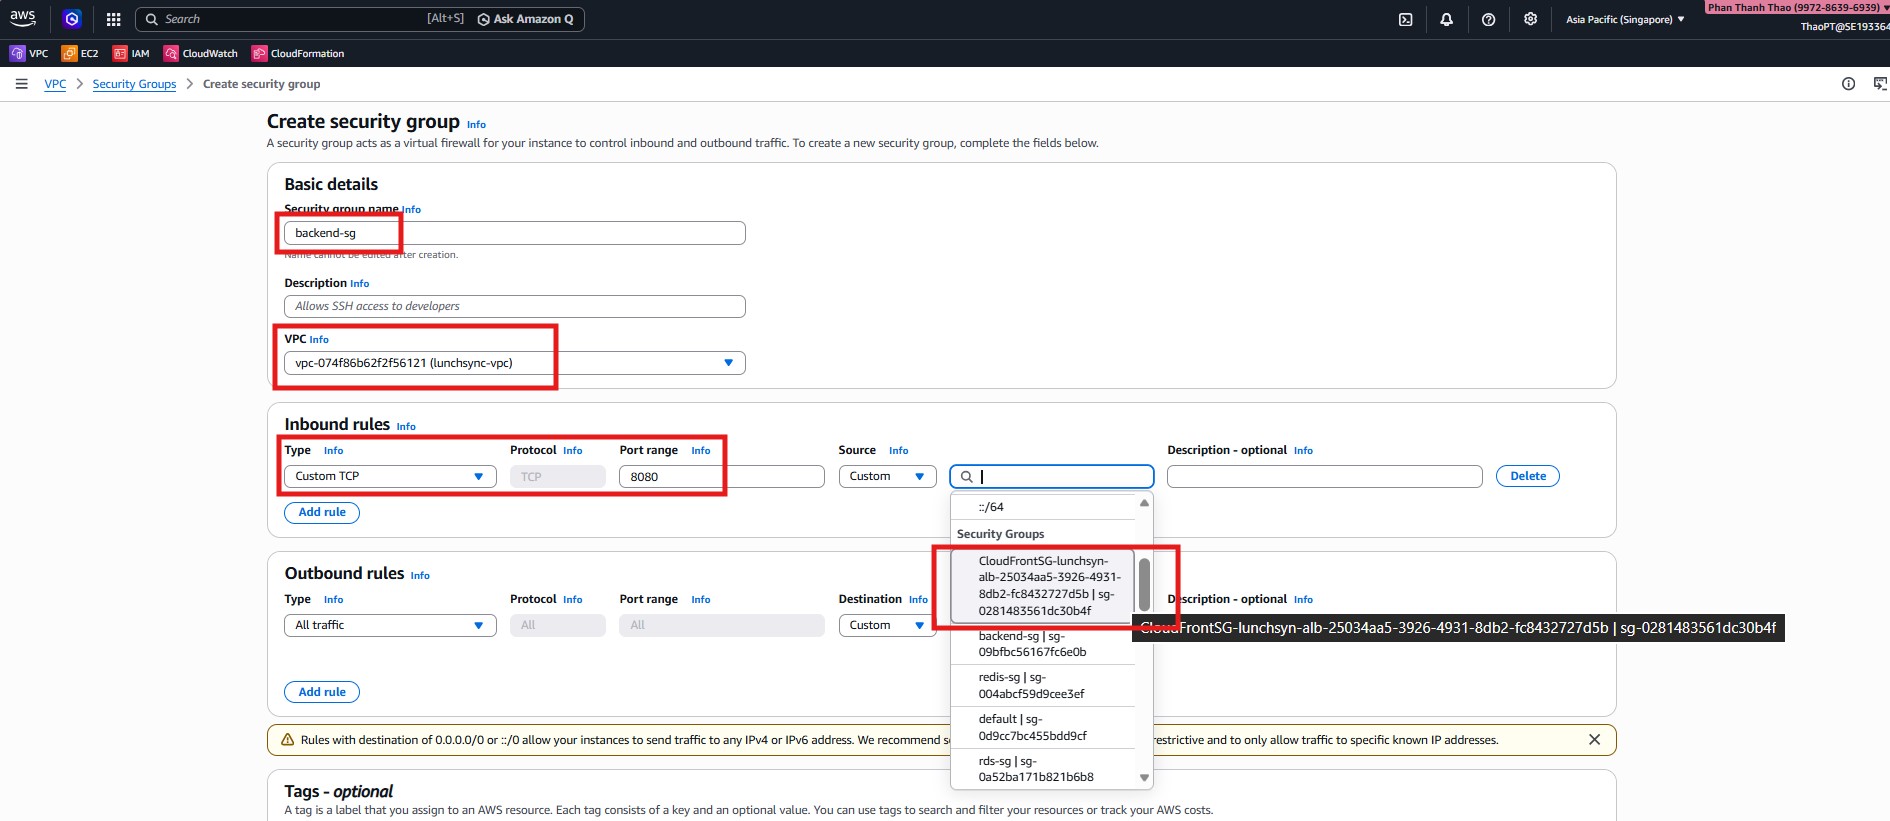
- Open Security Groups to review the groups in the VPC and prepare the backend group.
- Create
backend-sginlunchsync-vpc, allow inboundCustom TCP 8080from the ALB/CloudFront security group, and keep outboundAll traffic.
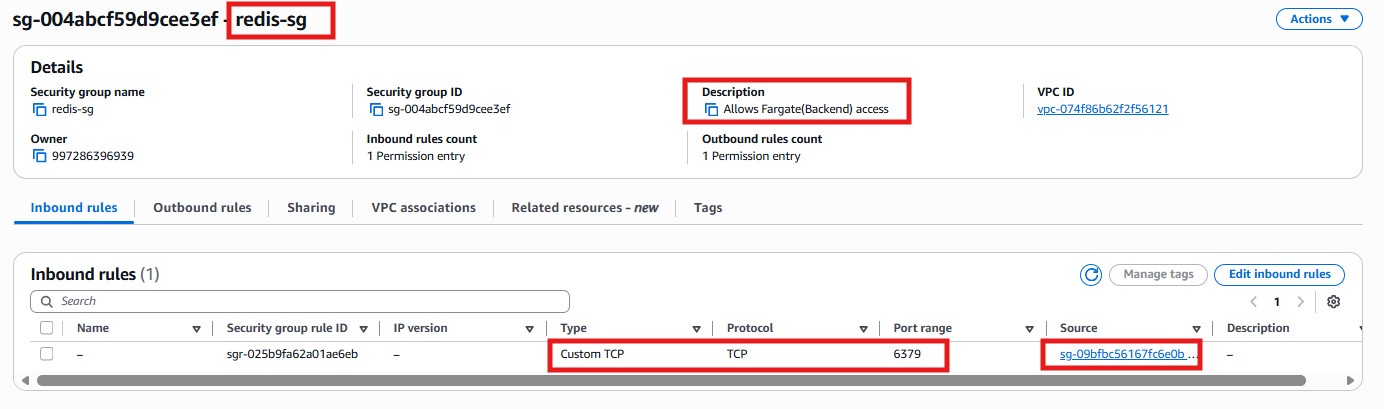
- Review
redis-sgand make sure it only allowsTCP 6379frombackend-sg.
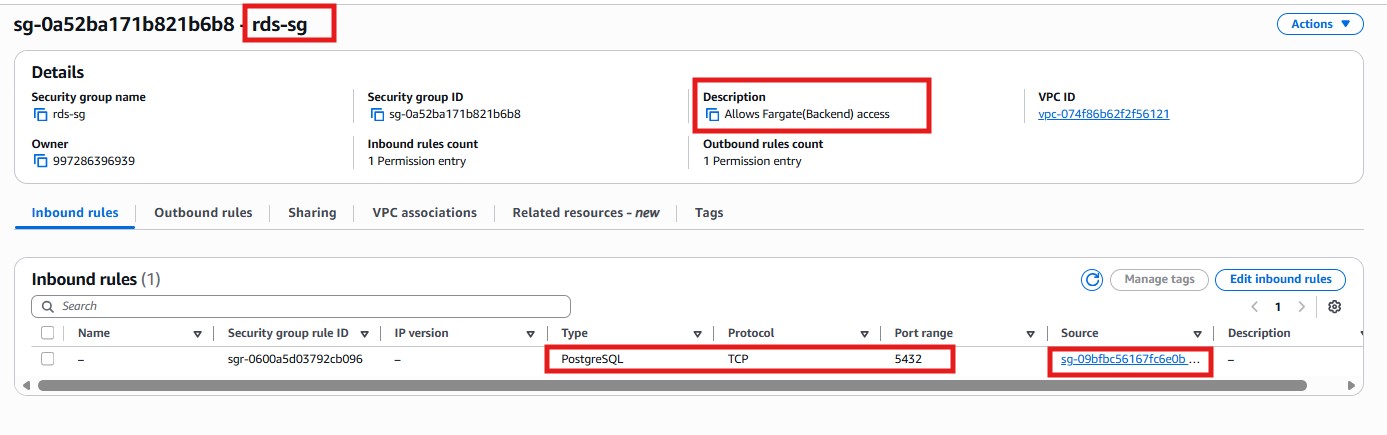
- Review
rds-sgand make sure it only allowsPostgreSQL 5432frombackend-sg.
- The final overview screenshot is used to quickly verify the workshop security groups as a whole: the ALB/CloudFront group,
backend-sg,redis-sg,rds-sg, and the default groups inside the VPC.